If you’re new to Premiere Pro, check out my Premiere Pro beginner tutorials.
Time Stamps
00:00 Introduction
00:36 Issue #1 – Project File Was Created w/ Previous Version of Premiere Pro
02:40 Issue #2 – Too many, old or corrupted media cache files
04:54 Issue #3 – Unused and Duplicated Files in Project
06:15 Issue #4 – Not Enough Memory / CPU Allocated to Premiere Pro
Project File Was Created with a Previous Version of Premiere Pro
Do you always upgrade to the latest version of Premiere Pro? For me, using project files created in earlier versions of Premiere Pro was a major reason for lag.
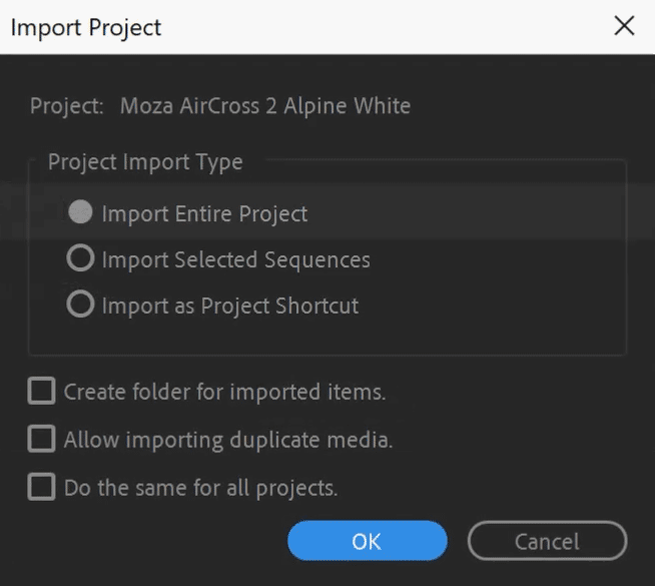
If you see this dialog box, it means the project was created with an earlier version. I recommend to not convert your project as, at least for me, that was a main reason to cause lag.
Instead, create a brand new project in Premiere Pro. Then, import the old project into the new one like you would any other media file.
Premiere Pro will give you a number of options:

Select to ‘Import Entire Project’. This will import all media, sequences and assets into your fresh project. You should end up with the exact same result as if you had ‘Converted’ the project.
However, for me, this option does not introduce lag and can often fix a project that is already laggy.
Too many, old or corrupted media cache files
As you work in Premiere Pro, temporary files are written to your hard drive to speed up rendering. These include previews for audio, media renders and more.
However, over time this can clutter up your hard drive and make Premiere Pro run slow. Additionally, corrupted media cache files can cause all sorts of issues, including not being able to import files properly – especially when re-using the same filenames.
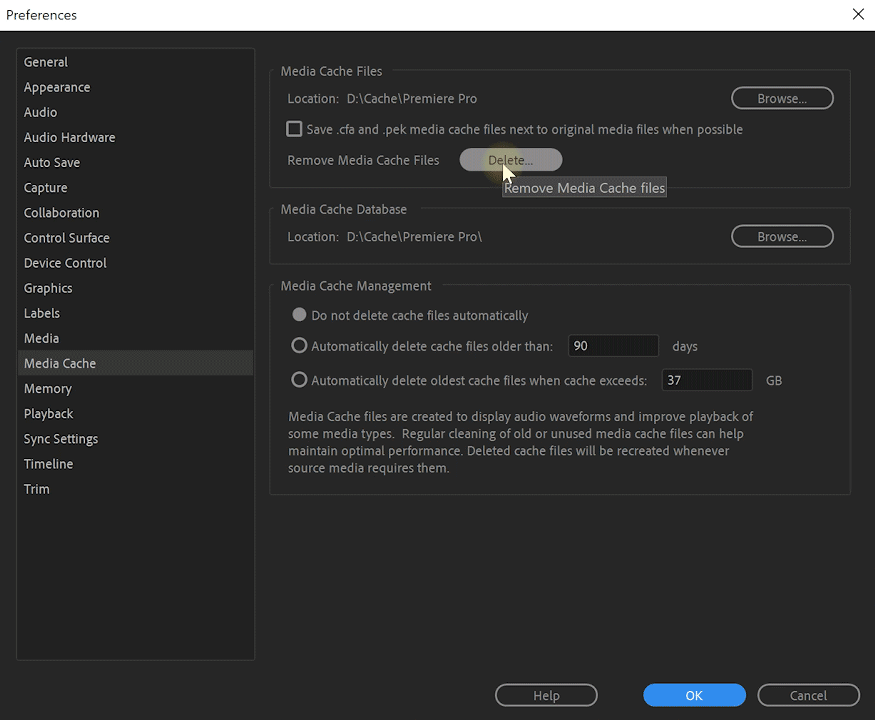
Fortunately it’s easy to clean out the Premiere Pro cache. Go to Edit –> Preferences –> Media Cache

Click ‘Delete’ in the Media Cache Files section to flush all your temporary files.
However, this may not clear all the cache files because you currently have Premiere Pro running. I recommend to close Premiere Pro, navigate to the ‘Location’ on your hard drive specified in the Media Cache settings and deleting all files in there directly.
Also, if you are not using the default location for the cache (mine is set to D:/Cache/Premiere Pro), I recommend also checking the default location that Premiere Pro would use. I have found that sometimes Premiere Pro still writes cache files to these locations – even though I’ve specified a different location.
Here’s the folders to check on your hard drive. Simply clear out any ‘Cache’ files in these folders to help fix Premiere Pro lag.
Adobe Premiere Pro Media Cache folder locations
MacOS:
/Users/Library/Application Support/Adobe/Common
Windows:
\Users\{username}\AppData\Roaming\Adobe\Common
Unused and Duplicated Files in Project
Another reason your Premiere Pro project may become laggy is clutter in the project itself. As you import media files and start to edit you may end up with duplicated imports or unused files. Cleaning those out can help speed up Premiere Pro again.
Simply go into the main menu and select
- Edit -> Remove Unused
This will remove any files you imported but have not used in any of your sequences. - Edit -> Consolidate Duplicates
This will collapse any files you imported multiple times and used within your sequences.
These cleanups can help reduce clutter in your project and make Premiere Pro run a little faster.
Not Enough Memory / CPU Allocated to Premiere Pro
Finally, make sure you have enough RAM and CPU allocated to Premiere Pro to run properly.
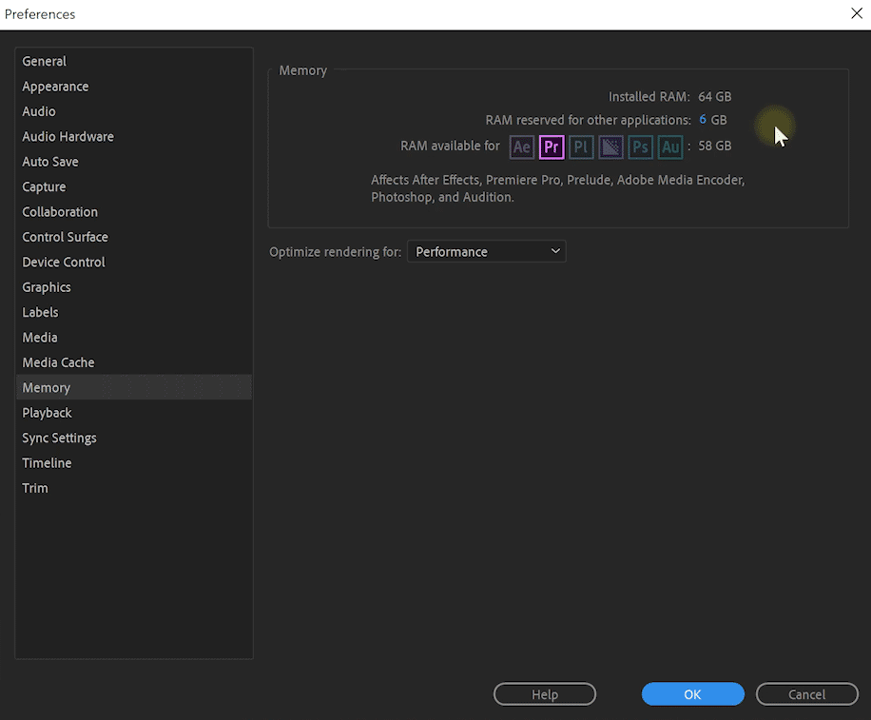
Go to Edit -> Preferences -> Memory and you should see this dialog:

Adobe recommends that you allocate at least 8GB of RAM to Premiere Pro, 16GB for editing HD footage and 32GB or more if you want to work with 4K. Check out the system requirements for Premiere Pro on the official Adobe site.
It is also recommended to leave a decent amount of RAM for the rest of your system to make sure your computer as a whole (including Premiere Pro) keeps running well.
Personally, I would recommend at least 8GB of RAM (allocate 4-6 to Premiere Pro) for a decent editing experience. 16GB is decent and 32GB is comfortable. I have 64GB of RAM in my system, but I also do a lot of memory heavy 3D work and work a lot with After Effects :)
In addition to RAM, you can also make sure that Premiere Pro has enough CPU time. Now this is a bit more technical and you may want to skip this unless you know what you’re doing, but here is how.
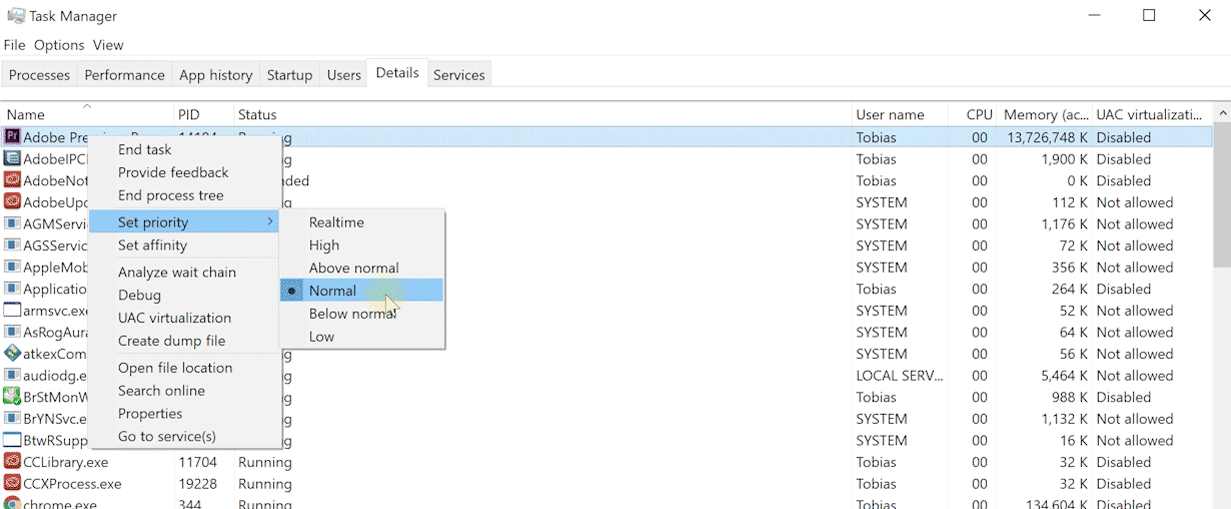
On Windows, open up the Task Manager and go into the Details tab. Find the ‘Adobe Premiere Pro.exe’ process and right click on it.
You will find an option to ‘Set priority’. This defines /wp-content/uploads/the priority that your system will give Premiere Pro to utilise the CPU. The higher this is, the more time of the CPU will be allocated to Premiere Pro.
Be careful as this takes away CPU from the rest of the system, but it can help boost Premiere Pro performance. I sometimes do this for heavy exports, but it’s not something I do often. Just know that it’s another option to reduce lag in Premiere Pro.

Share more Tips & Tricks
Got other tips to speed up Premiere Pro? Share them in the comments below :)


