In today’s tutorial I will show you a very simple but essential visual effect in Adobe After Effects: how to make things glow!
In this After Effects tutorial we will apply a glow effect to both a static element in the scene (the rubber duck) as well as to a moving element in the scene (my hands). Here is a screenshot of the final effect we will be creating:
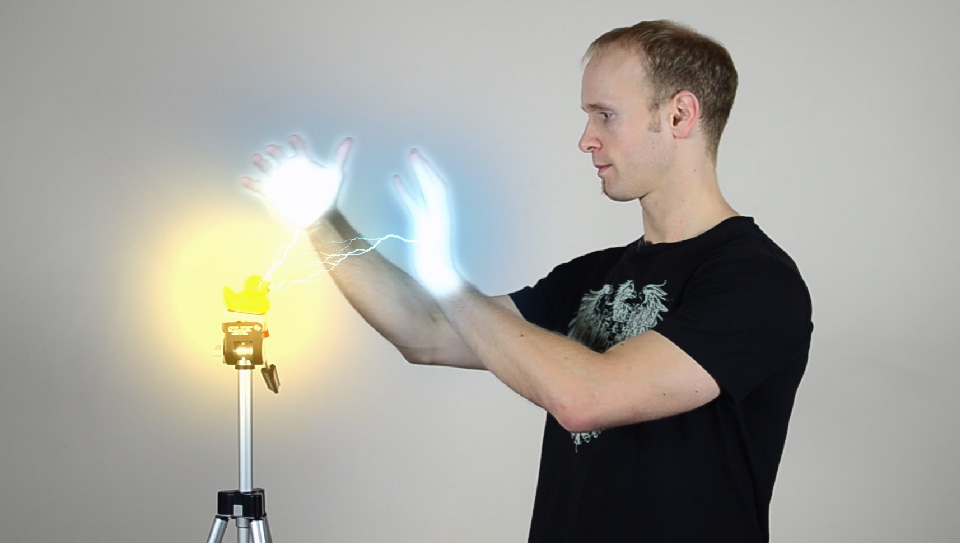
Note that I do not cover how to create the lightning effect in this tutorial. You can learn all about how to create lightning in Adobe After Effects in my Advanced Lightning In Adobe After Effects tutorial.
Let’s get started with the tutorial!
Making a static element in your scene glow
For this tutorial I will be using the same rubber duck footage from the YouTube tutorial, but remember that you can use the very same technique to apply a glow effect to any element you want for your own scene.
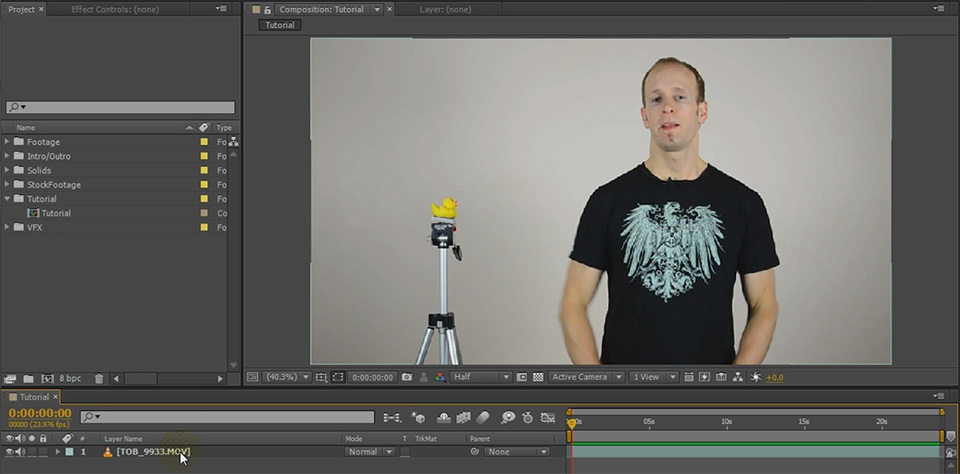
In order to apply any effect to only parts of your clip, you will first have to separate the elements from your base footage. There are many ways to separate elements from your footage in Adobe After Effects and for static elements like the rubber duck, you can simply use the masking tool.
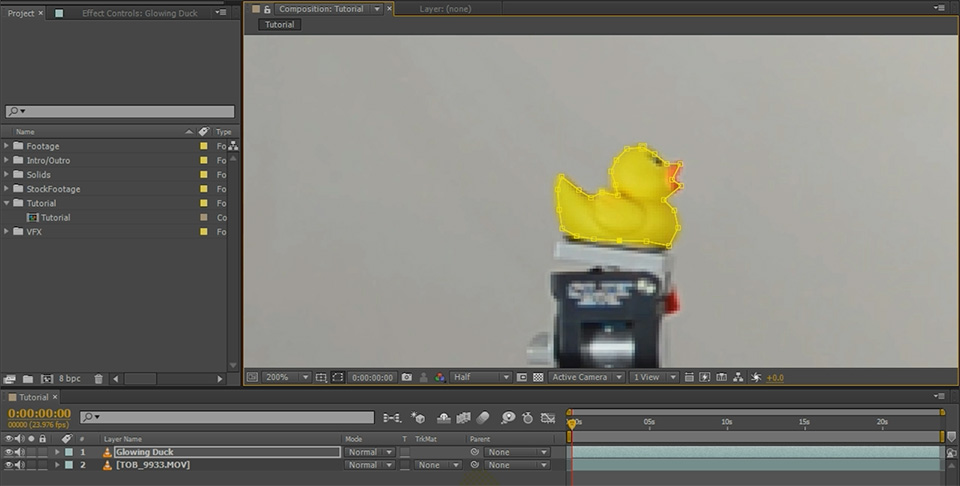
First, duplicate your footage layer. Since I will use this layer to separate out only the duck, I will call it ‘Glowing Duck’. You can rename any layer by selecting it and pressing the Enter key on your keyboard. Then select the masking tool and draw a mask around the element you want to cut out. I will draw a mask around the rubber duck.
If you do not know how to use masks, go check out my tutorial on Masking in Adobe After Effects.
After we applied the mask, your layer will contain nothing but the element we cut out. If we solo the layer, we will only see the rubber duck that we drew the mask around. This is perfect as now any effects we apply to this layer will only be applied to the rubber duck!
Next, search for the Glow effect in your Effects & Presets panel and apply it to the layer that contains your masked out element. I will apply it to the Glowing Duck layer.
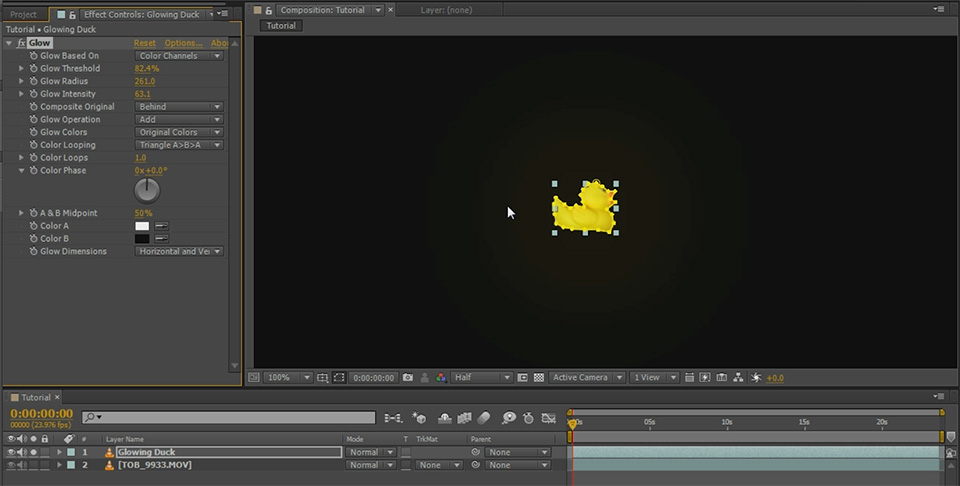
Most parameters of the Glow effect are pretty self explanatory and I recommend that you do play around with them to figure out what they do and have some fun, but here are the most important ones and what they do:
- Glow Based On: you can choose whether to base the glow on the colour (contents) or the alpha channel (outline) of your footage.
- Glow Threshold: this value controls which parts of your layer will glow. A high glow threshold will only have the bright elements of your layer glow, a low threshold will have darker areas glow as well
- Glow Radius: this property controls the size of your glow effect
- Glow Intensity: this property determines how strong your glow effect will be
- Composite Original: you can choose to place the original element on top or behind the glow effect itself
- Glow Operation: the blending mode used for the glow
- Glow Colors: you can choose whether to make the actual colours of your layer glow or to create a custom glow using the Color A and Color B properties
- Color A: only applicable when using ‘A & B Colors’ option for the glow colours. This is the inside colour of the custom glow
- Color B: only applicable when using ‘A & B Colors’ option for the glow colours. This is the outside colour of the custom glow
- Glow Dimensions: defines the direction of your glow to be either horizontal, vertical or both (default)
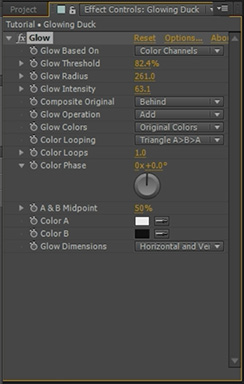
If you make your glow very large and very intense you might find that After Effects cannot properly display your glow and it just becomes weak or even invisible. But fear not! This is caused by a composition setting that we can easily change!
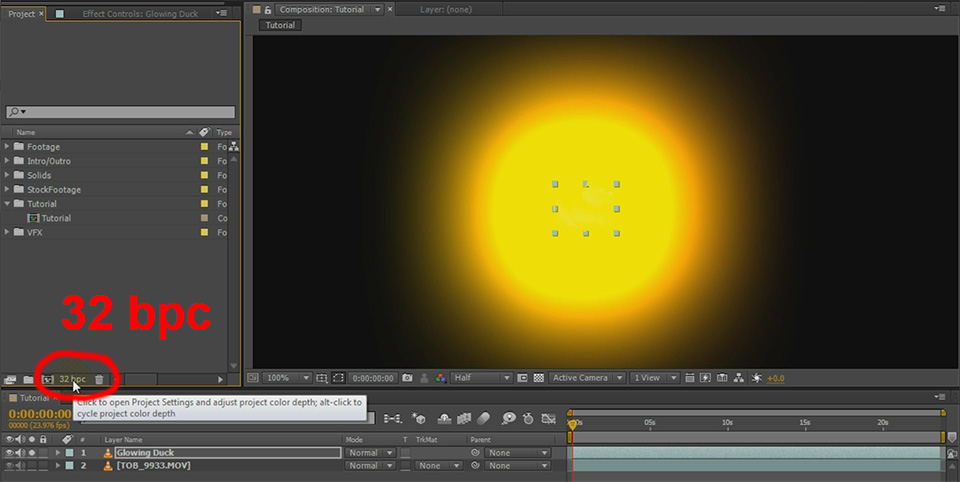
By default, After Effects uses a colour depth of 8 bits per channel, which is simply not enough to display large smooth gradients properly. But fortunately you can change the colour depth of your composition.
You need to return to the Project tab and at the bottom of your project window you will see a small ‘8 bcc’ option. ALT-click on this option twice to change it from 8 to 24 and then to 32 bcc. 32 bit per channel will give After Effects plenty of colours to work with to make your gradients appear as intended. Do note that working in 32 bit per channel colour space will make processing a little slower. But it’s worth it – check out the massive intense glow I added to my rubber duck!
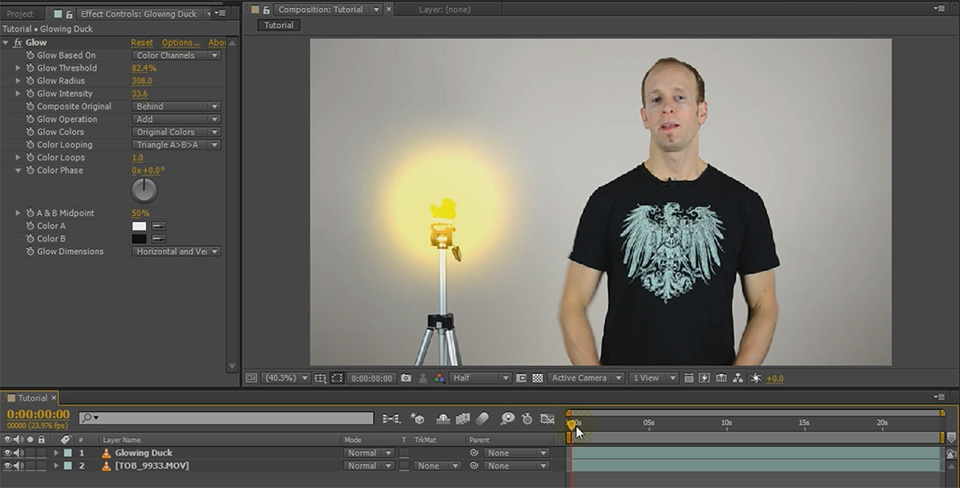
Now that you are in full control of the glow effect, tweak it as required, feel free to animate the radius, intensity or any other property as you please and then un-solo the layer to composite your glowing element back onto your original footage. This is what the glowing duck in my final shot looks like:
Now this was pretty simple! But what if we want to make a moving element glow? Read on to find out how to add a glow effect to a moving object in your scene!
How to make a moving element in your scene glow
Duplicate the base layer just like we did for the rubber duck and call it ‘Glowing Hands’.
No matter whether the element you want to apply a glow effect to is static or moving in your scene, you will have to separate it from the base footage so you can apply effects to it independently. When dealing with moving elements, you will have to rotoscope the element which means cutting them out frame-by-frame, to separate them from the footage.
There are different ways to achieve this, the main choices are using an animated mask or using the roto brush tool (available in Adobe After Effects CS5 or later). Using animated masks is a viable option if the moving element is very simple in shape. For this effect we will make my moving hands glow and trying to animate a mask frame-by-frame to follow my hands can be incredibly tedious so we will be using the roto brush tool instead.
Using the roto brush tool in After Effects
You can find the roto brush tool on the right side of the toolbar. To use the roto brush tool, select it and then double click on the footage layer you want to apply the brush to. I will select it and double click on the Glowing Hands layer I have created.
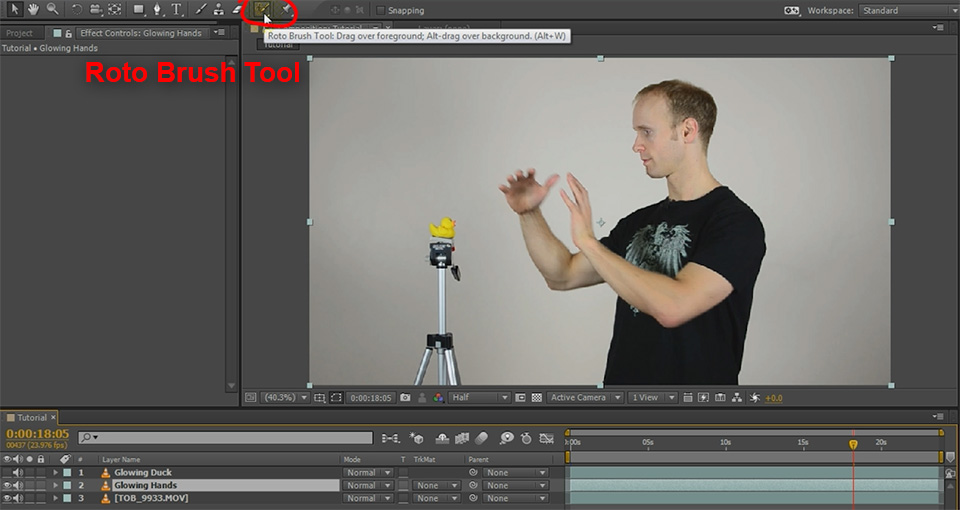
This will bring up a new preview window which contains some additional controls at the bottom that allow you to control how the roto brush will be visualised. You are ready to start painting! Well, wait! Before you start applying the roto brush tool, there is one important setting you should check: the resolution you are applying the roto brush in!
Go to View -> Resolution and ensure that the current preview resolution is set to ‘Full’. The roto brush tool propagates automatically frame-by-frame and this propagation changes depending on the resolution of your footage. If you do not apply the roto brush itself in full resolution and then export your composition at full resolution, the roto brush might be applied totally differently to what you expect. So avoid this pitfall and check that current resolution is set to ‘Full’ before starting to paint!
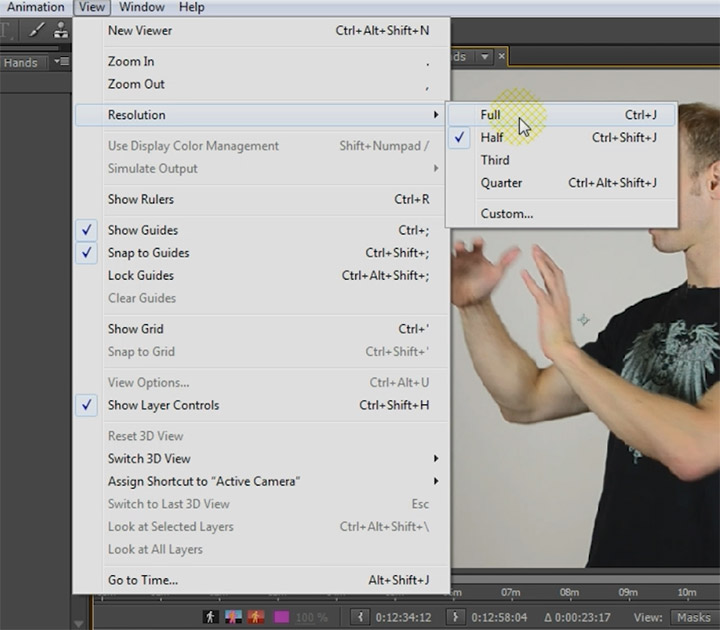
Now it’s time to start applying the roto brush! Simply paint over the elements in your scene that you want to keep. In normal mode you apply a green colour over your footage and you should see a purple outline around the elements you painted as the roto brush tool automatically tries to detect the objects you have marked. In order to remove an element from the roto brush selection you can hold down the ALT key on your keyboard for erase mode.
Then move through your footage frame-by-frame and apply the roto brush at every frame. The roto brush itself will try to follow the elements in your scene automatically, but it does – at times – require a fair bit of guidance to follow them correctly. This is much faster than animating a mask path, I ensure you!

Once you are done applying the roto brush tool to the moving elements – in this case my hands approaching the rubber duck – return to your main composition. The roto brush effect will now be applied to the layer and only the elements you painted green will be cut out. Note that the preview of this effect might differ slightly depending on what resolution you are previewing your composition in. Remember, the roto brush might give you different results depending on the resolution you are using and we applied it in full resolution.
One thing I usually like to do with the roto brush tool is to enable the Use Motion Blur option. This smoothens out the edges of the cut out elements as it takes motion blur into consideration. It will greatly enhance the realism of the roto brush effect.
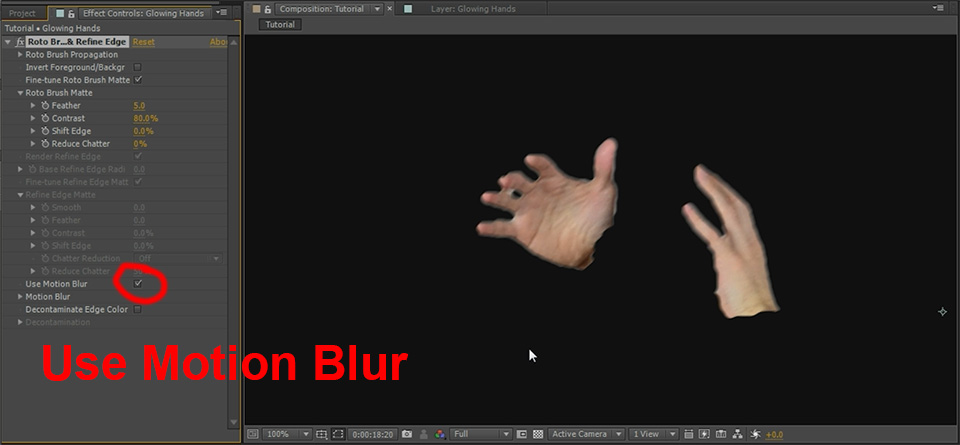
Now that we separated out the elements we want to work with, apply the Glow effect to the Glowing Hands layer. Tweak the parameters as you please to create whatever glow effect you are after. Because I wanted my hands to glow in a ‘natural’ blue, I set the glow colours to ‘A & B Colours’ and then chose two shades of blue for the Color A and Color B properties. Remember to lower the glow threshold and increase the glow intensity if the effect isn’t strong enough for your liking.
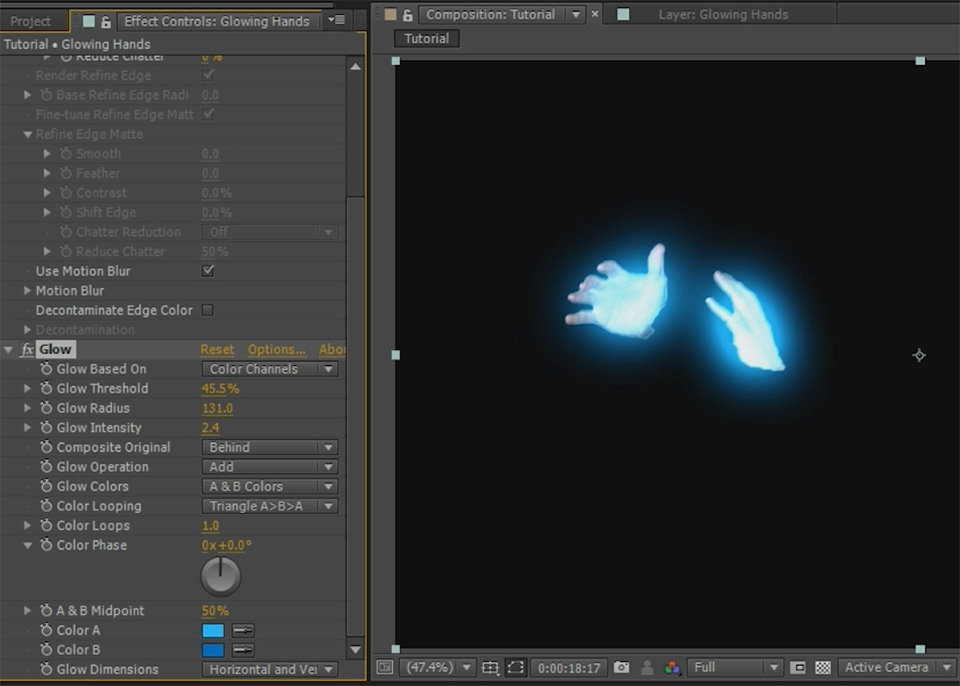
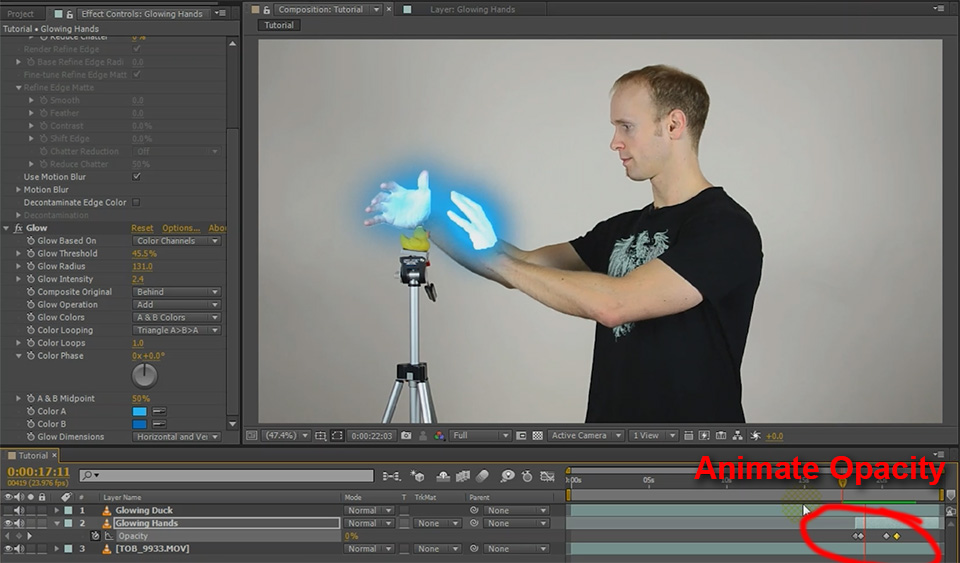
And with that we’re done! Ensure to un-solo any layers you have to see the final glow effect applied to the moving elements in your scene! One last thing I did was to animate the opacity of the Glowing Hands layer to fade-in and fade-out the glow effect to make it appear as if I could charge up my hands with a blue glow.


6 Responses
Hi, i m atmiya.my problem is that when i import audio into the project its look like streched out.it not play as normal rate.
Can you be more specific? So you are importing an audio file into After Effects and it plays back at the incorrect speed?
Thanks, Tobias! Getting started with AE, and this is exactly what I needed. Subscribed and learning. Thank you!
Thank you very much for the support! Great to hear you found my tutorials useful!
When i finished with rotoscope with rotobrush, i put some glow effect in it and it works on timeline. But when i export it as a video. The rotobrush effect doesnt want to shown up? What should i do?
Are you working in ‘full resolution’ when you apply your roto brush? You are likely using a different resolution in your timeline and for your final export.