There are a number of different reasons why your footage may have come out low quality, grainy and full of noise. Fortunately, it is really easy to remove noise from your video in Adobe After Effects – all without plugins!
Note: I start the video out by showing how to export the clip from Premiere Pro. That is actually not a good workflow as it compresses the video and loses you quality right off the bat.
I totally missed that as I was focused on the work done in AE and not the overall workflow. You’re much better off copy/pasting the video into AE or replacing your clip with an AE comp so you don’t compress the footage before removing the noise.
Why Is My Footage So Grainy?
The primary reason for grainy footage is having too little light available when you shoot your video. There are three fundamental ways in which your camera can compensate for low light:
- Open up the aperture (lens opening) to let in more light
- Slow down the shutter speed (to expose the sensor for longer each frame) to let in more light
- Increase the ISO value to make the sensor more sensitive to light
You may often find that your camera is already as the largest aperture (smallest number) and at the slowest shutter speed possible. The only option left for your camera is to increase the ISO value. If your camera is set to automatic mode that is exactly what is going to happen in those situations.
While increasing the ISO value will brighten up the image because the sensor becomes more sensitive to light, it also makes the sensor more sensitive to noise and so your footage will end up looking grainy.
How Do I Remove Noise From My Video?
It goes without saying that the best way to reduce noise and grain in your footage is to simply film with more light in your scene to begin with. However, that may not always be possible or you received footage from a client that already contains a lot of noise.
Fortunately, even if you did end up with grainy footage, you can easily fix that up using Adobe After Effects. And best of all: you won’t even need any plugins!
Remove Noise Using Adobe After Effects
If you are after a quick fix, your best option might be paid 3rd party plugins like Red Giant Denoiser or ABSoft Neat Video. However, you can also remove noise directly in Adobe After Effects using the inbuilt Remove Grain effect.
The Remove Grain Effect
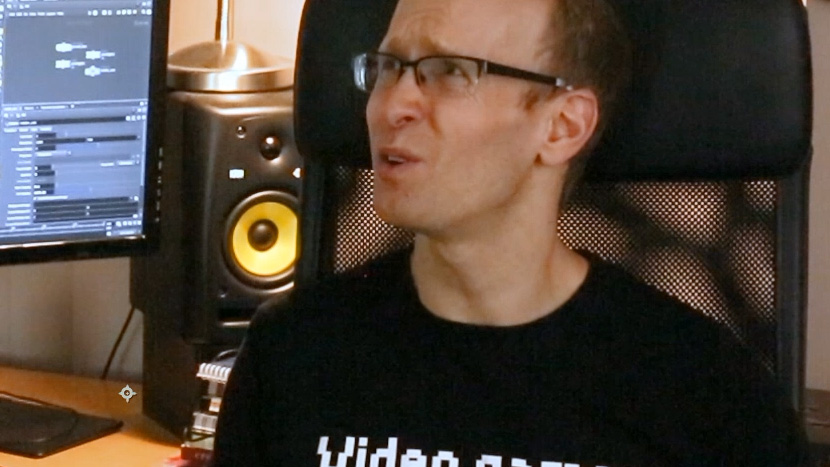
Let’s start off with some grainy footage. Here is a screenshot of a video with lots of noise due to a high ISO value. Eeew!
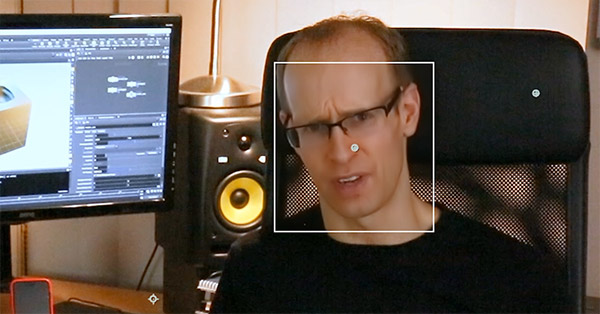
In the Effects & Presets panel within Adobe After Effects you will find the Remove Grain effect. Simply apply the effect to the noisy footage you want to fix. A small rectangle will appear on top of your footage. This rectangle is the preview region, giving you a preview of what your footage will look like with the final effect applied.
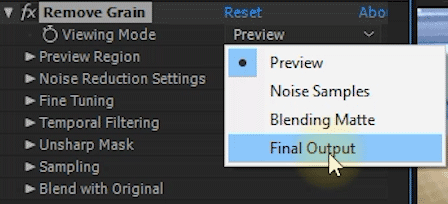
If you want to see the noise removed from the entire image, you can always switch the Viewing Mode over to Final Output. This however may slow down your computer as the Remove Grain effect is fairly computationally expensive.
The Remove Grain does have a lot of settings that you can adjust and it is important to understand how they affect the noise removal process for optimal results.
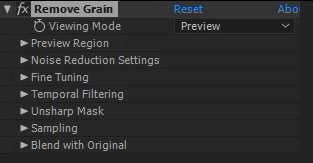
The primary settings for the Remove Grain effect are the Noise Reduction Settings. These allow you to control how aggressively Adobe After Effects will reduce noise in your video. Higher values will remove more noise, but potentially also make your video slightly blurry.
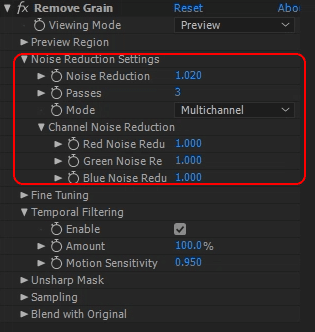
Here is what happens when you increase the Noise Reduction settings too much. Notice how a lot of the detail has been washed out of the image and everything has become pretty blurry.

You can adjust the Number of Passes for more thorough processing, but it will also make your computer work harder. I recommend slowly increasing this value until you no longer see any improvement. Fairly often I leave it on the default of 3.
Another important aspect of removing noise from your video is to understand that the noise is usually different within your red, green and blue channel.
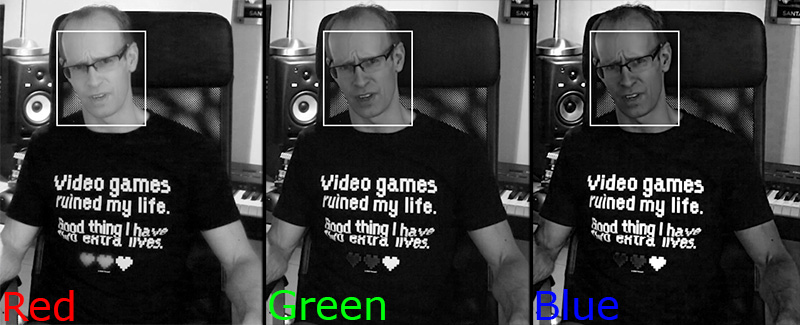
If you look closely you can see that the frequency, intensity and patter on the noise is different across the different colour channels of the image. For situations like this, the Remove Grain effect allows you to adjust the Noise Reduction for each channel independently.
Learn After Effects for FREE with my Easy Beginner Course 😊

Temporal Filtering
Once you have tuned your Noise Reduction Settings and play back your video you may notice that while a large amount of noise may already be gone, you may be able to see some flickering in your footage. This is caused by the fact that the Remove Grain effect works on every frame of your video independently and consecutive frames have different noise patterns, leading to flickering when you play back your final video.
To compensate for this, you can enable Temporal Filtering in the Remove Grain effect.
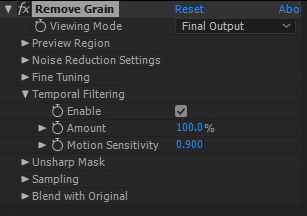
Temporal Filtering will take the noise from consecutive frames into account and compensate for that. Enabling this option should take care of most flickering you may see after removing the initial noise. However, like any other video processing effect, enabling Temporal Filtering can also have negative impacts on your video.
For example, you might see strange blocky artefacts on fast moving objects like in the screenshot below.

I recommend going to a frame where these artefacts are most obvious and then adjusting the Motion Sensitivity setting and the Amount of the Temporal Filtering slightly. You have to balance the benefits of reducing the flickering with the amount of artefacts you can live with. I usually find a good balance somewhere in the middle.
Manual Noise Samples
By default, the Remove Grain effect will sample a few random spots in your footage to understand what your noise ‘looks like’. You can see these sample points if you change your Viewing Mode to Noise Samples.
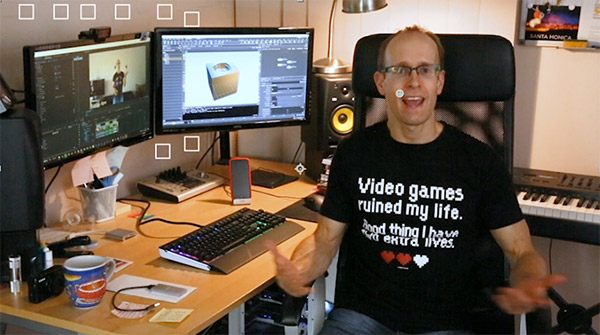
While the automatic noise sample selection usually provides a good starting point and a decent noise reduction effect, you can often get much better results by specifying the sample points yourself. In the Sampling tab of the Remove Grain effect, change the Sampling Method over to Manual.
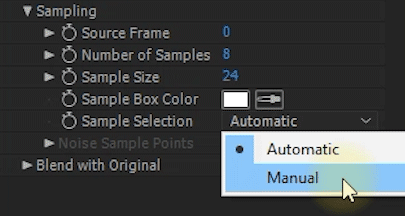
All of your sample points will collapse to the middle of the preview window. You can now drag them and place them manually in especially noisy parts of your video within the preview window. You can also adjust their number, size and define which frame of your video to sample in the Sampling tab of the Remove Grain effect.
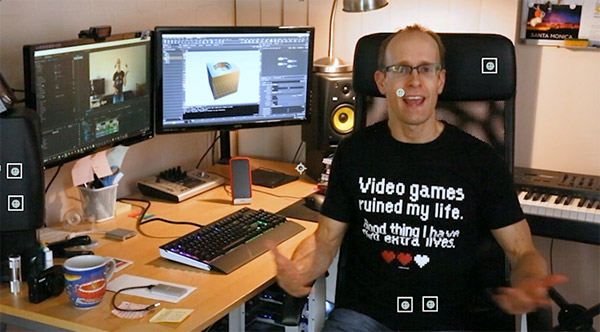
Manually placing and adjusting the noise sampling points usually give the Remove Grain effect a much better understanding of the pattern of noise in your video and help it reduce it more effectively.
Retaining Detail While Removing Noise
One of the big issues with removing noise from your video is that you will usually also remove some detail as the automatic process will struggle to tell the difference.
If you look at a closeup of my face after I applied the Remove Grain effect and pushed up the noise reduction settings, you can see how blurry all the details have become.

The Remove Grain effect gives you 2 different ways of retaining detail during the noise reduction process:
- Fine Tuning Settings
- Unsharp Mask
In the Fine Tuning section of the Remove Grain effect you will find a number of settings that give you more detailed control over how noise is removed and how small details are treated.
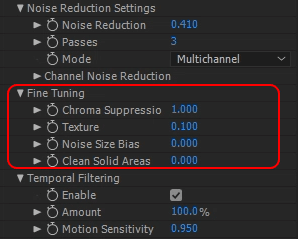
The most important one is the Texture setting. Increasing this value will retain texture detail within your video. However, if you increase this value too much you may cancel out the noise reduction effect altogether so you have to find a good middle ground.
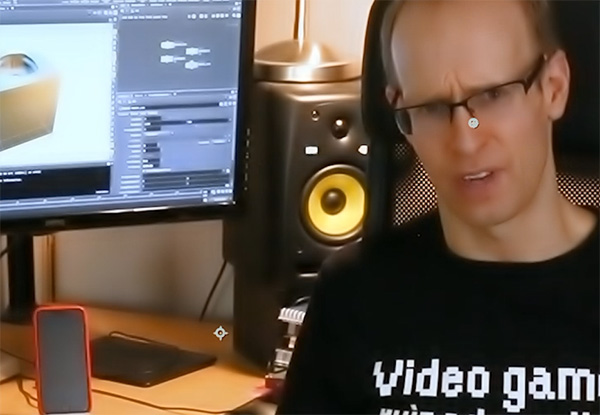
Another useful option is the Clean Solid Areas setting. Increasing this value will smooth out even areas within your video. Again, it is a matter of tuning in on just the right setting to avoid accidentally blurring away the edges of your image. If you push the Clean Solid Areas setting up too much, you may see the edges of your objects in the image bleed like the red mobile phone in this screen shot.
Finally, another way to retain detail in your video when removing noise is to use the Unsharp Mask.
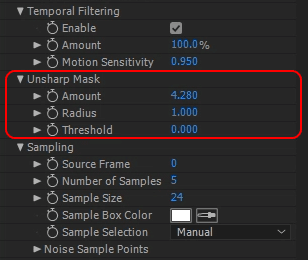
The unsharp mask is a sharpening effect. The name simply derives from the fact that a blurred out, inverted image is used for the sharpening process. As with all other settings, I like to increase the amount slowly to get optimal results without pushing it too far. If you sharpen your image too much, you may get all your detail back, but you will also be left with a rather harsh looking video.

Final Words
If all of that seems too complicated for you and you want something you can simply slap on and be done, you may want to check out paid 3rd party plugins such as Red Giant Denoiser or ABSoft Neat Video.
FREE Adobe After Effects Beginner Course



2 Responses
Thanks bro
No worries!
Thank you, that was very detailed and helpful.
One thing, when I went for manual sampling, the frame number changed. I could tell because the model’s pose shifted. Since it had to align with a duplicate layer, I wasn’t able to use that feature.
No worries!
When you select ‘Manual’ Sample Selection, After Effects will display the first frame of your clip while your Viewing mode is in ‘Noise Samples’ as that is the manual frame for you to select your samples from :) Once you change your Viewing Mode back to ‘Preview’ or ‘Final Output’ you’ll see the current frame again.
Hope that makes sense!
Cheers,
Tobias
sir, i cant seem to find remove grain in my effects panel.. please help
What version of After Effects are you using? I’m using CC 2017 for this tutorial