Z-Depth Compositing
One thing I recommend when rendering anything from your 3D program for compositing in After Effects is to also export a z-depth pass. The z-depth pass contains depth information for you 3D elements (in relation to the camera) and it can be used very easily to realistically composite stock footage elements together with your virtual objects.
For example, let’s assume we wanted to add a big cloud of smoke to the scene, just where your actor is standing. You could simply grab some smoke stock footage and slap it onto your scene. You can find free stock footage elements for your own use either on Detonation Films free stock footage page or on Footagecreate’s free effects page.
In my example, the smoke sits on top of the crows, but even if you placed the layer below the crows, you would notice that the two layers don’t interact – the crows would sit either fully on top or fully behind the smoke.
We can use the depth information from the z-depth pass to more realistically integrate these two layers. This technique is referred to as Z-Depth Compositiong.
Import your z-depth pass (making sure the frame rate matches your footage) and drop it on top of your crows layer. The two layers should be perfectly in sync. When working with z-depth passes, I recommend switching your project over to use full 32bit rather than the default 8 to give you finer control. You can do this by alt-clicking twice on the ‘8 bcc’ label just below your project window.
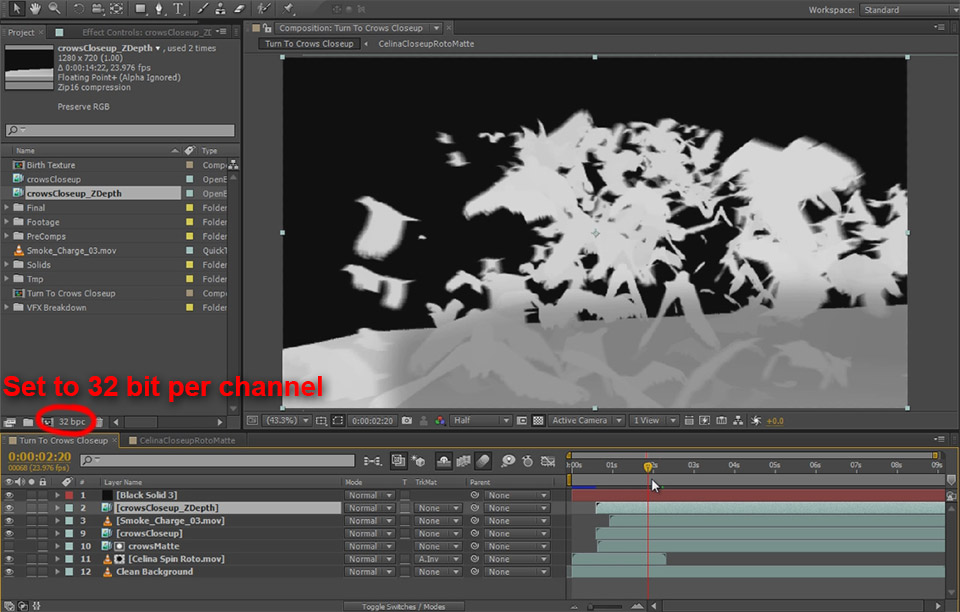
The z-depth pass is a greyscale image that visualises the distance of the crows from the camera. By using this layer as a matte onto any stock footage elements we place in the scene, we can fake an interaction between the 3D rendered elements and our flat 2D stock footage.
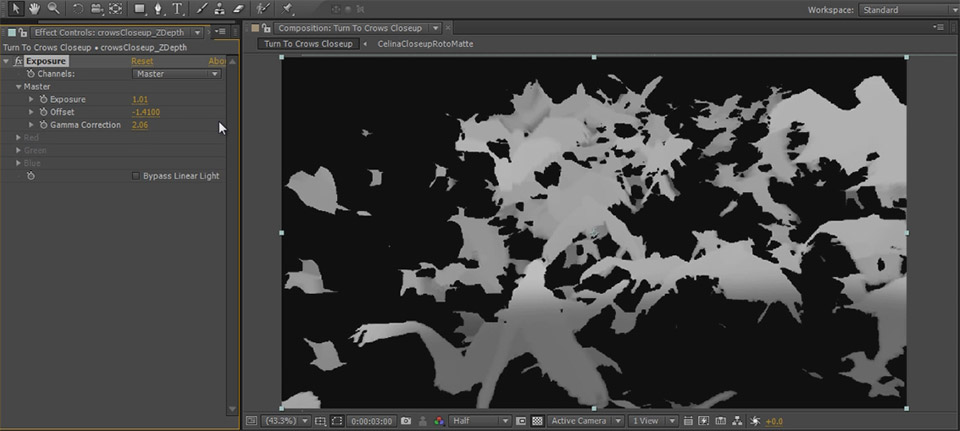
The great thing about the z-depth pass is that you can change it on the fly during compositing. For this, simply apply an Exposure effect to the layer. You can change the Exposure, Offset and Gamma Correction properties to change how strongly the depth information of your layer is presented, how much depth it has (e.g. expand or contract the grey scale range) and how harsh the edges of your objects will appear.
I have tweaked mine so only the crows that are closer to the camera than where Celina is standing, where I will place the smoke stock footage element, are visible in my z-depth layer.
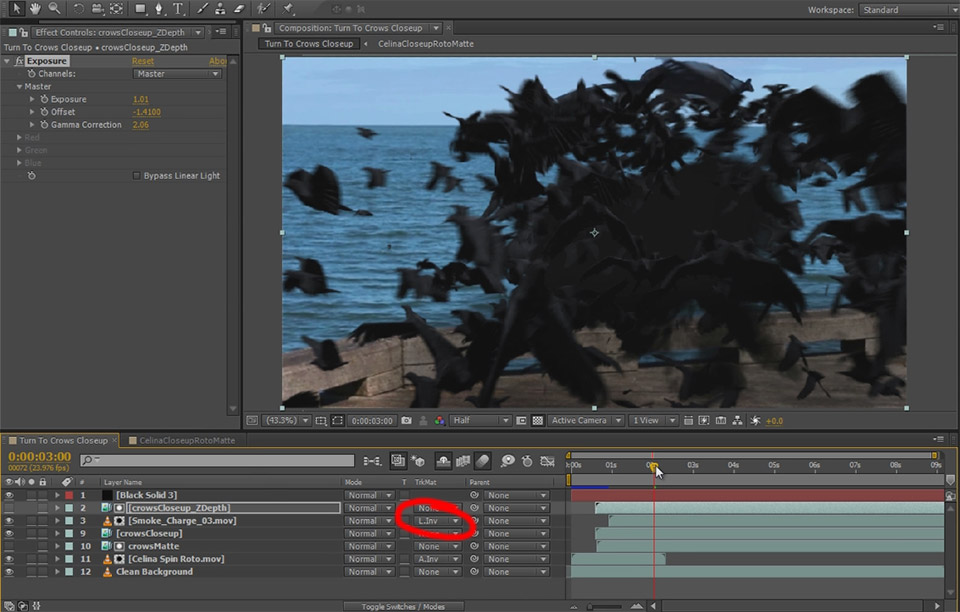
Finally, set the track matte option for the smoke layer to ‘Luma Inverted’. The smoke will only be visible where the crows are further away from the camera than where Celina is standing. This conveys the impression that the 3D crows are obscuring the smoke layer when they are in front of it, but are being obscured when they fly behind it.
To show you the true power of the z-depth pass, try changing your Exposure effect. You will notice how it pushes the smoke layer further to the front or the back of the crows. This gives you full power over where in your scene you want to position your stock footage elemenets in relation to the rendered 3D elements.
I just wanted to give you a small example of how to do z-depth compositing. Feel free to delete the smoke layer again if you don’t like it.
There is one more detail I want to add to our dissolve into crows effect and that is a small dark shadow that rushes over Celina’s body just ahead of her fraying out and dissolving into crows. This will add a bit more detail to the VFX and make it look more interesting.
Adding A Detailed Crow Shadow
To achieve this, duplicate the rotoscoped layer of your actor as well as the crows layer. Select these two layers and then precompose them. In my example, I called this new composition ‘Dark Shadow’.
Jump into this new composition. You should see the crows being spawned on top of your actor. Set the track matte option for the layer with your actor, the bottom one, to ‘Alpha Inverted’. This should hide your crows layer and you should get a clip of your actor dissolving.
Offset the crows matte just a little bit to the left so the pattern of crows is a few frames ahead of the crows layer in the parent composition. Otherwise she shadow will be perfectly covered up by the crows.
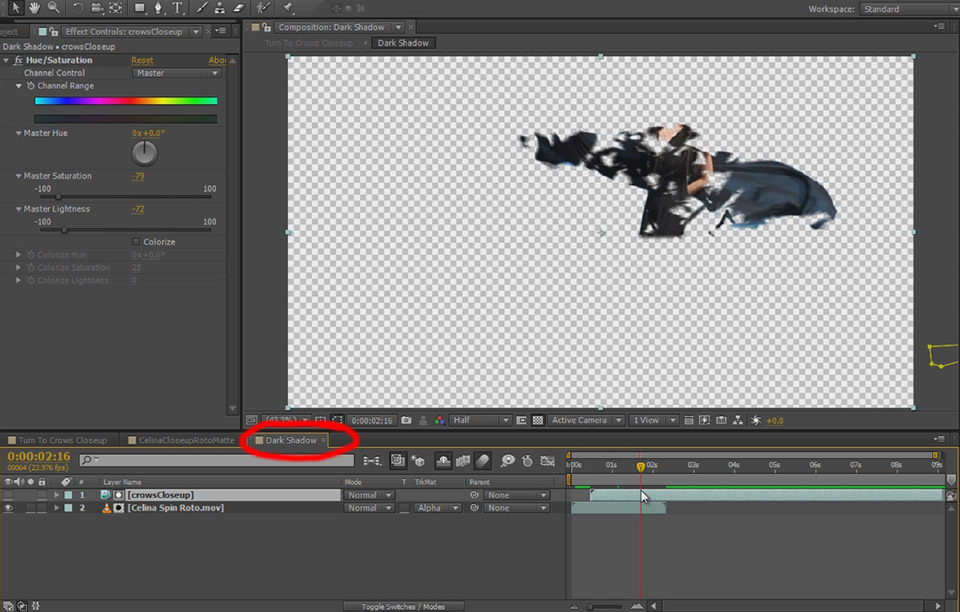
Return to the parent composition, select the Dark Shadow layer and apply a hue and saturation effect to it. Bring down the saturation and the lightness considerably to make this overlay layer nice and dark. If you now scrub through your composition, you should see a dark shadow precede the dissolve effect.
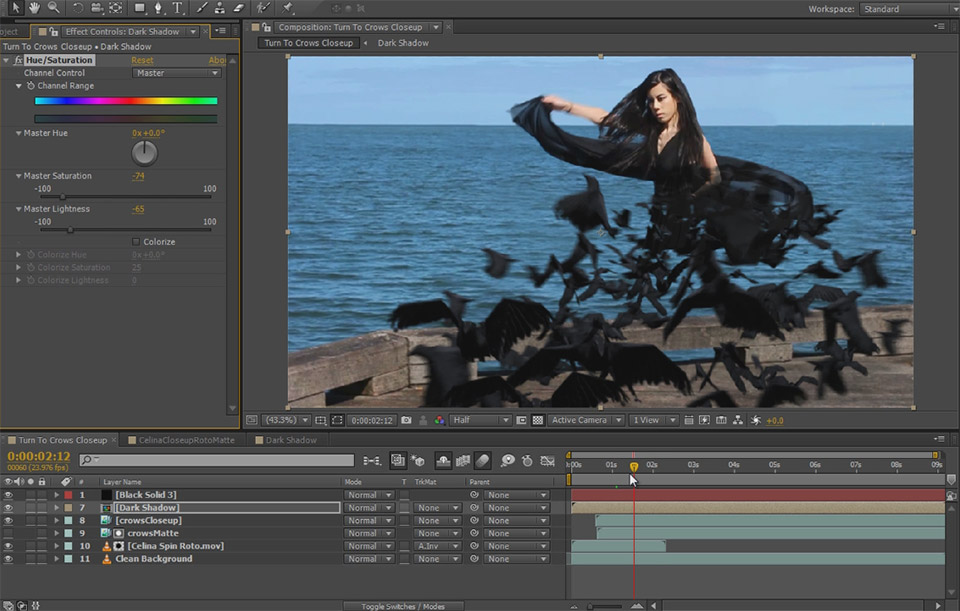
You can tweak the timing of the dissolve effect by either offsetting the Dark Shadow layer or by offsetting the crows matte we used inside the Dark Shadow composition. I reduced the offset to only a couple of frames to make the dark shadow a little less obvious and I also lowered its opacity to about 50%. Feel free to tweak this to your liking!

And that is how you can dissolve a person into a murder of crows. Creating 3D integration VFX can become quite complicated and time consuming. If you are looking for a more detailed introduction to creating these types of effects, check out my 6 part 3D Integration VFX series.
Feel free to leave any questions you may have in the comment section below.


One Response
Hey Buddy I’ve Seen All The Tutorials & Your Short Films.And All Those Are Amazing.I Love It.And Also Learn So Much From It.
Hey Buddy Please Make A Tutorial On A Scene Like- A Man Cutting His Head From His Nick. And It Look Like Exactly Real.Please Man I & We Appreciate It Please.
Thankx