May the Force Be With You – Adding a Vortex
In my scene, Celina is spinning as she dissolves into crows and so I wanted the murder of crows to twirl around her a bit like a vortex. I did this to more naturally translate her rotation energy into the direction of the crows and make the overall effect look more organic.
In order to achieve this, I added a Force into my scene, a Vortex force. You can create this Vortex Force object in 3dsMax by going to Space Warps –> Forces. When you select the Vortex you get a whole heap of settings in the Modify panel that you can tweak to your heart’s content.
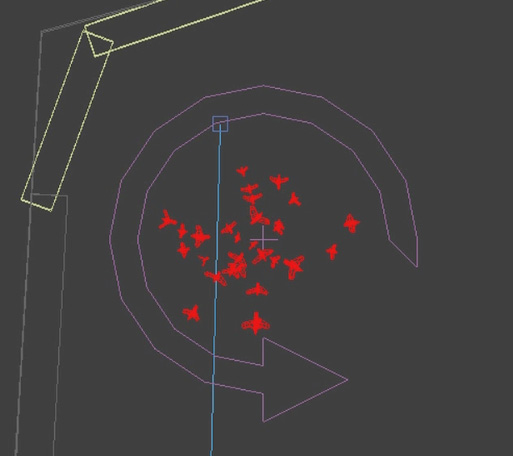
By default, this vortex (or any other force we add into the scene) will have 0 influence on our particles. This is because the force is not linked to the particle flow yet.
In order to link the force to our particles, return to the Particle Flow window and add a Force operator into the main particle event. In the parameters on the right side you can add the forces you want to have influence on your particles. You can also change the amount of influence these space warps have on your particles. I have linked my particle flow to the new Vortex force in my scene.
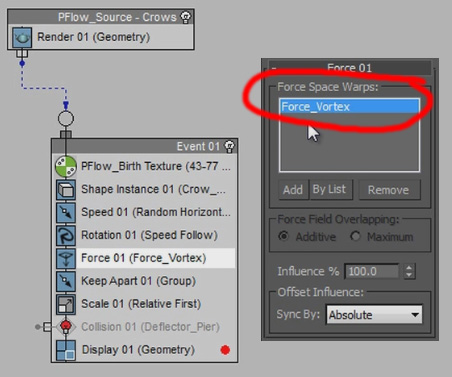
Once you’ve added added the desired forces and linked them up to your particles, your particles will be properly influenced by them. The Vortex force causes the crows to spin around Celina as she turns.
Using Deflectors to Prevent Intersecting Geometry
However, one thing that is likely going to happen when you move your particles around in your scene is that they will intersect and pass through the geometry you have set up. In the side view I can see the crows going through the floor of the pier.
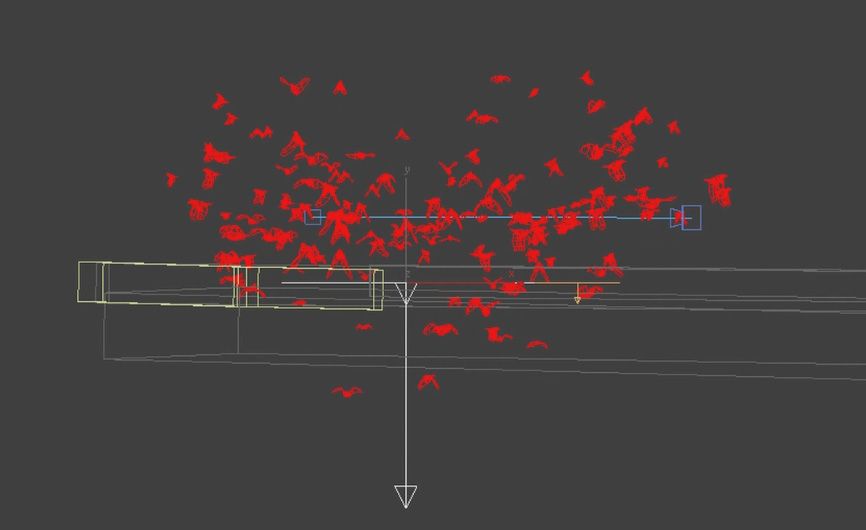
We can prevent this from happening by adding a deflector. You can add a deflector into your scene by going to Space Warps –> Deflectors in 3dsMax. I added a deflector over the ground of the pier.
Note that just like with the forces, you have to link your deflectors up to the particle flow for them to have an effect on the particles.
A deflector has a number of properties to define how objects colliding with the deflector should behave. Feel free to tweak this to your liking.
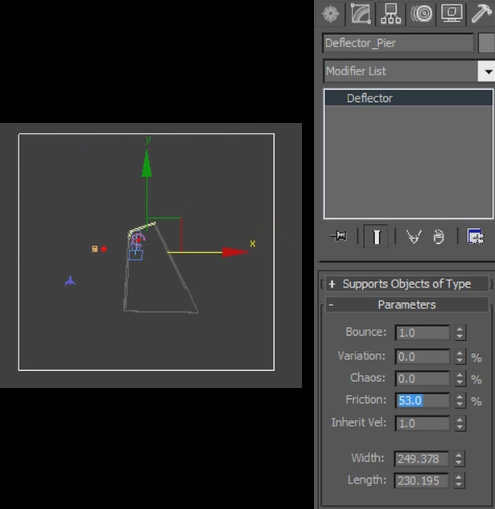
Now we need to link the deflector to our particles inside Particle Flow. For this you can add a Collision operator to your main particle event and select the deflector you added in the operator parameters. I will set the behaviour to Bounce and even though that might not be a very natural thing, it will prevent the crows from passing through the main part of the pier.
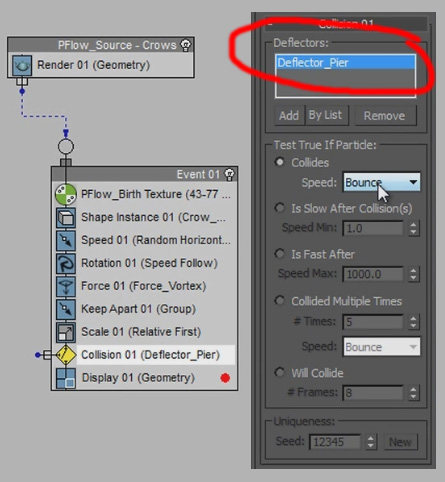
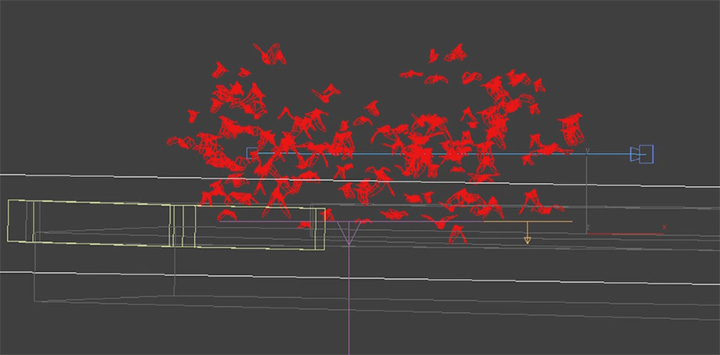
You can go into much more detail here and create physics and deflectors for all surfaces in your scene, but for simplicity and because the effect will only be a couple of seconds long, I only added this simple deflector. Looking at the side view you can see how the crows no longer penetrate the base of the pier.
One important element we have yet to cover before we get to the rendering of our scene are shadow catcher materials!


3 Responses
Compelling tutorial. I have attempted to emulate the animated mask; however the silhouette remains solid white in the parent composition. There appears to be a key step that eludes the completion of the true render for the pFlow. Any postulation… best, Campbell
I’m not sure what you mean. Are you having troubles animating the mask for the birth texture in After Effects?
hi, i like you tutorials very much :)
i don’t know how to work with 3dsmax
can u please tell me how to Do 3D integrations using C4D :)
I am doing this tutorial and it’s amazing…however, my crows are not spreading outward from the birth texture….they all are remaining within the plane….Can you help me figure out what I’m doing wrong? Thanks so much!