Getting Down and Dirty With 3dsMax Particle Flow
Nah, I’m just kidding, it’s not that bad, but Particle Flow is fairly complex so be prepared. Press 6 on your keyboard to open up the Particle Flow window.
In pFlow you define the process from the birth to the death of a particle as a sequence of event nodes. A particle’s life ‘flows’ from node to node and at each node, a number of operators controls what happens to the particle at that stage in their life.
You can create a new particle flow by right clicking into some empty space in the window and selecting New –> Particle System –> Empty Flow. In the screenshot below I have already set up my entire flow, but I have greyed out all items except for the source and the birth event so we can concentrate on them.
The source event node at the top just defines the particle spawn event. It gets interesting once we start to look at the operators in the ‘Event 01 node’. The first item in that node is the PFlow_Birth Texture operator. You can drag this operator into your flow from the event list at the bottom of the pFlow window.
When you select the birth texture operator, on the right hand side you will see all of its options.
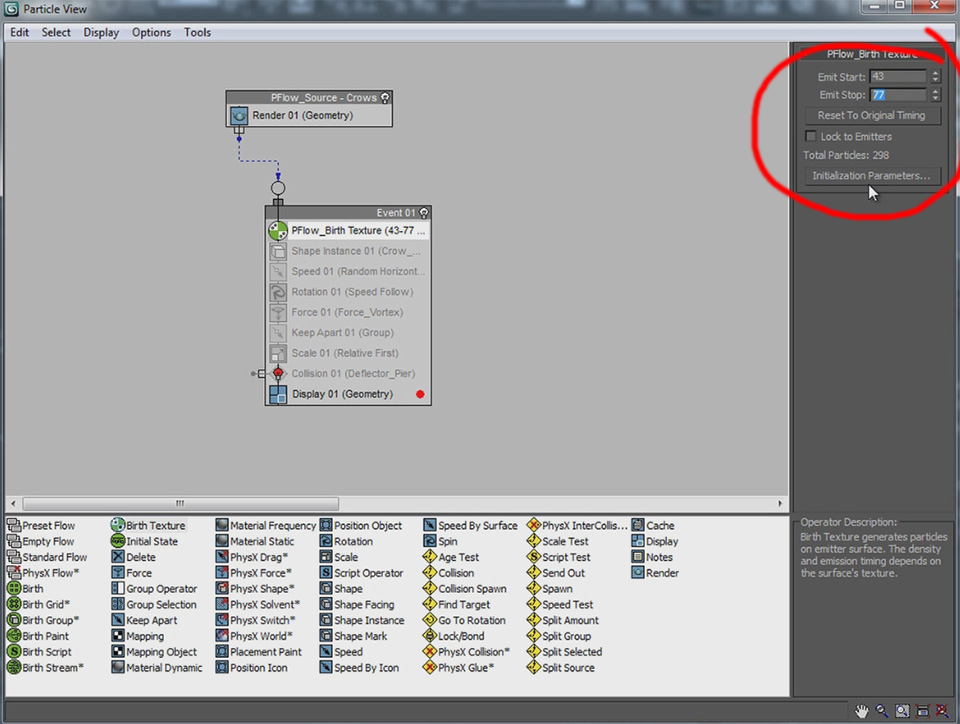
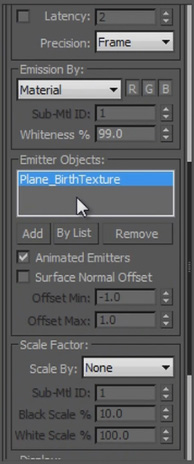
The Birth Texture operator has a Start and End Time to define when you want your particles to be emitted and if you click on the Initialisation Parameters button below, you will be taken to the modifier panel where you can set up all the other options for the Birth Texture. Here you can define the number of particles to be spawned and – most importantly – the emitter objects.
Add the plane with the white stripe material to the list of emitter objects. Ensure you tick the animate emitters check box since the material of the plane is animated.
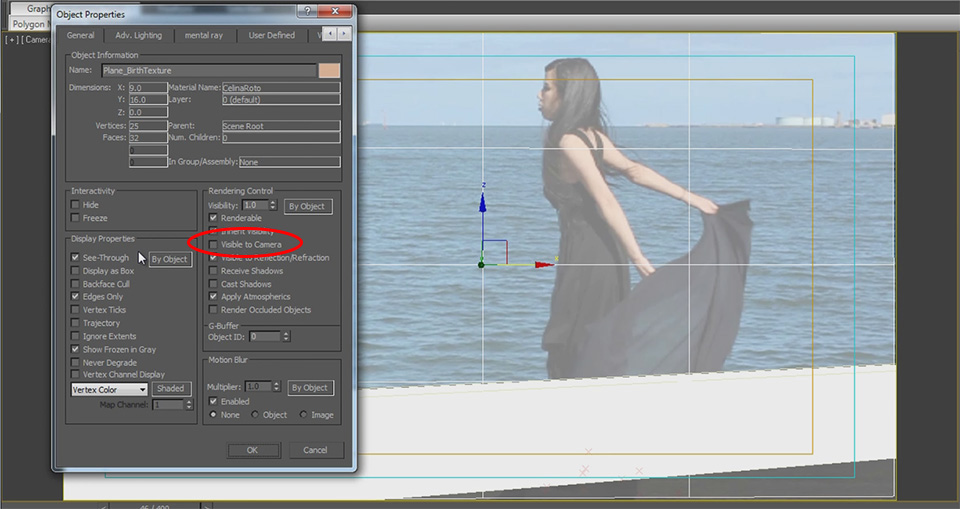
In our final render, the plane is merely used to define where the crows will be spawned; we do not want to see it in the rendered image. You can hide the plane by disabling the ‘Visible to Camera’ check box in the object properties.
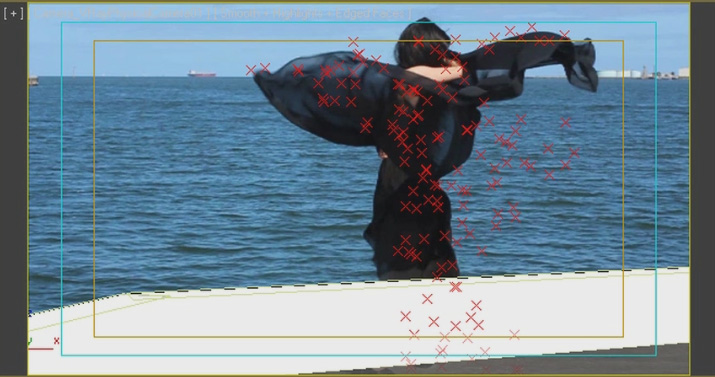
If you now rewind your animation and play it back you should see little ticks appearing in your scene exactly where your birth texture material is white at the time. These little markers are our particles that we will soon turn into fully animated 3D crows.
You can disable the see-through property of the plane (temporarily) so you can verify that this is working correctly. 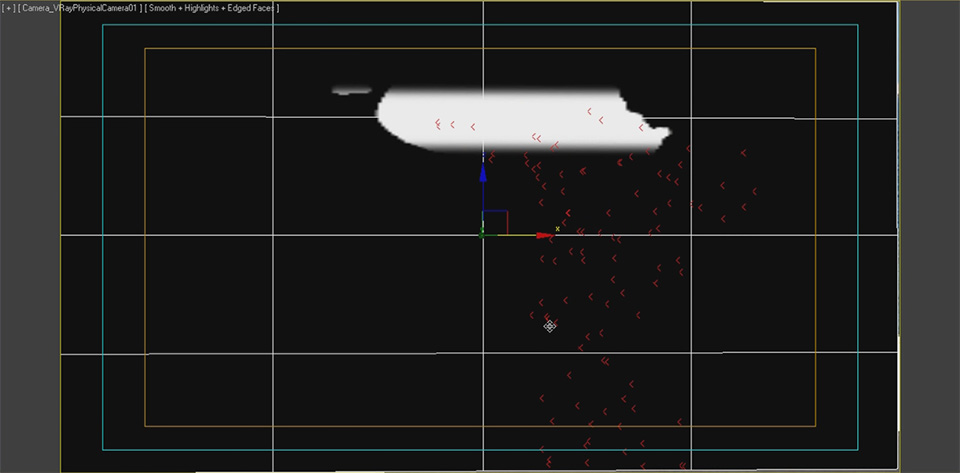
And if you once again hide the plane, you should see the red ticks appear over your actor in sync with the animation of the viewport background.
Time to get fancy with the particles!


3 Responses
Compelling tutorial. I have attempted to emulate the animated mask; however the silhouette remains solid white in the parent composition. There appears to be a key step that eludes the completion of the true render for the pFlow. Any postulation… best, Campbell
I’m not sure what you mean. Are you having troubles animating the mask for the birth texture in After Effects?
hi, i like you tutorials very much :)
i don’t know how to work with 3dsmax
can u please tell me how to Do 3D integrations using C4D :)
I am doing this tutorial and it’s amazing…however, my crows are not spreading outward from the birth texture….they all are remaining within the plane….Can you help me figure out what I’m doing wrong? Thanks so much!