Setting Up the Virtual Camera
The second step is to set up your virtual camera to match the physical camera you used to film your scene. Fortunately for me, this scene was shot with a static camera so I did not have to perform any complicated camera tracking. I simply set up a vRay camera and positioned it at the same point my real camera was in relation to Celina and the pier.
In the camera settings, whether you are using vRay or the standard camera, you have to ensure that all your settings match the camera you used to film the scene. These include focal length, aperture, shutter speed, ISO, white balance and more. The more accurately you set this up, the better the rendered elements will fit onto the original footage.
Finally, switch your 3dsMax viewport to use this camera and hopefully the geometry you modelled will line up perfectly with the footage we used as animated background. If it does not, you might have to do some tweaking on either the geometry or the camera.

Next, let’s set up the lights in your scene!
Let There Be Light!
Just like with the camera and the geometry, you want to try to simulate the conditions under which the footage was filmed as accurately as possible. Create lights for any light sources that existed during the shoot and adjust them as best as you can to replicate the real lights.
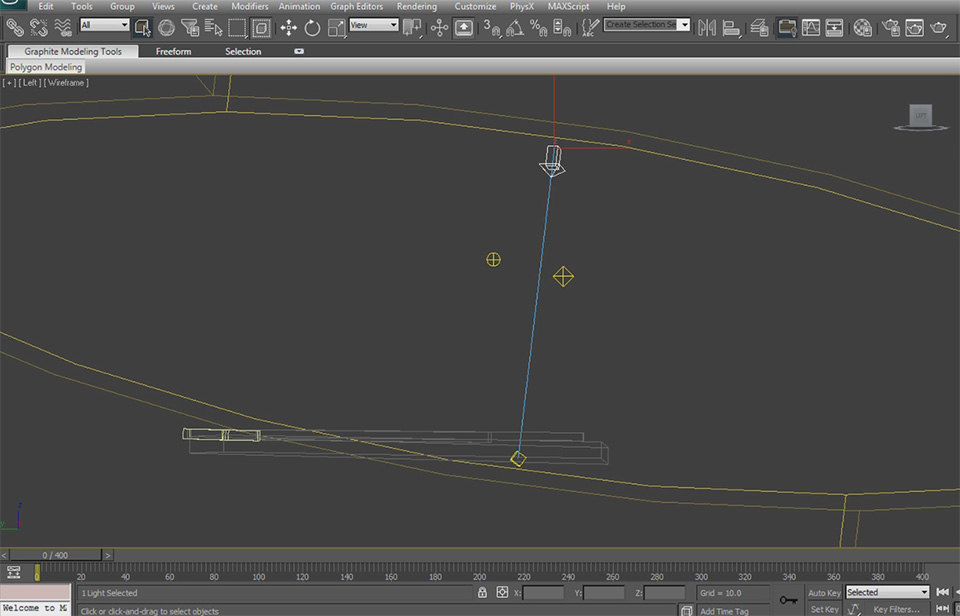
I decided to add 3 lights in total. First, I added one very large directional light to simulate the harsh sunlight and positioned it at the correct angle to the camera and the scene.

I set the intensity of this light pretty high because it was a sunny day when we shot this scene and I wanted this light to be just as harsh.
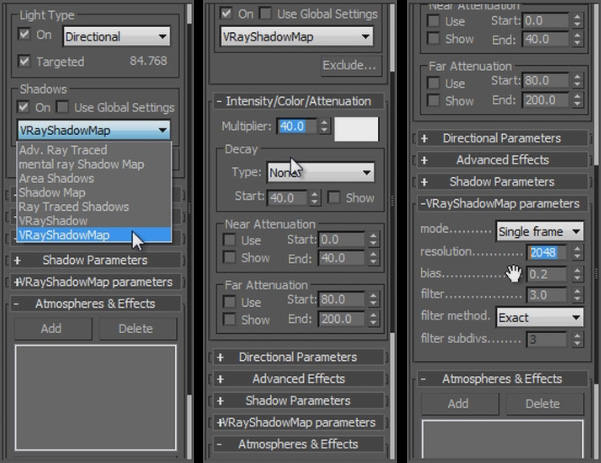
To make this effect realistic, it is important that you enable the shadow options on the primary lights you use in your 3dsMax scene. How you set up the shadows will vary depending on whether you are using vRay or the default Scanline renderer, but here are some general guidelines:
- Ensure you enable the shadow option for all lights that represent real light sources that existed when you filmed the scene
- If you are using a shadow map, ensure that the resolution of your shadow map is sufficiently high so you get the right level of detail into your shadows
- Ensure that the light intensity and colour matches your scene as accurately as possible
Tweak as required until you are happy with the setup. Don’t be shy and render out a couple of tests to get the lights set up correctly.

Since a virtual 3d scene will be absolutely black if no light hits the surfaces directly (unless you use global illumination) and in the real world there is a level of ‘ambient’ light due to reflection, I added a very weak ambient light into my scene just to avoid 100% black areas.
Now with the basics out of the way, let’s move on to setting up the particle system using pFlow. This is going to get a little more complicated so hold on to your socks!


3 Responses
Compelling tutorial. I have attempted to emulate the animated mask; however the silhouette remains solid white in the parent composition. There appears to be a key step that eludes the completion of the true render for the pFlow. Any postulation… best, Campbell
I’m not sure what you mean. Are you having troubles animating the mask for the birth texture in After Effects?
hi, i like you tutorials very much :)
i don’t know how to work with 3dsmax
can u please tell me how to Do 3D integrations using C4D :)
I am doing this tutorial and it’s amazing…however, my crows are not spreading outward from the birth texture….they all are remaining within the plane….Can you help me figure out what I’m doing wrong? Thanks so much!