First, we want to assign a material to the roof tiles so they don’t look all boring and grey. We want them to be the same colour as the roof in our background image. For this, create a new material and go over to the Color settings. adjust the Color and Brightness properties until the material matches the colour of your roof. You may also want to tweak some of the Specular settings to make the roof tiles appear less shiny.
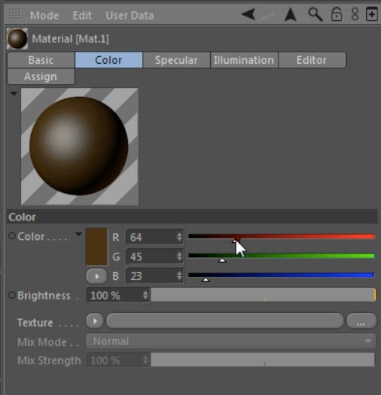
Assign the material to the roof tiles by dragging it onto the Roof Tile object that we added below the Cloner object in our scene. If you preview the scene now (CTRL+R), the roof tiles should match the colour of your roof. For me, I gave them a brown colour to match up with my background image.
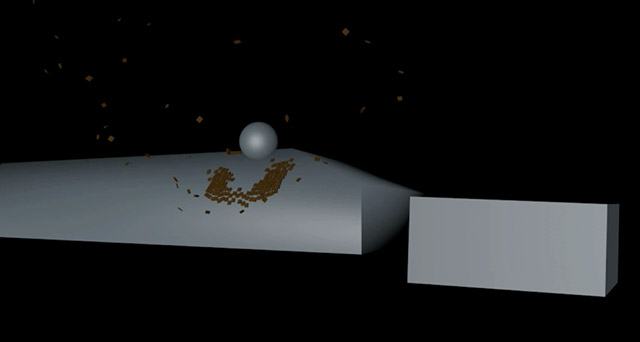
Now we’re faced with a problem. Yes, we can see the roof tiles which we want to composite into the destruction effect, but we can also see the helper geometry we have set up: the house, the trailer, the ground and the sphere.
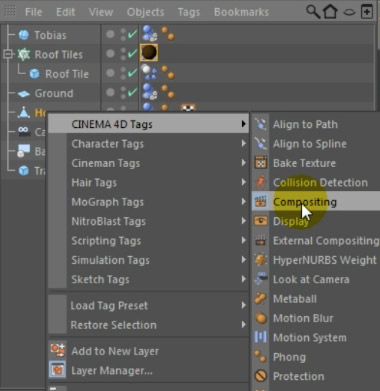
We need to tell Cinema 4D that we do not want to render these elements and you can do that by assigning a Compositing tag to the geometry you want to hide. dd this tag to the house, the trailer, the ground and the sphere.
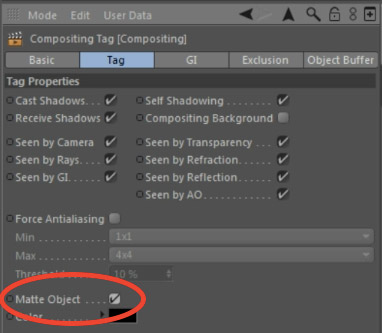
In the settings for the Compositing tag, enable the Matte Object checkbox. This tells Cinema 4D that this object should still interacts with everything in your scene as normal, but should not be included in the final render.
If we preview the scene now, we can only see the roof tiles being destroyed and flung all over the place. Perfect!
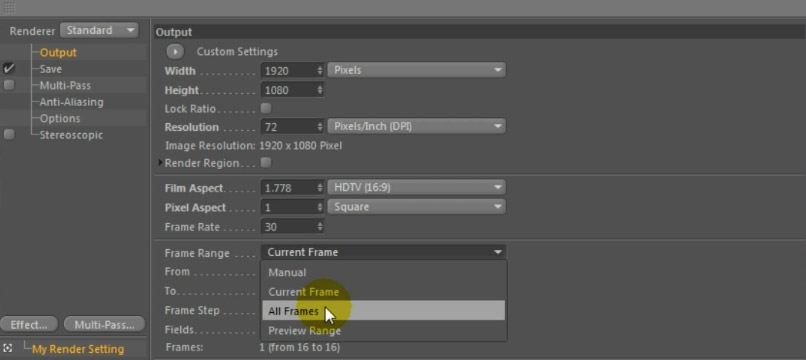
Go to your project settings and select the Output tab. Ensure that your resolution is set up correctly and choose to export ‘All Frames’.
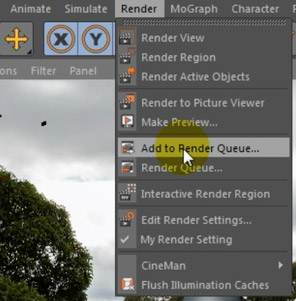
Close the settings dialog box. To render the entire animation, go to Render -> Add to Render Queue. This works very similar to how the render queue works in Adobe After Effects.
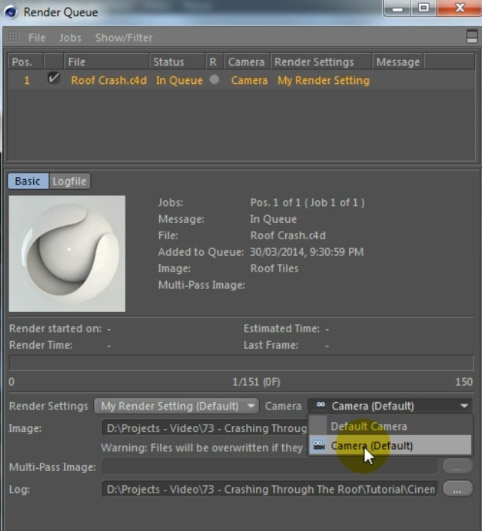
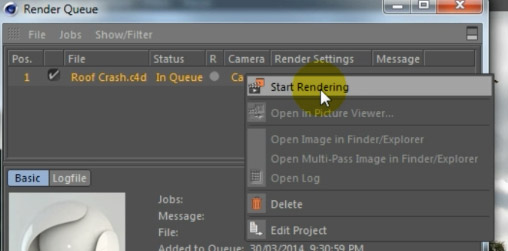
The Render Queue popup will open automatically, with your animation already added. Make sure that you select the correct camera, the one that we matched up with the angle of our real world camera used to film the scene.
Finally, right click onto your animation in the render queue and select ‘Start Rendering’ from the context menu.
The Cinema 4D destruction scene will now be rendered. I chose to export my animation as a PNG image sequence with alpha. Once the render is complete, we can return to After Effects to finish off the roof destruction effect!


2 Responses
you guys are great thanks so much
Thank you for the comment!