One of the easiest ways to enhance the look of destruction effects like explosions and impacts is to add a little bit of camera shake. Even the smallest amount of camera shake will greatly intensify the power of the effect. It does so by conveying the impression that the explosion or collision was powerful enough to make the ground on which the camera stands shake.

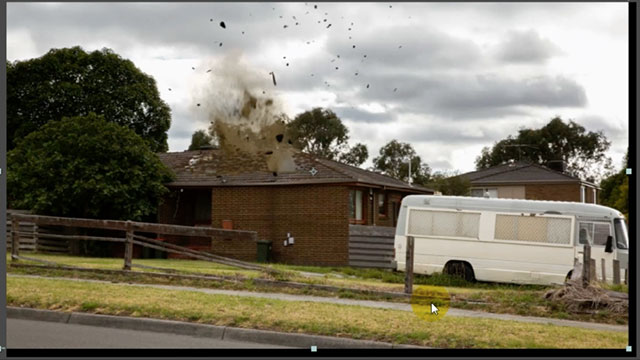
Fortunately, it is very easy to add camera shake in Adobe After Effects and in this tutorial we will add some camera shake to the effect we created in my roof destruction effect tutorial. Here is the final sequence of a giant smashing through the roof.

Adding Camera Shake With Expressions & Expression Controls
To add camera shake to our footage we will make use of two great features in Adobe After Effects: Expressions and Expression Controls. Start out by revealing the Position property on the layer that you want to add camera shake to. ALT-click onto the stop watch icon to add an expression to the property. In the expression editor type
wiggle(10, 100)
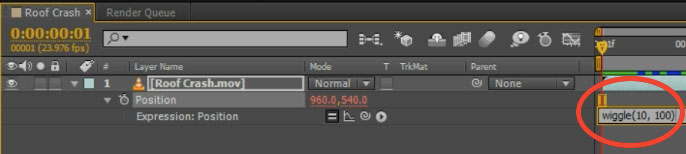
If you scrub through your clip now, you will see that the clip jumps around by up to 100 pixels 10 times a second. This seems to make the entire scene shake rather intensely. Note that you will see black borders as your clip leaves the main area of the composition, but don’t worry about that for now. We will fix that up once we’ve got the camera shake under control.

The strength of the camera shake is controlled by the second parameter of the wiggle expression. We can lower the amount of shake by changing the expression to
wiggle(10, 10)
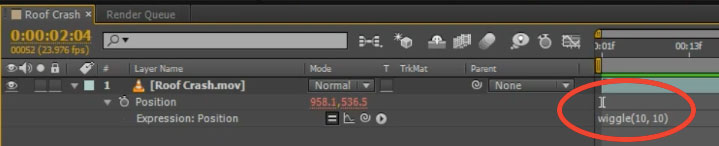
You will see that your clip now jumps around the screen a lot less, up to 10 pixels 10 times a second.

When adding camera shake to a destruction effect, you will likely want the camera to be stable at first, start shaking when the explosion or collision occurs and then slowly return to a stable shot. Unfortunately, because the strength of the camera shake is controlled by the second parameter of the wiggle expression, we can’t keyframe it. But we can use Expression Controls to get around this limitation.
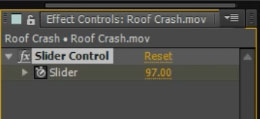
Go into the Effects & Presets panel and search for the Slider Control effect.
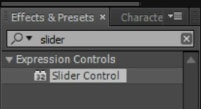
Apply this effect to your layer. You will end up with a simple Slider Control effect on your layer that does absolutely nothing. But we can wire up the value of the slider to the second parameter of the wiggle expression – and therefore control the strength of the camera shake with the slider.
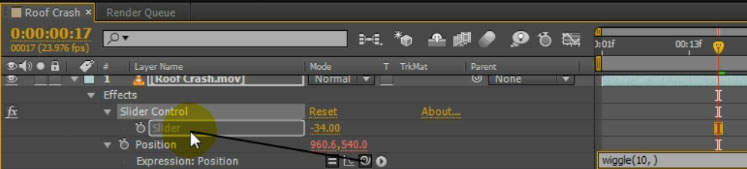
To do this, expand the Effects tab so that you can see the Slider property of the Slider Control in your layers window and then go into the expression editor to modify the wiggle expression. Type
wiggle(10,
and then, with the cursor at the end of your incomplete expression, drag the pick whip icon on the left side of the expression editor onto the Slider property of the Slider Control. Release your mouse to insert this value into your expression. Finish the expression off with a closing bracket and you should now have
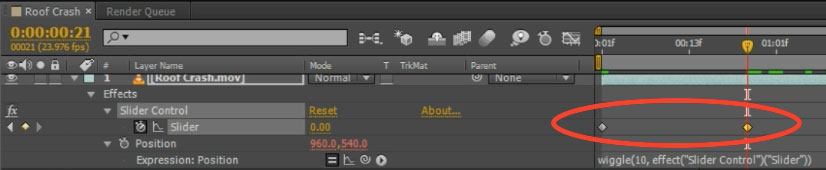
wiggle(10, effect("Slider Control")("Slider"))

This expression will cause the layer to shake 10 times a second by the amount specified by the slider value. And, since we can keyframe the Slider property, we can now keyframe and control the amount of camera shake for our effect.
I added a few keyframes to kick in with a fairly strong camera shake just as the giant smashes through the roof and then subside slowly back to 0.
Your composition will now have some camera shake that helps sell the roof destruction effect.
Finally, let’s deal with the ugly black borders that we can see as our footage moves around the render area.


2 Responses
nice, thanks.. helps a lot..
but how did you do that? that crashing roof things?
the roofs really look crash.
Got a roof crash VFX tutorial right here: https://www.surfacedstudio.com/tutorials/after-effects-c4d-roof-destruction-vfx-part1