Adding The Building Explosion
The Skyline Matte now properly covers up the lower part of building throughout the entire shot. But what if we want to add other elements like explosions, smoke, and debris to our destruction effect? We’d want all of those elements to affected by the Skyline Matte as well so they appear to sit behind the buildings in the foreground.
Since you can apply a track matte in Adobe After Effects to only a single layer, we need to pre-compose the building and all other destruction elements that we want to apply the Skyline Matte to.
One difficulty we have to overcome with this shot is that we have a 3D tracked scene and the layers we are working with are 3D layers. If you pre-compose the layers, they will no longer be properly placed in your 3D scene. One way to get around this issue is to make sure you nest a copy of the 3D camera together with your 3D layers. I also recommend nesting a copy of your base footage so you can see what is going on when working in the pre-composition.
So, duplicate the 3D camera and the base footage. Select these 2 layers together with the Building Image layer and pre-compose them.

I will call this composition ‘Building Comp’. Ensure that the track matte option for the new composition is set back to Alpha Inverted so the Skyline Matte now applies to all elements within the nested composition.

Next, go into the Building Comp and set the base footage layer to be a <em>guide layer</em> only. We do not want the footage to be rendered within this composition but just help us out when we go and position the explosions and any other destruction elements.
To easily place the explosions correctly in the 3D scene I recommend duplicating your Building Image layer and replacing it with the explosion footage. If you don’t have any explosion stock footage, you can find free explosion stock footage on detonationfilms.com.
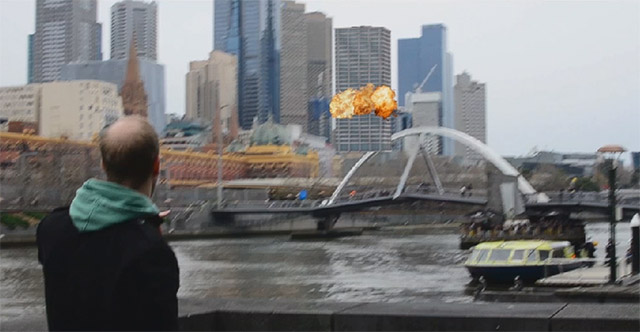
Add any number of explosions in your scene and position them where you want them to hit the building. In the screenshot below you will see that I have also animated the opacity of the explosions because I wanted them to fade out a little faster.

Playing back the Building Comp, you should now have explosions strike the building. Note that within this composition the elements will overlap the city footage again as we don’t have apply the Skyline Matte here. They will all be properly covered up when we go back to the parent composition.

I duplicated the explosions a couple of times and moved them around in the scene to pack some more action into the destruction effect. How much and how many is totally up to you.

To keep things neat, I recommend pre-composing the explosion layers. Again, remember to also nest a copy of the 3D camera within this new composition or the explosion elements will not appear where you’d expect them to. I called my layer ‘Explosions Comp’.

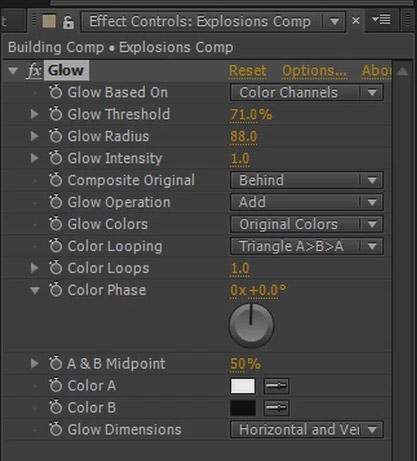
To add a bit of glow to the explosions and make them sit a bit better in the scene, I then applied a Glow effect to the Explosions Comp layer. The settings are up to you, just tweak them until you are happy with the glow the explosions are giving off.

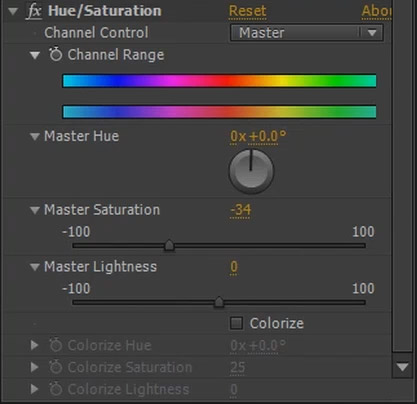
The explosion elements I used were a little bit too saturated for the footage I was placing them on so I also applied a Hue/Saturation effect to drain some of the colour out of them.

And that’s it for the explosions. As a last step for the destruction effect, let’s make the building ‘collapse’ after it has been bombed.


