Adding Shrapnel to the Explosion
I will disable the visibility of the explosion layers just so it’s easier for us to see what we are doing.
We want our shrapnel particles to be bits and pieces of the motorcycle and for this, we will first need to create a small composition that contains all the images we want the particles to have.
Create a new composition by dragging an image of the motorcycle (I am using the frame I used to create my clean plate again) onto the ‘Create New Composition’ icon.
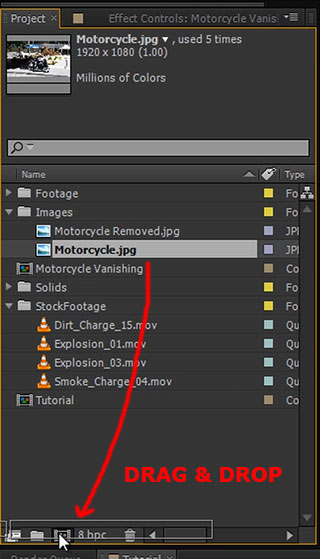
Reduce the duration of the composition to a few frames. Trim down the image layer to be only a single frame long.

Apply a hue/saturation effect to the layer and bring down the saturation and lightness to make the bike look dark and charred as before.
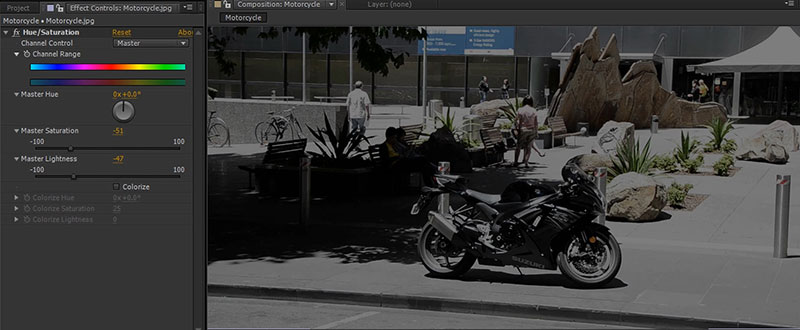
Then duplicate the layer a few times and shift each frame over to stagger them until your composition is filled.

Now go through the individual layers and cut out a different small piece of the motorcycle for each layer. These bits will be the shrapnel particles we will spawn for our explosion so I recommend picking parts that aren’t too distinct.

Finally, move all the motorcycle bits into the centre of the composition and reduce the resolution of the composition to barely fit the layers.
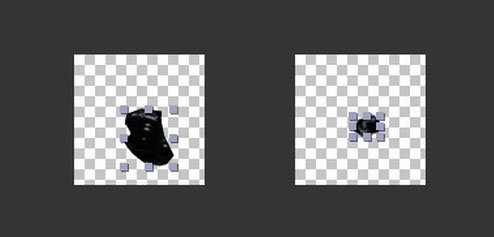
I will rename this new composition we created to ‘Shrapnel Particle’.
You should end up with a small composition with one frame for each different motorcycle piece in it.
Go back to your main composition and drag the Motorcycle Particle composition into your explosion.
Ensure the layer starts exactly when the explosion hits.

Now it’s time to create the particle layer. Create a new solid and call it ‘Shrapnel’. Apply the CC Particle World effect to the layer.
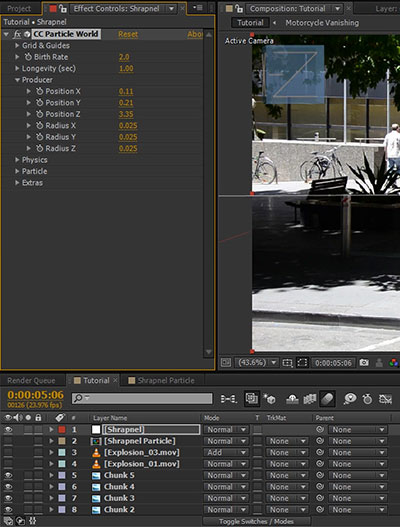
I wish the particle world effect used the same scale as the scene, but unfortunately it does not so we have to do a bit of manual set-up. Open up the Producer options and move the producer in X, Y and Z coordinate to position it as best as you can at the same position as the bike. Scrub through your footage to make sure it sits at the right depth and follows the shot correctly.
Ensure the particle layer starts at the same time as your explosion and – this is important – at the same time as your Shrapnel Particle comp that contains the bits and pieces of the motorcycle we want to use as particles.
Now animate the Birth Rate of the CC Particle World effect to start at 0. Move forward one frame and set the Birth Rate to 3. Move forward another 2 frames and set it back to 0.
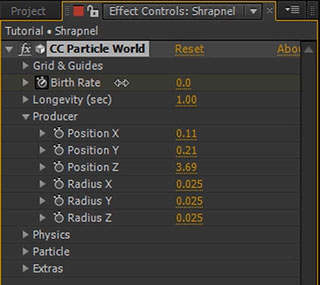
This will cause a small burst of particles to be emitted from the producer. In this screenshot they are still small orange streaks and might be a little hard to see.
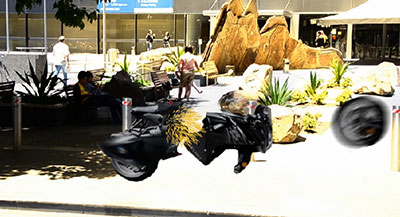
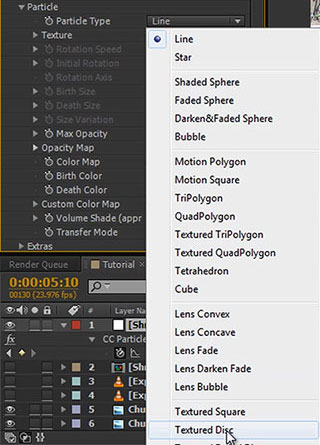
Let’s change the particle to use the frames of our Motorcycle Particle composition. Open the Particle options and change the Particle Type to Textured Disc.
Expand the texture, set the Texture Layer to the Shrapnel Particle and the Texture Time to birth.
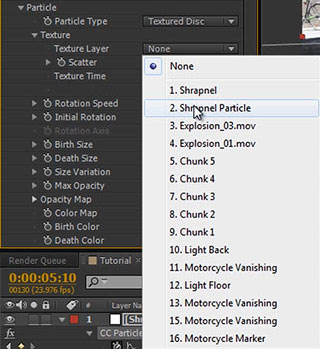
Birth tells all particles emitted at this moment to take the current frame from the Texture Layer and freeze the animation.
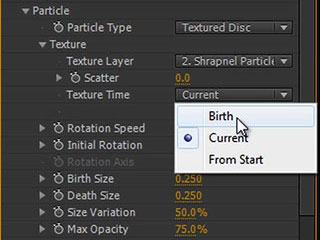
This is why it’s so important to have the Shrapnel Particle layer positioned at the moment you are emitting the particles! If it’s not at the right time, the particles will not be able to select the current frame when they are spawned and will end up being invisible.
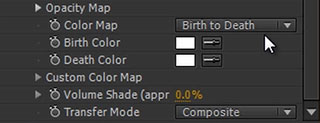
Now change the start and death size to something fairly big like 10 and change the Birth and Death Colour to white as we do not want to tint our particles. Also set the opacity to 100% because we don’t want the motorcycle shrapnel to be semi-transparent.
Open the Physics tab in the CC particle world effect and ensure the Animation is set to Explosive.
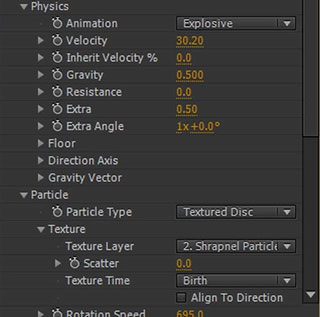
Increase the velocity to around 30 to have the particle shoot out from the motorcycle when it blows up. Scrub through your footage and tweak as required.
As I mentioned before, motion blur is important for realism so I will enable the option on the particle layer effect layer.
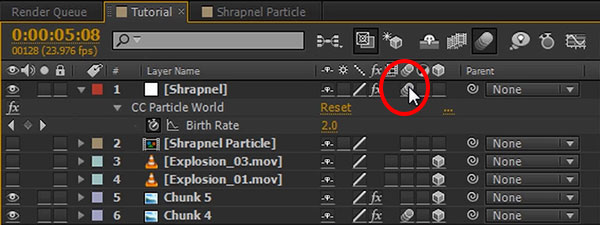
Re-enable the explosion layers and check out the explosion effect we have so far! Starting to look good!

Let’s also quickly add some soft ground shadows to the particles. Simply duplicate the Shrapnel layer and call it ‘Shrapnel Shadows’.
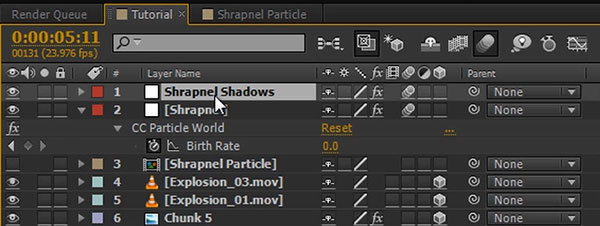
We now need to position this layer on the floor and since we already have a layer that is positioned in the floor, our Light Floor layer, we can simply copy the position and orientation from the Light Floor layer over to our Shrapnel Shadows layer.
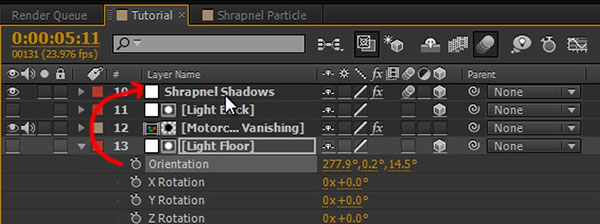
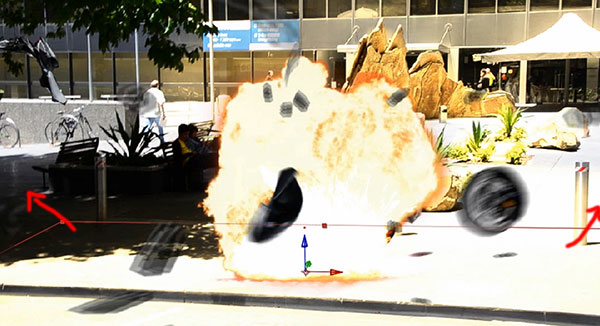
The Shrapnel Shadows layer should now sit nicely on the ground, we just need to position it a bit better and scale it up to suit our scene.
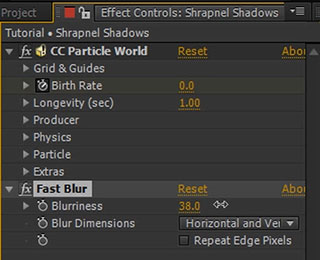
Search for the Fast Blur effect and apply it to the shadows layer. Increase the Blurriness until your shadows are nicely blurred out.
If the shadows come out too harsh, you can lower the opacity of the layer to around 50%. Here is out scene with the shrapnel particles shadows added.

Because no vehicle explodes without some smoke, let’s add a black smoke cloud into our shot.
Adding Smoke
Again I am going to use a smoke charge element from Action Essentials 2 by videocopilot but again you can find free option detonationfilms or footagecrate. Drag the smoke element into your composition and time it to start at the same time as the explosion.
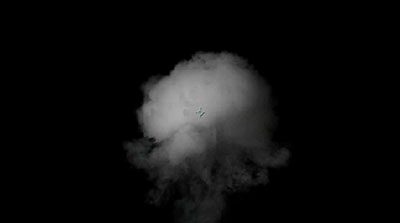
If your smoke charge appears to be a bit too slow, you can speed it up by applying a time stretch effect. For this, right click the layer and select Time->Time Stretch. Since this is a pretty instant explosion, I like to speed up my smoke to around 30% of the original duration. Now, with the smoke that I am using, the smoke is all white and I want an angry black cloud.
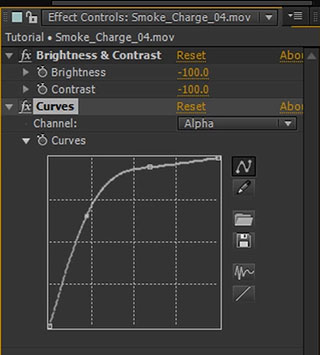
We can fix this quite easily by applying a brightness & contrast effect to the layer and reducing both brightness and contrast to -100.
For further adjustments, you can also add a curves adjustment to the smoke charge and bump up the alpha channel to make the smoke a little more opaque and not so… dainty. We want angry smoke!
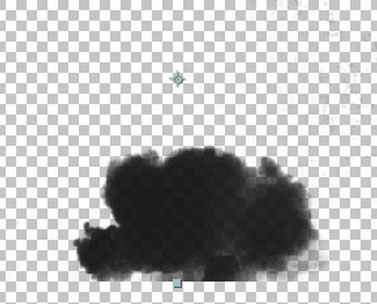
Here is the final angry black smoke cloud after all the colour and brightness adjustments applied:
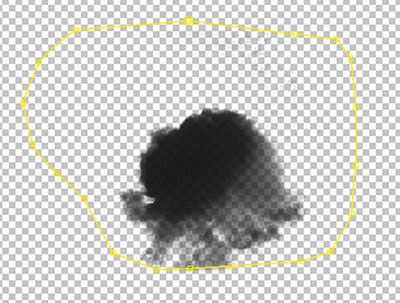
If there are any artefacts around the corners of your black smoke you can remove them by applying a simple mask and feathering out the edges.
We now need to position this smoke element in our explosion. For this, turn the layer into a 3D layer and copy the position and orientation of one of the already placed explosion layers over to our smoke layer.
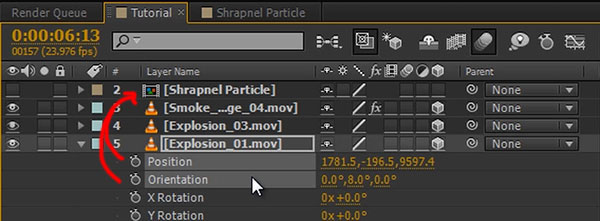
Scale the layer up and position it so it sits nicely just between the two explosion elements. You may have to tweak it a little bit so it sits into the scene just the way you want it to.
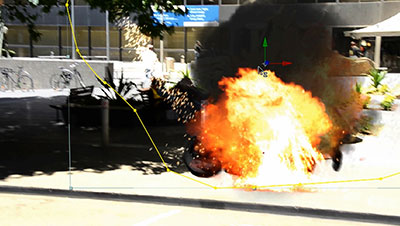
Here is the final motorcycle explosion with chunks, explosion, lighting, shrapnel, shrapnel shadows and smoke added. Lookin’ pretty cool!

Remember, you can add as many elements into the scene as you need to make the explosion look exactly like you want. We covered all the techniques you need in this tutorial so far.
Finally, let’s add some camera shake to finish off this effect!


8 Responses
this is the most detailed aftereffects tutorial i hv ever seen. really good work mate.
Thanks man!
This one is awesome tuts, I’m 3d old in AE and i started to watch your basic tuts in YT because its very instructional.
muchas gracias a todo lo que hacen
thank so much friend
hi there…….i have a question about removing objects of the scene……..i have footage with person in it and there is also a rope around top of his body…….in the footage the person is being pulled by rope and i want to remove the rope so it seems that this person is being pulled by an invisible force………could please tell me how can i do that???????(sorry for my bad english grammer)
Hi there, here is a video where I talk about how to remove an object from the scene: [youtube id=”LyCui6i8vuc”] You can use this technique to remove the rope
hello, I need this effect . can you help me ?
While I don’t do freelancing work, I am happy to try to answer any questions you may have about how to create this effect :)