After a few more advanced tutorials, I am finally continuing my basics series with this new tutorial covering the fundamentals of compositions and their many uses in Adobe After Effects.
What is a Composition?
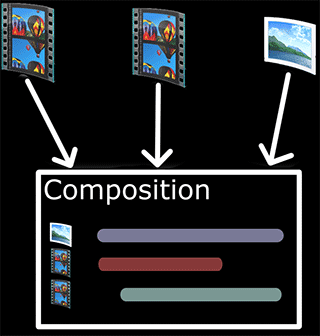
A composition is a container for your visual elements. Whenever you want to create a visual effect in Adobe After Effects, you will have to create a composition first. You then add your visual elements, be they images or video footage, as layers into this composition.
You can then modify the layers, blend them together and apply all sorts of effects before exporting your composition into a final video :)
You can also use compositions to group together a number of layers. You do this by pre-composing a number of layers and nesting them in a new composition. This new composition then replaces the original layers.
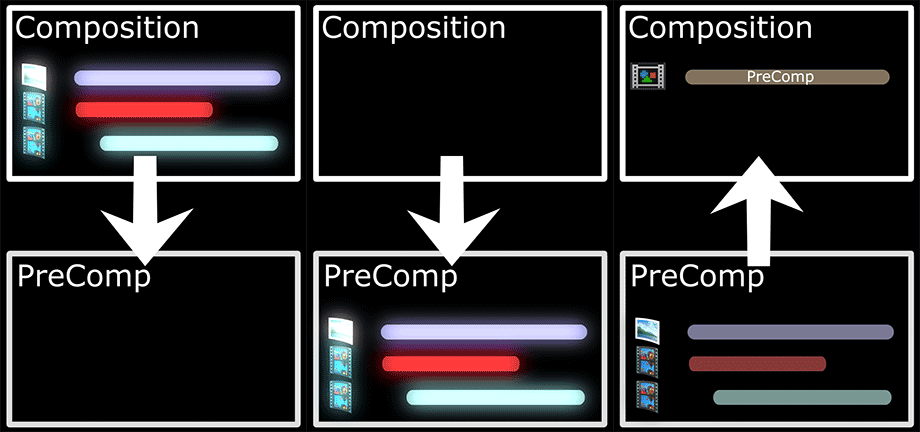
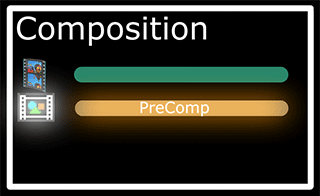
The advantage of this grouping is that you can now deal with all the layers you pre-composed as a single layer and move them around or apply effects to the entire group.
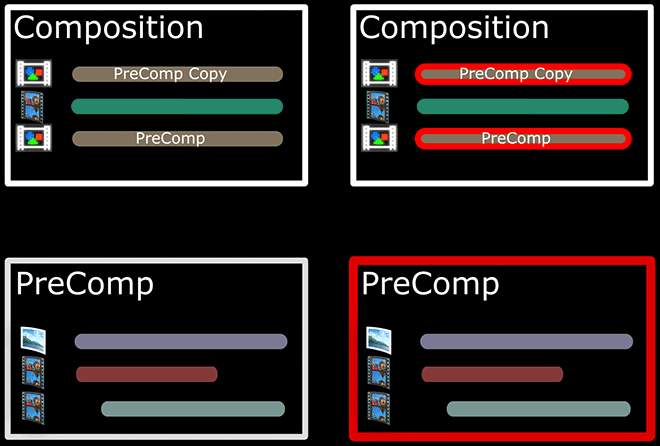
Finally – to me the most powerful aspect of compositions – is that you can use compositions to create reusable elements for your effects. You add a number of visual elements into a composition and then you can use copies of that composition as often as you want.
If you now change the contents of this composition, you will affect all instances of it across all of your layers!
Setting Up
Before we get into this tutorial, I will assume that you already watched my Adobe After Effects For Absolute Beginners video.
I am going to use 2 pieces of footage for this tutorial:
- A small clip of a park from my After Effects Explosions tutorial. However, it doesn’t matter what footage you use, just use something that looks cool if you add some explosions to it :)
- A stock footage explosion clip that you can download for free from detonationfilms.com. You can click this link to download the clip directly
Here’s a peek at the explosion stock footage we will be using :)

Creating Compositions
As you know, to create any visual effect in After Effects, we first need to create a composition that we can drop our footage into.
There is more than one way to create a new composition. You can go to the menu and select Composition -> New Composition. You can also right click into the project window and select the ‘New Composition…’ option from the context menu. If you’re not a fan of menus, you can also click on the little ‘Create a new composition’ icon just below the project window.
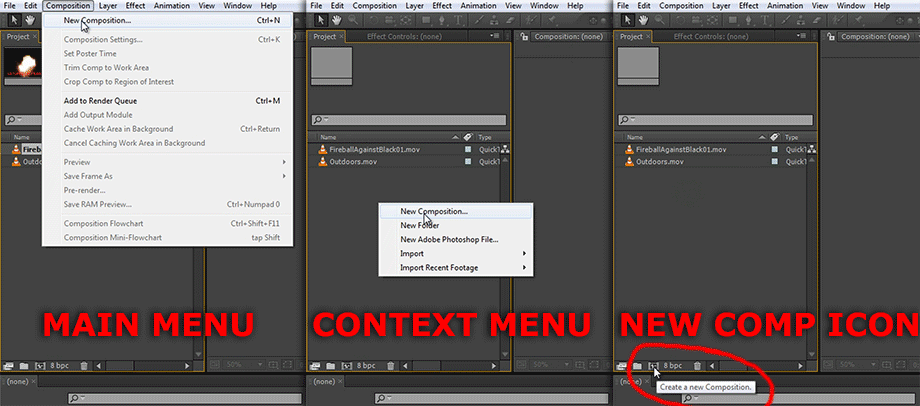
Let’s go with the menu option. No matter which option you choose, you will see the Composition Settings dialog box pop up where you configure your new composition.
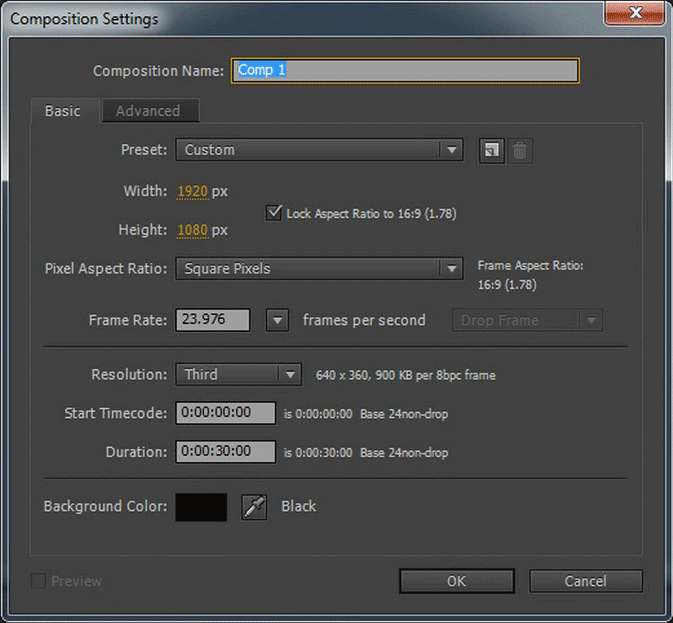
You can give your composition a name. For this tutorial I will call mine ‘Creating Compositions’.
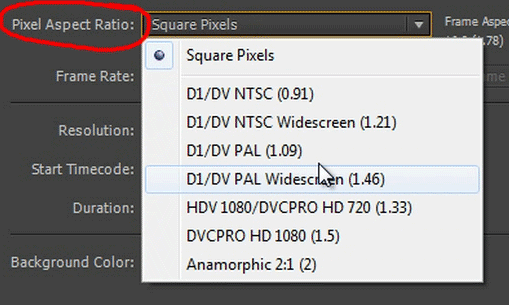
Make sure you set up your resolution as required and that you set up the correct pixel aspect ratio to match the footage you want to work with. I am going to leave this on Square pixels which suits the footage shot with my DSLR.
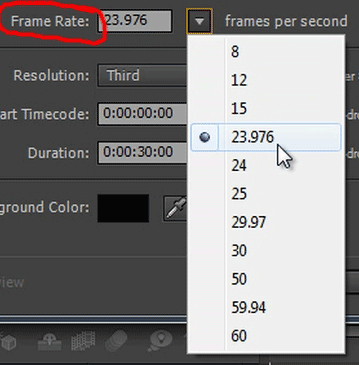
You can also change the frame rate either by typing it into the text box or by selecting one of the most common options from the drop down menu. I filmed my footage at 23.976 frames per second so I will leave it at the default setting.
Below that, you can define the start time code. This specifies the start value of the time indicator in your composition. Sometimes it’s useful to alter this, but for this simple tutorial you can just make sure it is set to 0.
At the bottom, can change the duration of your composition to suit whatever effect you want to create. Set it to around 30 seconds.
Finally, you can define the background color used for your composition. This is used for working with your composition only and will not have an effect on how it is rendered. Just leave it on black.
Click OK to create the composition.
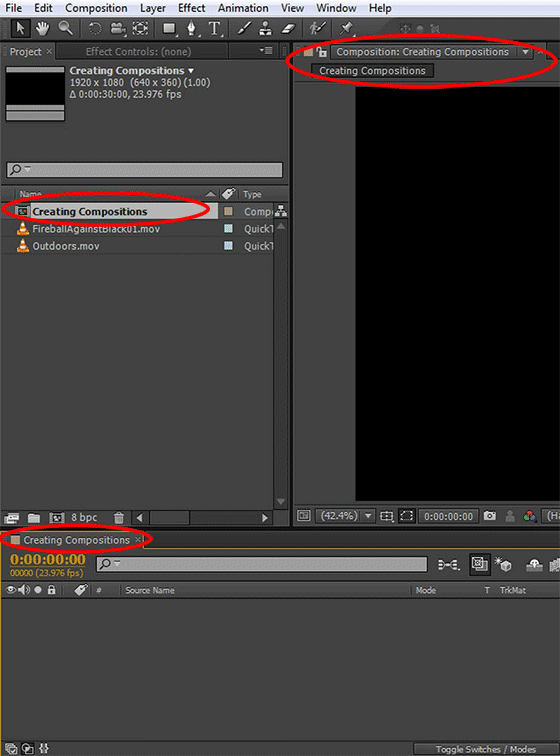
You just created a new empty composition! It will be black if you scrub through it, but that’s because we haven’t added anything into it yet. Note that you can see the currently selected composition at the top of the preview window, in the timeline tab and you should see your newly created composition in the Project window as well.
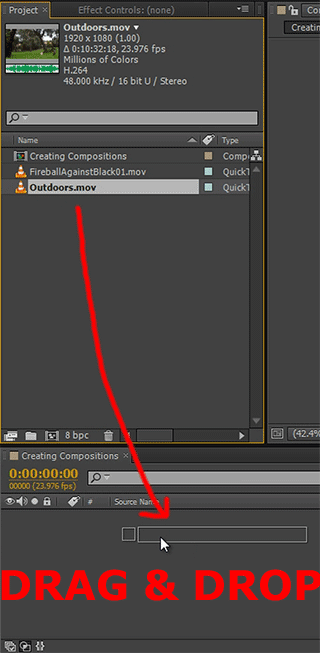
We can now drag our base footage into it and create a new layer. As I mentioned, this is the same clip I used for my explosion tutorial and is just a simple scene of a park. You can use any video you have for this, I chose this footage simply because it suited adding some explosions into it.
Next, drag the explosion stock footage into your composition on top of the base layer.
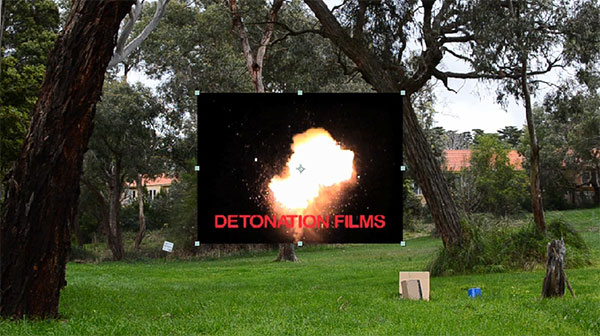
We now have a simple explosion in the scene, but it looks pretty bad.

It starts out with the detonationfilms logo and has a massive black box around it.
As I’ve shown you already in my After Effects Basics Beginner tutorial, we first want to trim out the first few frames to get rid of the label.
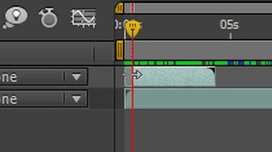
Then we will set the blend mode of the layer to Add to blend it more organically into our scene.
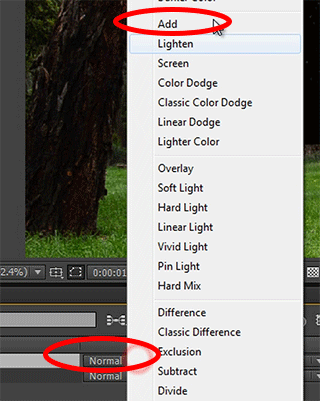
Playing this composition back you should now see a single explosion appear in your scene. I will reposition the explosion and scale it a little bit to sit nicely on the right side of the shot.
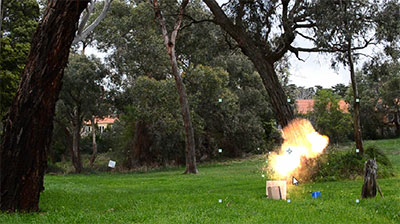
Let’s add more explosions! If one explosion is good, more must be better!
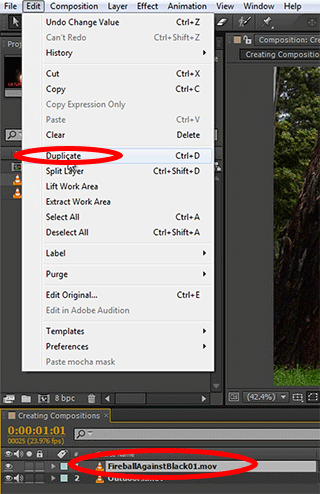
Make sure the explosion layer is selected and duplicate it. You can press Control-D (Function-D on a Mac) for this or you can go to the main menu and select Edit->Duplicate.
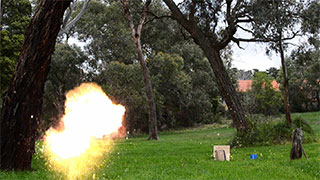
Move the copy of the explosion to a different part of your scene. I am going to move it to the very left side of the frame. Scale it a little bit and drag it forward on the timeline so it does not start at the same time as the first explosion. Now we have 2 consecutive explosions in our composition.
Repeat the process and add a 3rd explosion somewhere into your scene. I am going to add another into the back of the park and scale it down so it looks like it is further away. It doesn’t really matter where you add it, we just want to have 3 separate layers for our explosions in our composition.
Again, delay the 3rd explosion on the timeline so you now have 3 explosions being triggered.

You should now have 3 consecutive explosions in your scene :)
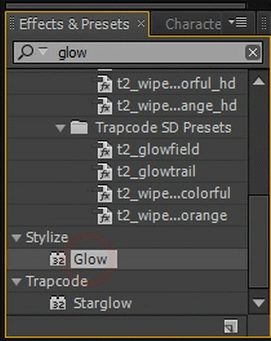
Let’s add some glow to our explosions! For this, move to a time position where you can see one of the explosions, select it and search for the Glow effect in your Effects & Presets panel on the right side of the interface. Double click on it or drag it onto your explosion layer to apply it.
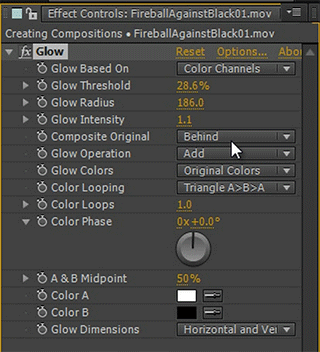
In the effects properties window on the left side, increase the glow radius to something fairly large like 200, decrease the glow threshold to around 30 and also jack up the glow intensity until you can see the effect clearly.
If we scrub through the footage, you will notice that our the explosion layer we added the Glow effect to now has a nice intense glow to it.
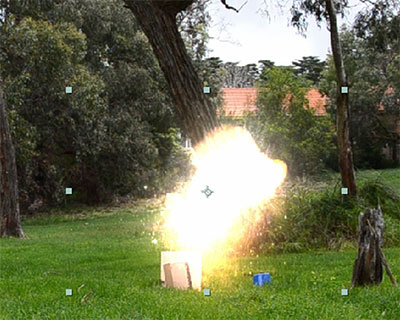
Note that the other 2 explosions do not have the glow effect. To achieve this, we need to apply the same Glow effect to the other 2 explosion layers as well.
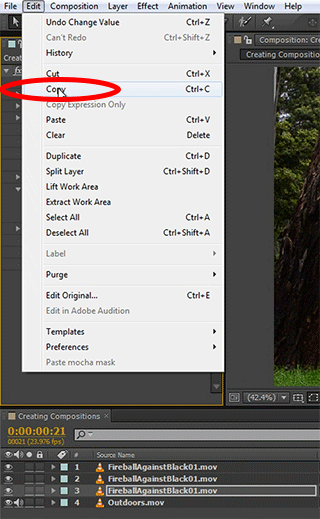
Simply select the Glow effect and copy it – either via Ctrl+C or via the menu Edit->Copy – then select the next explosion layer and paste it. Select the 3rd explosion and paste the same Glow effect onto it.
Now all explosion layers in our composition have the same Glow effect.
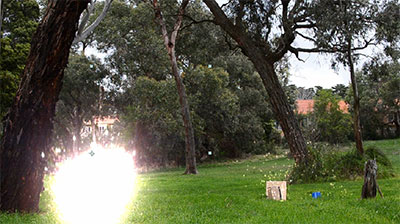
But this is a bad way of applying the same effect to multiple layers! Let’s use compositions to be a bit smarter about it. First, delete all the Glow effects you applied to the explosion layers.


6 Responses
Hi There ( i don’t know Yr Name, Yet :P )
Maybe i’m first who comment here…
Very Great Tutorial and also Help Me…
Thanks…
Really great! Thank you!!
Hey Tobias,
I’ve been editing for a little while now and wanted to expand my Affter effects skills. Your tutorials are great! i really appreciate you taking the time to put these together and have the different experience levels to work through. Your the man, keep up the great work!
Thank you very much :) Glad you’re enjoying my tutorials!
Hi!
Thanks for all the hard work you are putting in .
Best
Thank you very much!