Last time I talked about Masking in After Effects. This week I will be showing you why you should all know how to use Adjustment Layers :)
Benefits of Adjustment Layers
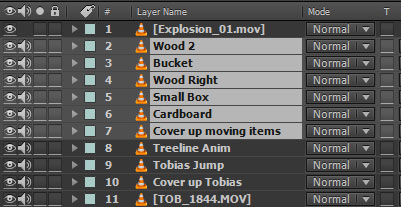
When you start to create more complicated visual effects, you will often find yourself with compositions that contain a fairly large number of layers. Here is a scene from my After Effects Explosion Tutorial:

Note that I pulled this scene apart and all the individual elements flying around, parts of the background and the clip of me are cut out and layered on top of each other.
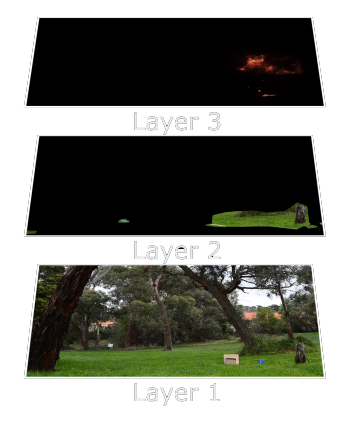
For simplicity, let’s assume we have 3 separate layers: an explosion layer, a layer for the flying elements and our background footage layer. Of course this concept just gets more important the more layers you have in your comp.
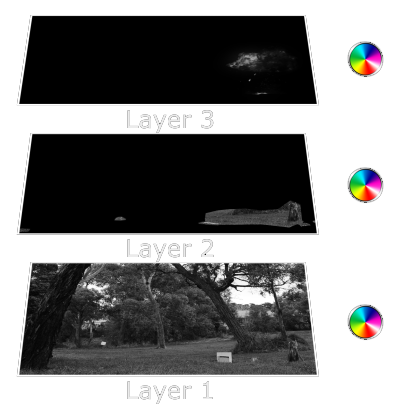
If you now decide that you would like to desaturate the entire scene, you may apply a Hue & Saturation effect to each layer and desaturate it. However, this become tedious very quickly, especially as your number of layers increase and you have to keep all the effects synced up to make the elements match.
Also, if you want to make any changes to the Hue & Saturation effect, you’d now have to go through every single layer and make the desired changes!
This is where adjustment layers can save your bacon!
An adjustment layer is an invisible layer that applies any effect you attach to it to all layers below.
To solve our problem above, we can simply add a new adjustment layer on top of all other layers and apply the Hue & Saturation effect to it. Automatically, all layers sitting below will get the same effect applied to them :)
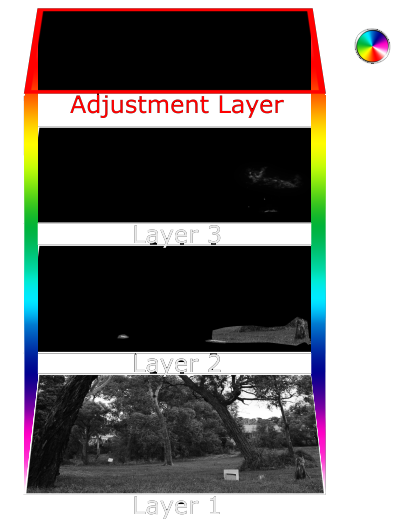
Note that only the layers that are covered by opaque areas of the adjustment layer will receive the effects. If you accidentally move your adjustment layer, you can see that the areas that are not covered no longer receive the effect.
This is actually a very good thing because it allows us to use masks or mattes on the adjustment layer to define where it is visible and therefore control where the effects are being applied :)
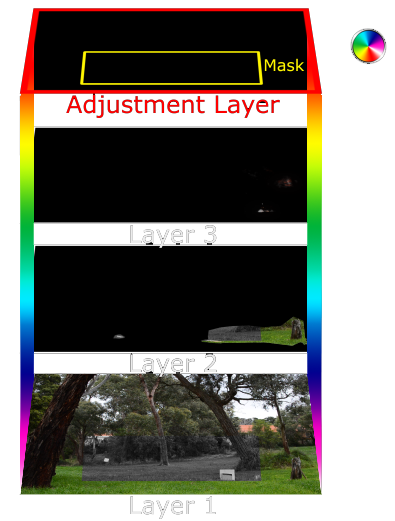
In the following example, I cut out a small area of the adjustment layer with a mask.
Note that the layers only receive the effects from the adjustment layer where it is visible, e.g. where I drew my mask!
Utilising mattes, you get even more power!
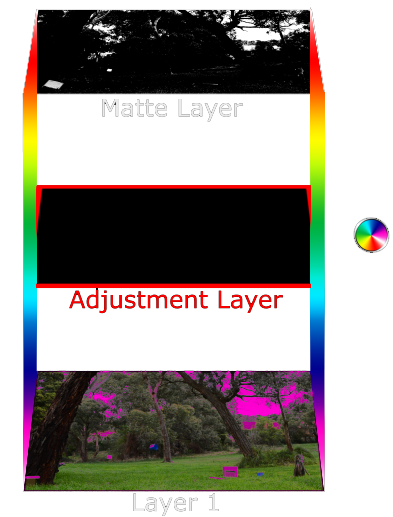
You can apply a matte to your adjustment layer and therefore, similar to masks, by controlling the opacity you can control where your effects are being applied.
In the example below I created a luma matte for the sky and applied it to the adjustment layer. The adjustment layer contains a simple Colorama effect that tints the image pink and you can clearly see that it only affects the areas defined by the matte as only the sky has turned pink :)
One last (but important) thing to note is that you can animate your masks or your mattes while they are applied to adjustment layers. This will dynamically change where the adjustment layer is visible and thus where all your effect are being applied to and opens up endless possibilities for creative and complex effects :)
Have fun experimenting!


6 Responses
Great tut!!! You sure know your stuff!!! Ill be watching all your videos for sure, as i an getting into after effects… thanks again!
Well done !!!! The description was so clear that I learned everything which I should have knew about so easily !!!
Thanks
Great to hear you enjoyed it! Thanks!
WOOOWWW!!!!AWESOME!!!
soooo…to keep the rose coloured i have to mask frame by frame?…….there’s not an option to keep track of its movement? :(
thanks again for another awesome tutorial :)
You could try a Leave Color effect instead – I’m simply showing here how you can mask out Adjustment layers. There is no ‘one click solution’ in AE that does exactly what you are looking for if that’s what you’re after. You have to separate the elements first in some way. Another tool you can use is the Rotobrush Tool which makes things a little easier than hand animating a mask