In the last part of my 3D integration VFX tutorial I took you along on an actual shoot to discuss the things to keep in mind when filming a scene for 3D integration.
Today I will talk about how to use the 3D camera tracker in Adobe After Effects CS6 to extract camera movement information and export that information into your favourite 3D program :)
Do I need to use the 3D camera tracker?
Using the 3D camera tracker to analyse your footage and extract camera information only makes sense if your camera is moving during the shot. If you have a locked down shot (fixed camera position) and assuming you wrote down all the information to replicate the scene in your 3D program as discussed in the last part, you do not need to use 3D camera tracking and you can move on to the next part of this tutorial :)
However, in the UFO scene we filmed, the camera executes a pan and a tilt up towards the sky so we will have to track our footage.
Using the 3D Camera tracker
Before we get to our UFO scene, let me first show you how to use the 3D camera tracker in a normal situation. I have a scene here of me walking with my camera through a street in Melbourne.

To apply the 3D camera tracker, simply locate the ‘3D Camera Tracker’ effect in the Effects & Presets panel and apply it to your footage layer. The tracker will immediately begin analysing your footage in the background.
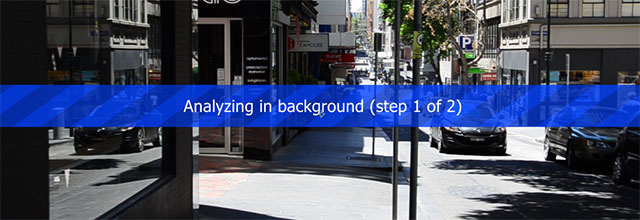
The 3D camera tracker is now processing your footage frame by frame and applying 2D track points to trace the movement of distinct visual elements in the scene. Once it has completed this task, it will solve this cloud of 2D track points and their movement to reverse engineer the position and movement of the camera. It will also convert the 2D track points into 3D track points using the calculated depth information.
This can take a while depending on the resolution and length of your footage as well as the power of your computer.
While this is going on, let’s have a quick look at all the parameters availale in the 3D camera tracker.
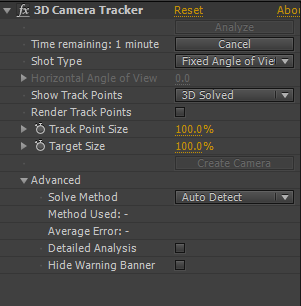
I don’t find myself changing these parameters often as the tracker usually does a pretty good job all by itself. However, it’s good to know what these settings are useful for in case you do get into a more tricky situation.
At the very top, the effect will show you a progress indicator to tell you how much longer you will have to wait until analysis is complete.
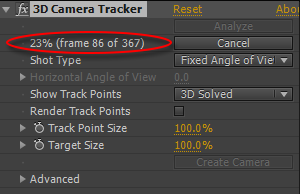
Below this indicator you can specify the shot type.
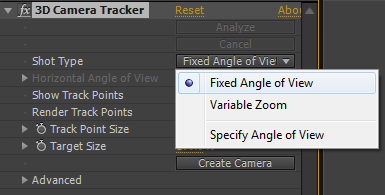
- Fixed Angle of View. Use this option if your focal length did not change during the shot and you are fairly confident the tracker will detect it automatically
- Variable Zoom. Use this option if you zoomed in/out with your camera during the shot
- Specify Angle of View. If you do not trust the 3D camera tracker to detect the angle of view automatically, you can use this option to specify it explicitly
For most of my shots, I usually just leave it on ‘Fixed Angle of View’ and I haven’t had many issues yet :)
The next option allows you to specify which track points to show.
This will only become relevant once the 3D camera tracker has finished analysing and a number of track points is displayed on top of your footage.
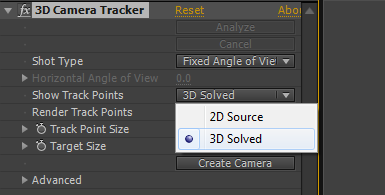
- 2D Source. This option will show the flat 2D track points used to trace the visual elements in your shot
- 3D Solved. This option will show the final 3D track points that were created using the calculated depth information from the 2D source
Just leave it on ‘3D Solved’ and you’ll be fine. If something goes wrong and you do not have any 3D track points, the 2D source track points will be displayed instead :)
You can also adjust the track point and the target size. The target size refers to the size of a visual bullseye helper that you will see when you hover your mouse over a tracked piece of footage. You will see that shortly. If you want to render the track points as part of the effect, you can check the ‘Render Track Points’ option.
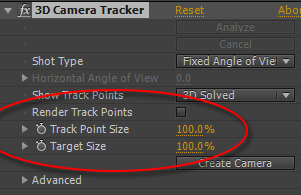
Just above the advanced options you will find the ‘Create Camera’ button.
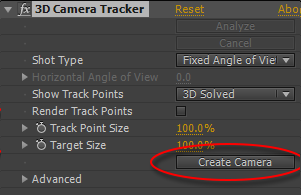
Once the 3D Camera Tracker has finished its work, this button will be enabled and you can click it to create a camera that imitates the movement of the camera used to film the footage.
Let’s expand the Advanced options by clicking on the twisty (triangle) to see what goodies we have in there :)
First off, you can specify the solve method used to try to extract camera and depth information from the 2D track points.
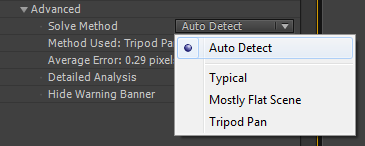
- Auto Detect. This option will automatically try to detect the best of the three options below
- Typical. This is your typical scene inluding potential camera movement and rotation
- Mostly Flat Scene. This specifies that your scene is mostly flat
- Tripod Pan. This specifies that the scene includes panning movement with a camera that was sitting on a tripod
Once the 3D camera tracker has finished analysing your footage and solving the 2D track points, you will see some results information below the solve method option.
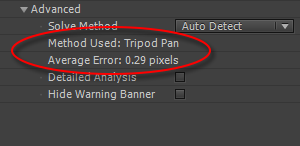
- Method Used. Displays the solve method that was used. If you set Solve Method to Auto Detect, this will show you which option auto detect chose for you
- Average Error. This value indicates the accuracy of your tracking. It is the pixel distance from the 2D track points to the final 3D track points. A value below 1 is usually a fairly good track, a value above 1 could mean the tracking was not very spot on and you might want to adjust a few parameters and track your footage again
You also have the option to perform a more detailed analysis of your footage and suppress any warnings that are usually shown when the tracker wants to tell you that you should re-analyse your footage.
Working With Track Points
Once the 3D camera tracker has completed its work you will see a number of brightly coloured track points overlayed onto your footage when the layer is selected.
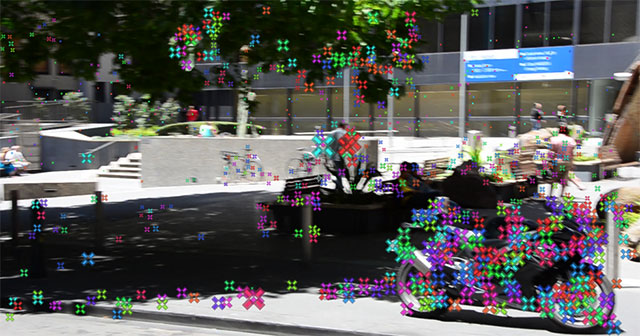
The track points should be properly placed in the 3D space of your scene with smaller track points being further away. When you play back your footage, the track points should remain properly attached to their respective visual elements – this is a sign that your tracking data is good :)
You can hold your mouse button down and drag a circle around any track points you want to delete. The selected track points will be highlighted for you.
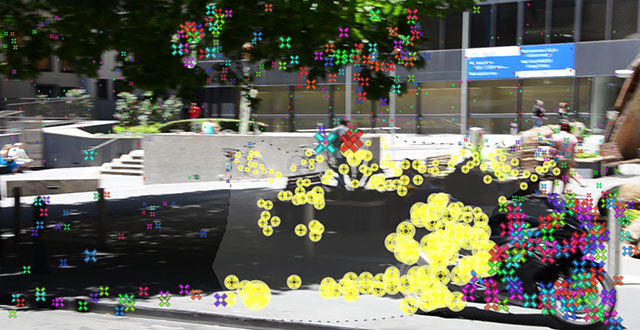
This is useful for deleting any track points that are sitting in unclear areas of your footage to improve the tracking quality and lower your Average Error. Whenever you delete some track points, the 3D camera tracker will solve your 2D track points again to update the final result.
If you however your mouse over the footage in the preview window, you will also see the bullseye appear that I mentioned earlier.
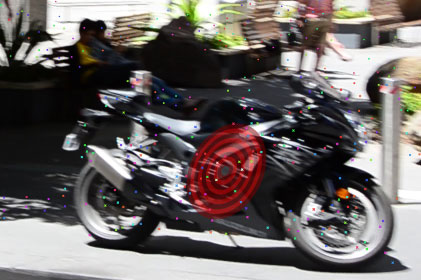
The 3D camera tracker will pick the nearest triplet of track points to define a plane in your recreated 3D scene that you can use to place virtual elements directly in your shot. To show you what I mean, let’s place a piece of text in the middle of the street :)
Find a target that matches the surface of the street, then right click on it and select ‘Create Text and Camera’. Note you will not see the ‘and Camera’ part of the option if you already created one using the Create Camera button.
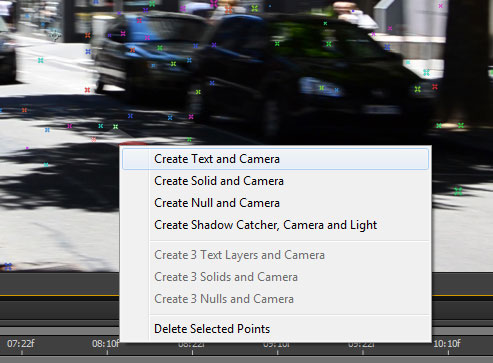
A new camera and a new text layer will be added into your composition. The camera has been keyframed to immitate the movement of the camera that was used to shoot the scene. The text layer is 3D and you can position, scale and rotate it to place it properly on the street. If you now play back the footage, it should look like the text is actually part of your original shot.

If you select your camera and go to the top view, you should be able to see the movement of your After Effects camera and it should match the movement of the camera you used to film the scene :)
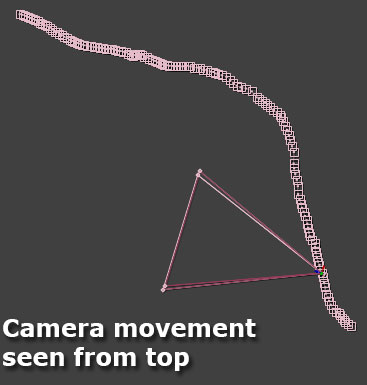
There are many awesome things you can do with the 3D camera tracker because it allows you to integrate virtual elements right into your scene in After Effects. Now let’s get onto tracking the UFO footage we filmed so we can get the camera information exported into our 3D program :)
Tracking the UFO scene
As you hopefully remember, the UFO scene we filmed included a camera pan and tilt up towards the sky so we do need to track it before we can move on to setting up our 3D scene.

We will follow the exact same steps as discussed above to track our footage. Once the 3D camera tracker has finished, you will notice that, when you hover your mouse over the footage, all targets that appear are flat and a note saying ‘No depth from a tripod pan solve’ is displayed.
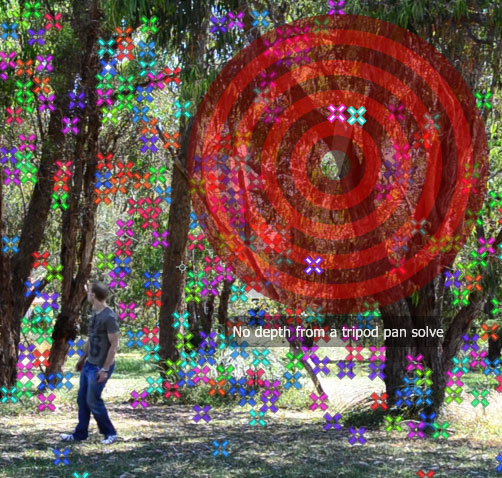
Because our camera was locked down and did not physically move around in the scene, the perceived size of the visual elements in the scene never changes because their distance to the camera remains the same.
Therefore, the 3D camera tracker cannot determine where the objects are in relation to the camera or in relation to each other and it cannot derive depth information to create and place any 3D track points.
This is normal for a tripod pan solve.
However, lucky for us, all we want to add into this scene is a UFO way above the treeline in the sky and we can get off without matching its position up to a specific element in our shot. We only need to ensure that the approaching UFO can be seen through the opening in the foliage. We can do this even without depth information :)
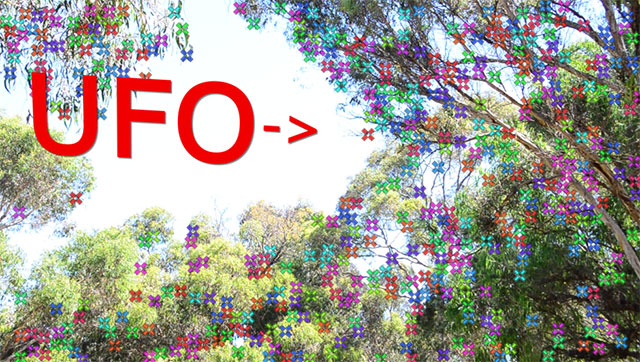
Before we export our camera information, we want to create a few markers so we can identify where certain elements were located in our scene. For this, we can create a number of null objects by selecting the track points we care about, right clicking on them and selecting ‘Create Null’. I am going to mark all 4 corners of the opening in the foliage.
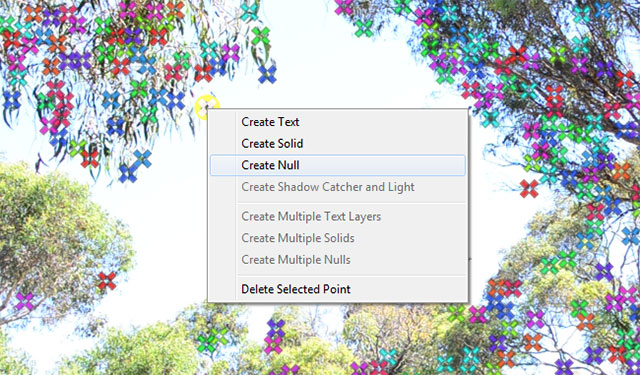
Give your null objects sensible names because these names will be retained when you export your information.

If you do this in a scene with depth information, like the street scene we tracked, the null objects and the dummy objects you will get in your 3D program will be located properly at the 3D position of the visual elements they represent in the scene. For our UFO scene however, because we have no depth information, the null objects we create will only indicate the opening in the foliage if seen from the cameras point of view – but that will be enough for us to ensure we set up the approaching UFO correctly :)
We’re now ready to export our data.
Exporting 3D Camera Tracker Data To Your 3D Program
There is a free script called After Effects 3D Export (AE3D) available that allows you to export camera and layer information from After Effects into a format that can be imported into Maya, 3dsMax and Lightwave. You can download it from the AE Enhancers forum for free :)
If you are using Cinema 4D, you have 2 options:
There is a script available on the AE Enhancers forum to export data to Cinema 4D or you can use the After Effects Exchange plug-in provided by Maxon.
Since I am going to export to 3dsMax, I am going to download the AE3D Export script.
To run the script in Adobe After Effects, simply go to File -> Scripts -> Run Script File. Locate the script and double click on it to run it. A small export dialog will pop up.
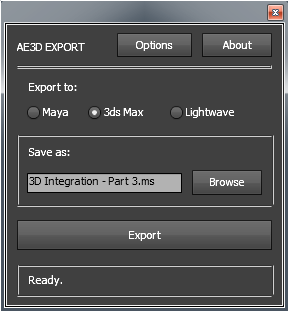
In this popup you can specify the output format and configure a few options. In the options I like to ensure that the ‘shift the comp centre to 0,0,0’ is ticked and set the worldscale to 1:1. The world scale determines how much the distance of the exported object to the origin will be scaled up or down. You may have to play around with this a little bit depending on the scene you are working with. For me, the 1:1 option usually gives me good results :)
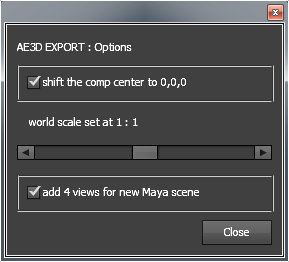
The last thing you need to do is to select the layers you want to export – I am going to select the camera layer and the 4 markers I have created to define the opening in the foliage – and hit the ‘Export’ button! A new file called ‘UFO camera data’ has now been saved in the .ms file format which we can import directly into 3dsMax :)

I hope you enjoyed this 3D Camera Tracker tutorial and next time, I will take you through importing the data into 3dsMax and setting up and rendering our 3D scene :)


8 Responses
Tobi,
thank you very much for what you are doing here. Helping and sharing with beginners is admirable.
It would be nice if you show the process of compositing passes for the UFO. Obviously, beginners are having quite hard times with passes compositing at the very first time.
Also i suppose you can lit some light on the media management. In short words show guys how you organise the shooting (converting media, back up, organise folders, naming working files etc). You can share how you use your wonderfull Pigeon software. From my exp and point of view it’s wonderfull i recomend it to everyone who is viewing this website. Really guys, shotgun will come infront of you some day, but this simple but yet powerfull peace of software is woth to try.
And one more suggestion, try to tutor on your real projects. It’s very helpfull when you can see a real challange.
regards,
Tim
Hi Tim,
Thank you for your feedback and apologies for taking so long to get back to you. It’s been a bit busy with work and YouTube lately so I didn’t get much time to spend on my blog. I have since uploaded tutorials for creating the 3D scene and compositing the UFO in After Effects :)
I have put requests for a media management tutorial and some more behind the scene VFX tutorials (where I show how I solve real problems for my projects) on my request list. I can’t ever guarantee when I’ll get around to them, but I am trying to do a few lighter tutorials on my channel so I can create content for everyone a bit more frequently :)
Regards,
Tobias
Just a quick question:
Do the colours of the tracking markers mean anything? There have been times where I have tried to use points with the same colour as they seem to be on the same plane. Is this the way it works or is that coincidental? Maybe they are just multicoloured for visibility purposes?
Cheers,
Olly
PS this page is crammed with useful info, nice one!!
Thanks for the feedback! It sounds like you are talking about two different modes: masks (usually yellow) and shapes (usually blue). If you try to draw a shape/points onto a layer and you don’t have the layer selected or you are not over the visible parts of the layer, After Effects will create a new shape layer and your shapes will appear blue. If you have the layer selected and are over a visible part of the layer, After Effects will create a new mask which will likely appear blue. These colours can also be configured. Cheers!
this 3d camera Tracker tutorial was really very nice but i have a question that can i ride a 3d virtual bike if yes please make a tutorial for it
Glad you enjoyed the tutorial. You can, but it’d be a complicated tutorial. I recommend watching the entire 3D VFX series (all 6 parts). The very same technique can be used for any type of 3d effect – including riding a virtual bike. Though you’d likely be better off just riding a real one
sorry , I can not complete the above steps , it is an ” alert
tou need to check ” Allow Scripts to Write an Access Network Files ” in the Genral Preferensces in order to use this plug in “
Since it asks you to enable that option, is there a particular compelling reason why you don’t? :)