When it comes to giving your video a nice cinematic look, your footage needs to go through at least two processing stages: colour correction and colour grading. Please check out my two detailed tutorials on these topics by clicking on the links above.
In these tutorials I showed you how to colour correct and grade your footage using nothing but the inbuilt colour effects for Adobe After Effects and Adobe Premiere. There are many plugins out there that make these processing steps a lot simpler and the one of the most popular ones is Magic Bullet Looks by Red Giant. In this tutorial I will show you how to use Magic Bullet Looks to colour correct or colour grade your footage.
To show you how the plugin works, I will be using a clip from our Zombie Hunter VFX short film.

Note that the clip is already colour corrected. In this tutorial we will use Magic Bullet Looks to apply colour grading, but you can just as easily use the plugin to perform colour correction.
Color Grading with Adjustment Layers
I have already touched on the importance of adjustment layers in my previous tutorials. Once all your individual clips are colour corrected (and therefore all match up nicely), I prefer placing a single adjustment layer across all of them to apply my colour grading effects.

Note that adjustment layers are now also available in Adobe Premiere.
How To Use Magic Bullet Looks
Once you installed the Magic Bullet suite you will find the Looks effect in your effects panel.
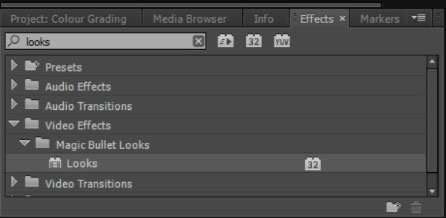
Apply the Magic Bullet Looks effect to your adjustment layer. In the effects control panel you will now see the Looks effect applied and within the effect settings you will see a small ‘Edit…’ button.
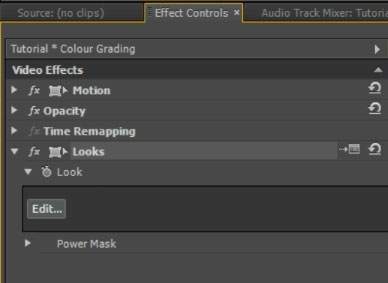
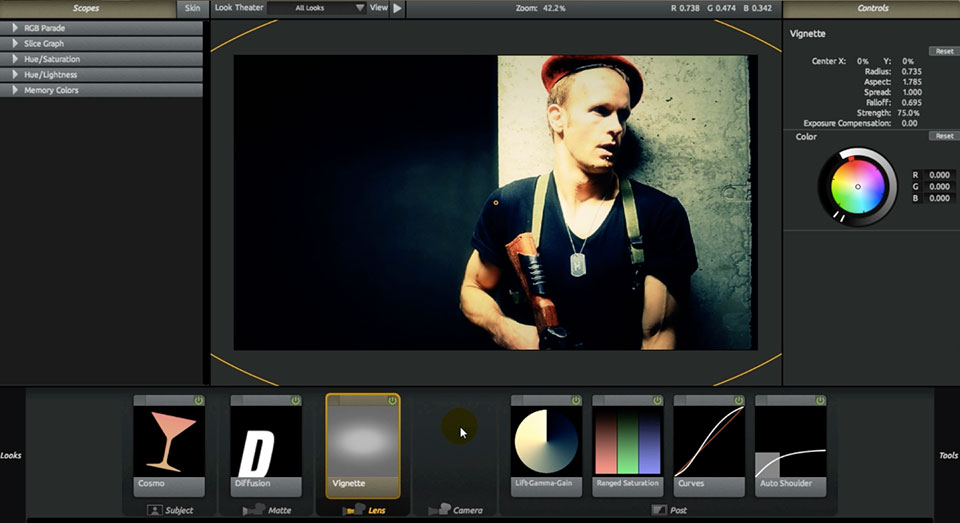
Click on the ‘Edit…’ button to open up the Looks Builder. Here is a screenshot of the interface:
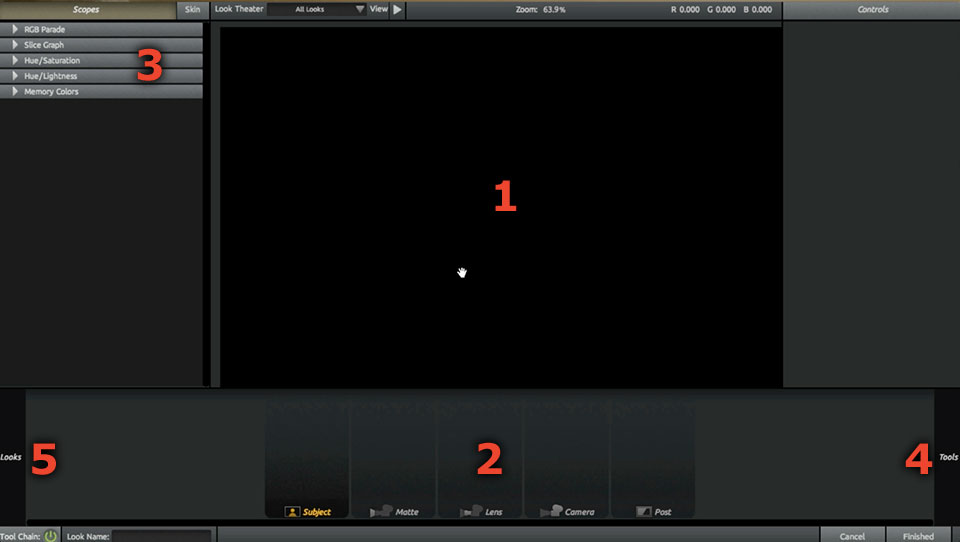
- Preview window. Your final video with any colour adjustment effects will be displayed here.
- Effects tool chain. Any effects applied to your clip will be listed here. They are applied from left to right.
- Scopes. A variety of tools for visualising the colour information in your footage. These help you make accurate adjustments.
- Tools. Hidden beneath this tab you will find all of the effects that are available to you to modify your footage.
- Looks Presets. Under this tab you will find a large library of preset looks that you can quickly apply and tweak.
Note that our preview window (1) is currently empty. This is happening because we have applied Magic Bullet Looks to an adjustment layer and the plugin only displays the contents of the current layer – which, for an adjustment layer itself, is nothing. I hope the guys over at Red Giant do add that functionality at some point because it would make life a lot easier.
For now we can get around this problem by going back to our timeline and applying the Magic Bullet Looks effect to one of our base footage clips instead. We will then set up our desired colour grading in the Looks Builder and, once we’re happy with the final look, cut and paste the effect back onto the adjustment layer.

Go back into the Looks Builder and this time you should see your actual footage in the preview window.
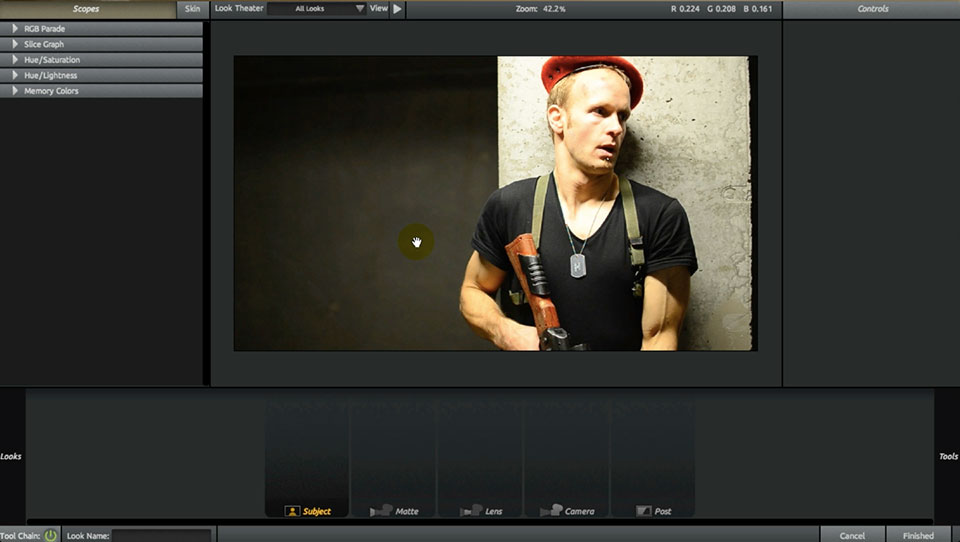
Now it’s time to get our hands dirty and start applying some colour adjustments to our footage!
On the right side of the Magic Bullet Looks Builder interface you will find the Tools tab. Hover over this tab to reveal a pretty large collection of effects that you can choose from to alter the look of your footage.
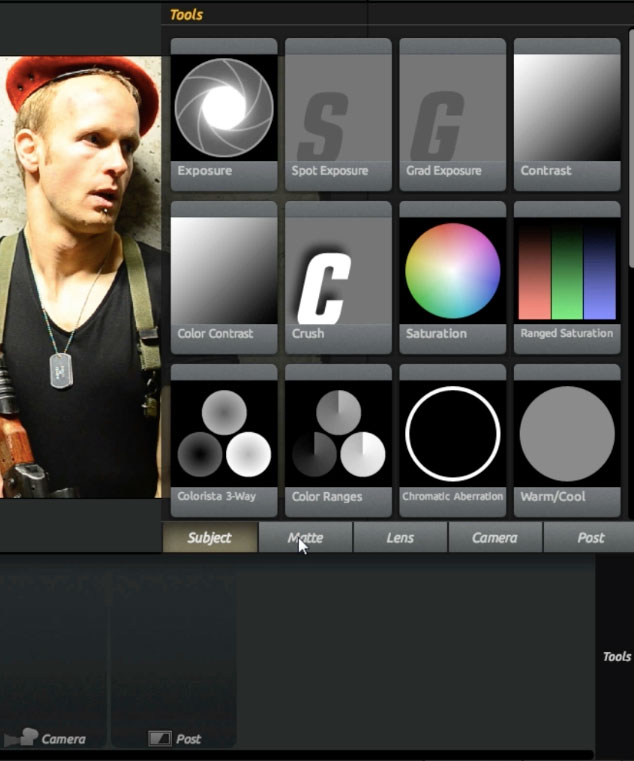
The effects are organised into different categories: Subject, Matte, Lens, Camera and Post. To apply any of these effects to your footage, simply drag the effect down below your preview window onto the effects tool chain. These effects are now being applied to your clip from left to right.

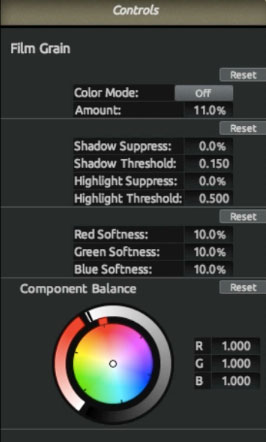
When you select one of the effects in your pipeline, a number of effect controls will be displayed on the right side of the interface. This controls panel is where you can tweak the individual effect parameters to your liking. Here are the controls available for the Film Grain effect:
You can disable individual effects in the pipeline by toggling the little power switch in the top right corner of the effect.

You can also disable the entire tool chain with the power button on the bottom left of the interface. This is useful for comparing the processed footage against your original clips.

Starting with your original footage, add any effects you want into your processing pipeline and tweak their parameters until you get the look you are after. I have increased the contrast, added a vignette and a little bit of grain to my Zombie Hunter footage.
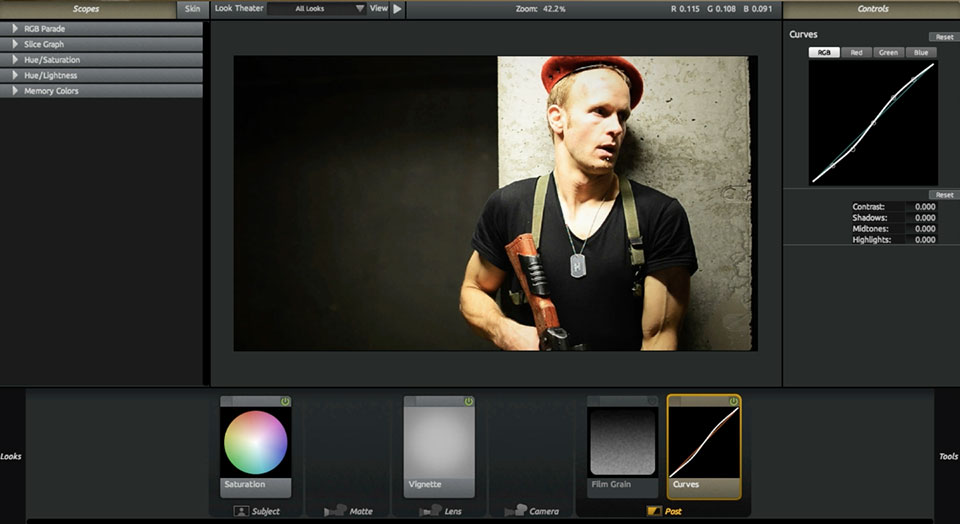
Here is the original clip I started with, already colour corrected, next to the clip after processing it with the Magic Bullet Looks plugin.

But what if you don’t have the time to try to assemble your own colour processing pipeline? Or if you’re lazy like me? Fortunately, Magic Bullet Looks contains a large number of cool preset looks that are very easy to apply. Let’s check out how that works!
Working With Look Presets
In the looks builder interface of the Magic Bullet Looks plugin, on the left side is a small tab called ‘Looks’ (5). Hover over this tab to reveal a gallery of preset looks, applied to the current clip in your preview window. Simply click on a look to apply it to your footage.
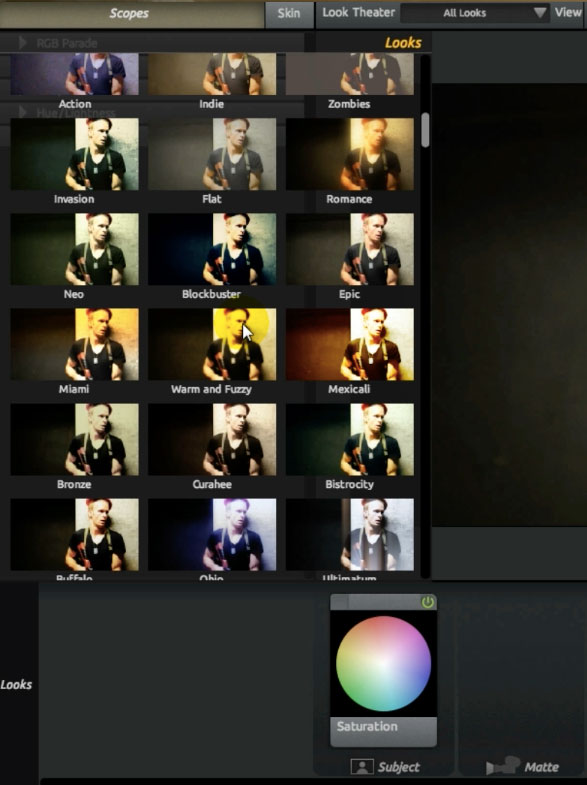
Magic Bullet Looks contains a large number of presets and they range from warm sunrise colours to glaring lights or high contrast horror styles.

Here is the ‘Blockbuster’ look applied to the Zombie Hunter footage. It is a fairly high contrast look with a cold blue tint and some heavy vignetting.

The great thing about the preset looks in Magic Bullet Looks is that they aren’t set in stone. When you select a look, your effect tool chain will simply get populated automatically with all the processing steps required to achieve the final style.

This allows you to alter the preset look to your liking. You can remove individual effects, add new ones or alter their parameters until you are happy with the final look.
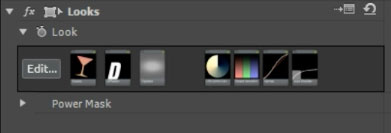
Another cool feature of the Magic Bullet Looks plugin is that you can see a small preview of your effects pipeline directly in the effect settings within Adobe Premiere or Adobe After Effects. To alter the tool chain you will have to open up the Looks Builder though.
Once you are done configuring your cinematic look, don’t forget to cut and paste the Magic Bullet Looks effect from the individual clip back onto the adjustment layer to apply it to all clips in your project.

And that’s it! The Magic Bullet Looks plugin makes it very easy to colour correct and colour grade your footage to achieve a solid, cinematic look.

I personally love just browsing through the preset looks to get some inspiration and try out a number of different styles to see what would suit my video. Once I’ve settled on a style I can then either alter the preset or set up my own effects tool chain to take my video from boring to cinematic!


