After Effects CC 2014 – Creative Cloud Updates
On June 18 a new version of Adobe After Effects, After Effects CC 2014, has been released on the Adobe Creative Cloud. Since it is a new version rather than a minor upgrade, you have to install it as a separate application from the Creative Cloud desktop app.
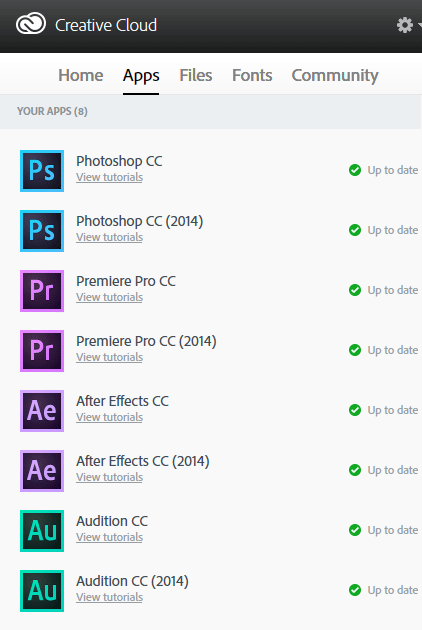
In this post I will cover some of the exciting new features that are available in After Effects CC 2014.
Advanced Keying – Key Cleaner & Advanced Spill Suppressor
One of the most common techniques in Visual Effects is using a green (or blue) screen as backdrop for your actor and then keying out this screen to place your actor on a different background layer. After Effects CC 2014 adds 2 new effects to help you get a clean key when working with grainy footage or with footage that suffers from compression artefacts. These two new effects are Key Cleaner and the Advanced Spill Suppressor. You can find them under the Keying tab in the Effects & Presets panel.
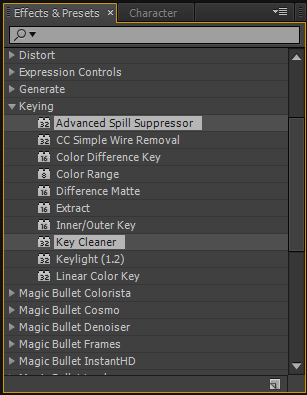
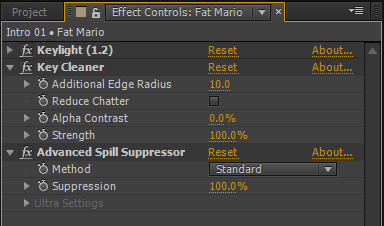
Both of these effects are designed to be used in conjunction with the Keylight effect so a typical setup would see the Keylight effect followed by the Key Cleaner and then by the Advanced Spill Suppressor.
Here is a typical green screen scenario. Ignore the fact that the green screen setup itself is pretty awful – the green screen is not smooth and the lighting on it is rather irregular. Once the green screen has been removed using the Keylight effect in After Effects, you may see some ugly edges around your actor. Have a look at how rugged Mario’s hair looks in the shot on the right.

This can be caused by blocky compression in your footage, but also by a rather bad green screen setup – like the one I had when I shot this scene. This is often compensated for by jacking up the strength of the Keylight effect, leading to ugly, hard edges in your key.
The Key Cleaner effect in Adobe After Effects CC 2014 can help reduce the harshness of your edges by removing any noise from the underlying footage. Have a look at how much more detail can be seen in the green screen matte after applying the Key Cleaner after the Keylight effect.

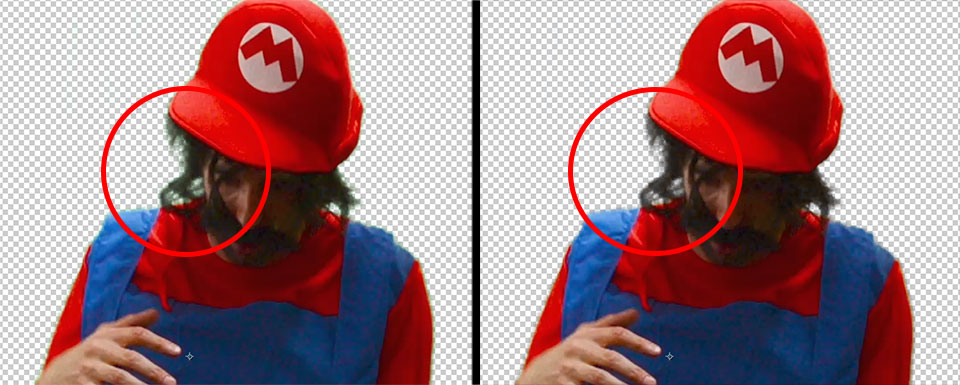
In the screenshot below you can see the results of applying the Key Cleaner effect to the final green screened clip on the left. Note that Mario’s hair has gotten a rather green tint, but we can easily remove that by also applying the Advanced Spill Suppressor in After Effects CC 2014. On the right hand side you can see the final, cleaned result.
Effect Masks
After Effects long had the concept of Adjustment Layers which allow you to apply effects to specific areas of your footage. After Effects CC 2014 takes this concept one step further and introduces Effect Masks. These masks can be applied to individual effects and control the area that will be affected.
Let’s assume you wanted to darken your entire footage, except the area around your actor. In the old world you might make a copy of the footage layer, add a mask over your actor to cut them out of the upper layer and then apply a Brightness & Contrast effect to darken everything except the area around your actor.
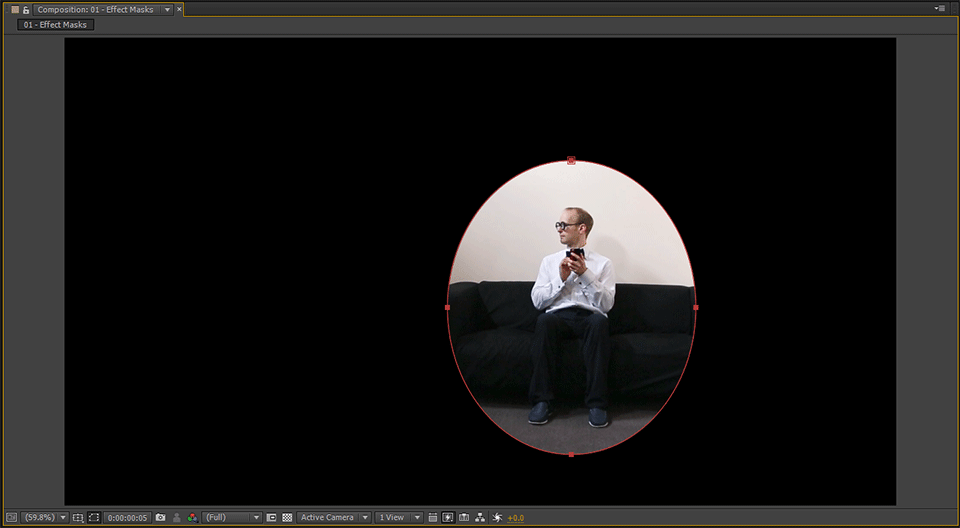
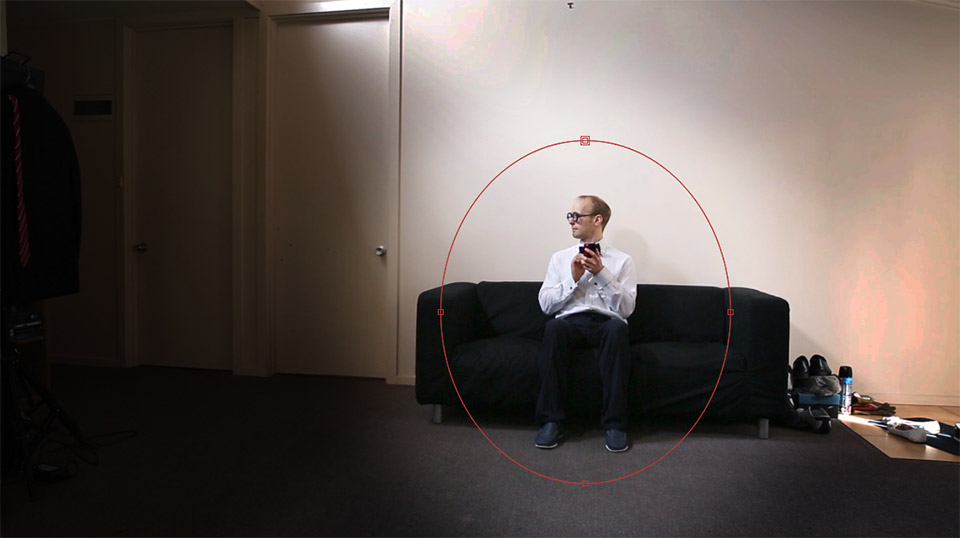
In After Effects CC 2014 you can apply a mask directly to the Brightness & Contrast effect. First, add a mask to the layer that you want to work work with. In the screenshot below, I have cut out the area around Walter.
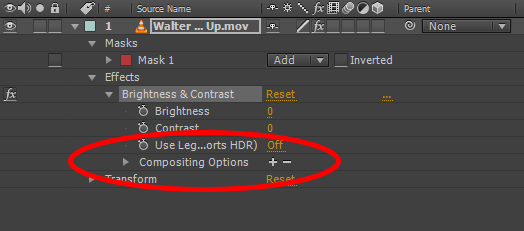
Apply a Brightnss & Contrast effect to the layer and then expand the effect properties in the Layer window. Every effect in After Effects CC 2014 now has a new setting for Compositing Options. Click on the little ‘+’ to add Compositing Options to the Brightness & Contrast effect.
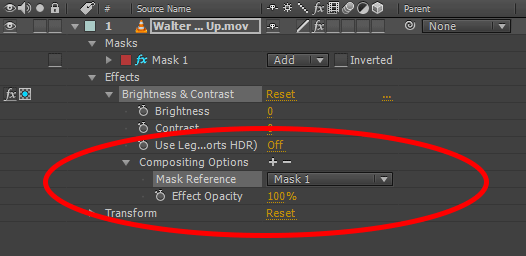
In the Compositing Options you will find a Mask Reference property. Simply select the mask you added earlier as your Mask Reference. This will restrict the area of the effect to the area of the mask. Super easy!
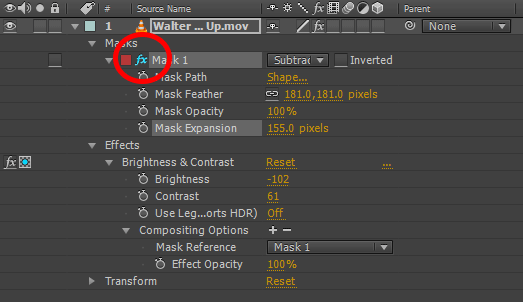
Note that the mask on the layer has been marked with a little ‘fx’ to indicate that this mask is now a Mask Reference for an effect. All of the normal settings for the mask are still available and will now control the area of the effect the mask is tied to. I have set my mask to ‘Subtract’ to only have the Brightness & Contrast effect applied to the area not covered by the mask.
We now have full control over the area of the Brightness & Contrast effect and without having to duplicate layers or use Adjustment Layers, we can control where individual effects are applied to!
Live Text Templates
Final Cut Pro has long had the capability to create Lower Third templates in Motion and easily configure and re-use them in Final Cut Pro for all of your titles. In Premiere Pro, this has long been a manual process where all custom text elements had to be set up in Premiere Pro and were limited by the animating capabilities of Premiere. You could create a new After Effects composition for every single title you ever use but that would be a major hassle!
I am really excited about the Live Text Templates feature in After Effects CC 2014 and Premiere Pro CC 2014 because they give you the power to create a complex lower third template composition in After Effects CC 2014 and then use the template in Premiere Pro CC 2014 with the ability to change any text elements contained within the composition.
This gives you the power to create some awesome animated text templates in After Effects and use them in your Premiere projects!
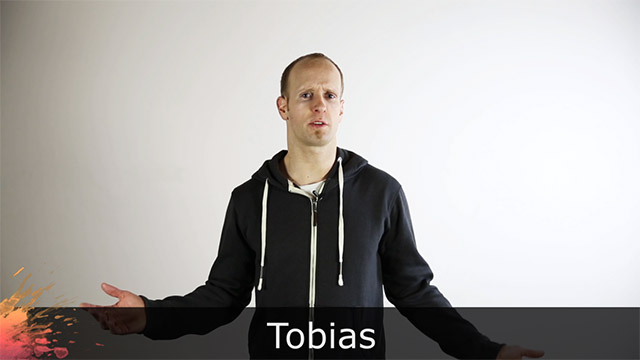
Here is my typical setup of titles in Premiere Pro. Title layers containing the text sitting on top of background layers, both timed to match up as best as possible. This is rather tedious to create and if you ever decide to change the style of your titles – well, then you’ll be going through every single one of them to apply the changes.

In After Effects CC 2014, you can simply add the text element into the After Effects composition since you will be able to alter it later in Premiere Pro CC 2014.

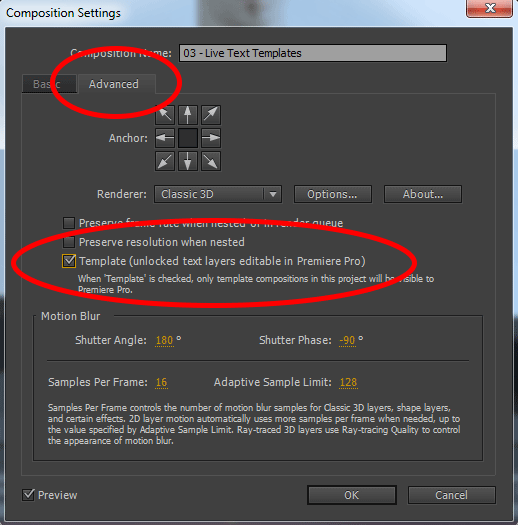
In After Effects CC 2014, the only thing you need to do is open up the composition settings and under the Advanced Tab, enable the ‘Template’ option. This will make all text elements nested within this composition editable in Premiere Pro CC 2014.
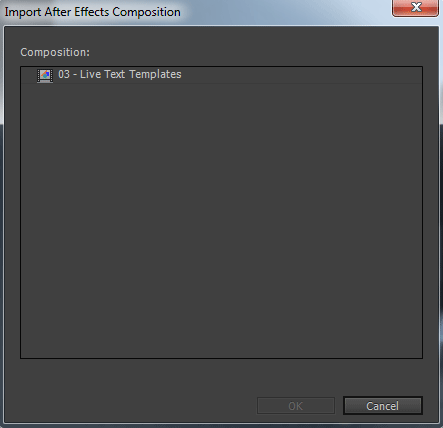
Back in Premiere Pro CC 2014, you can now import your After Effects project. A small dialog box will pop up and show you all compositions in the After Effects project that have been marked as ‘Template’. Select the composition you want to use and then click OK.
If you double click on the imported composition in your project window you will bring up the Source view for the item. Hop over to the Effect Controls tab to inspect all effects applied to this project instance. Any text layer nested within the After Effects composition can be edited here and it will immediately update wherever you use this item in your sequence.
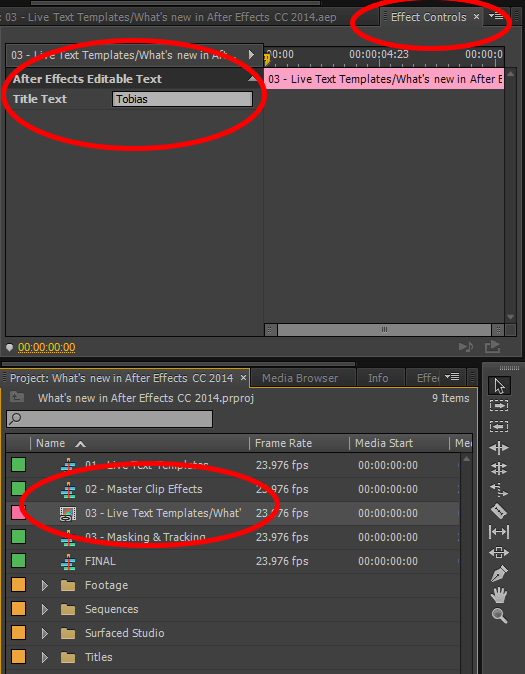
Note that you can only change the text once per project instance of the imported composition. This means if you want to create a new lower third with a different text you will have to import the After Effects composition multiple times and change the text for each composition.
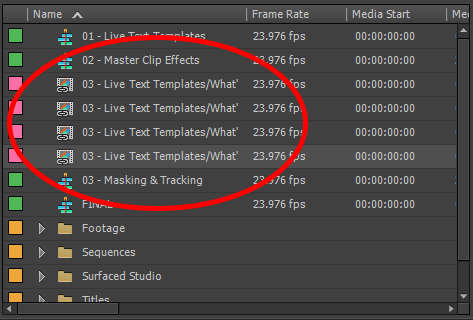
I would much have preferred if you could have edited the text for each instance of the composition that sits in my timeline. This would allow me to import the composition only once, then use it as often as I want and change the text on each copy in my sequence. Still, Live Text Templates are a great new feature and I love using them!
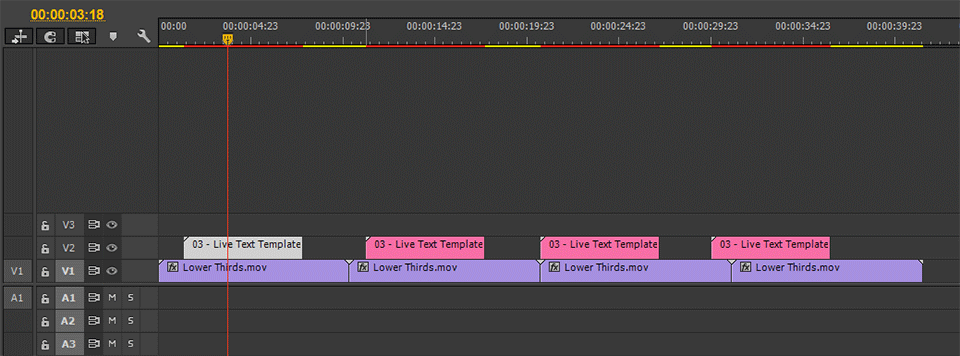
Here is a screenshot of the simplified setup of all my titles. Note that in this scenario, making changes to the animation of the titles is a lot simpler since all you have to do is modify the underlying After Effects composition.
Other New Features
There are other great new features available in Adobe After Effects CC 2014 and you can find a complete list here. There’s Kuler iPhone app integration, improvements to the Mercury engine, Typekit integration and much much more.
After Effects CC 2014 brings a lot of great new functionality to the table that are certain to enhance your workflow and make creating awesome visual effects even easier!


