In the last part of my 3D integration VFX series I showed you how to render a UFO using 3dsMax. In this part I will show you how you can integrate the rendered UFO back onto your footage using Adobe After Effects.
Adobe After Effects Setup – Base Footage
We will composite the UFO we rendered in 3dsMax back onto the original clip that we extracted the camera data from using Adobe After Effects. It won’t fit onto any other footage because the camera used for the UFO is unique to this scene.
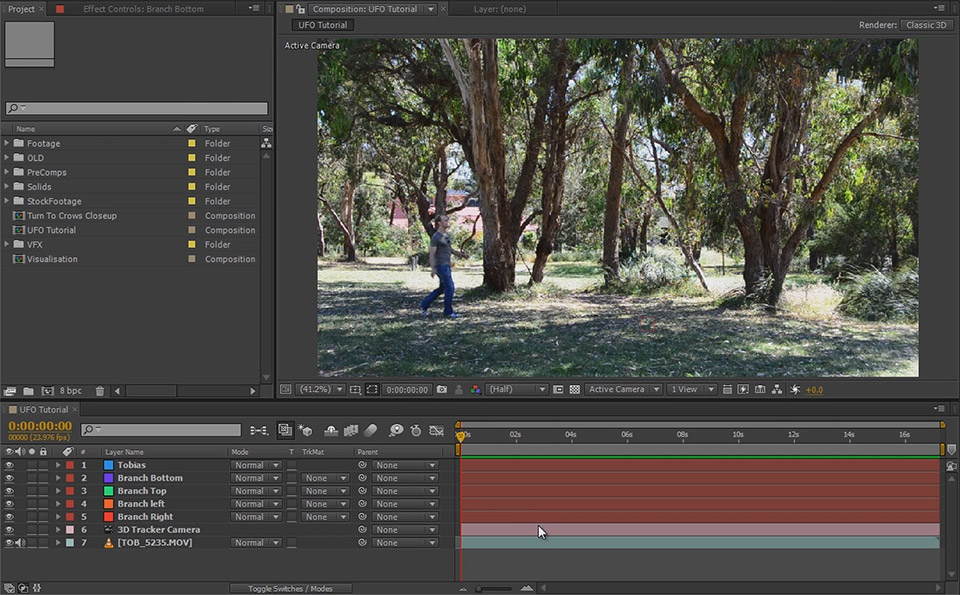
Importing the UFO footage
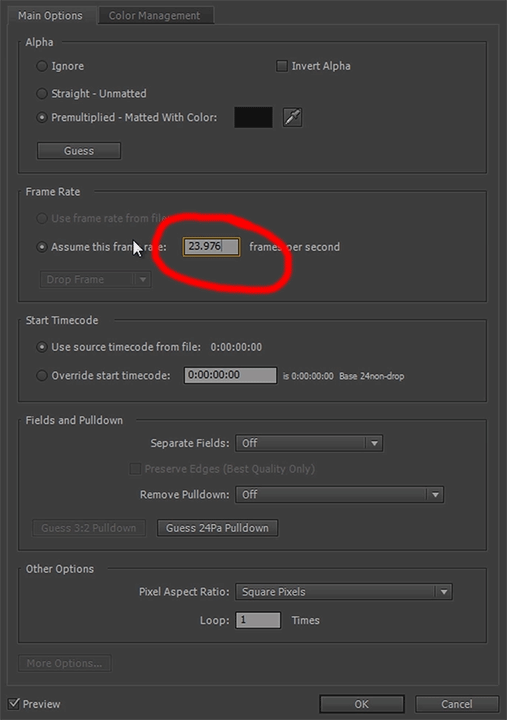
When importing your rendered UFO into Adobe After Effects (select the first EXR image and enable the ‘Sequence’ checkbox), there are a few things we need to set up to ensure the footage will match your composition. For this, right click the imported UFO sequence and go to ‘Interpret Footage’.
Ensure that the frame rate matches the frame rate of your composition. You also want to make sure you enable the ‘Preserve RGB’ option in the Color Management tab.
Keying out the sky
Once you have placed the UFO on top of your base footage you will notice that it sits on top of all the branches in the scene. Of course, we want it to sit behind these branches. For this, you can duplicate your base footage, move it above the UFO layer and apply a Linear Color Key effect to key out the bright sky areas. You may have to tweak this a bit to suit your scene as your sky might be a different colour.
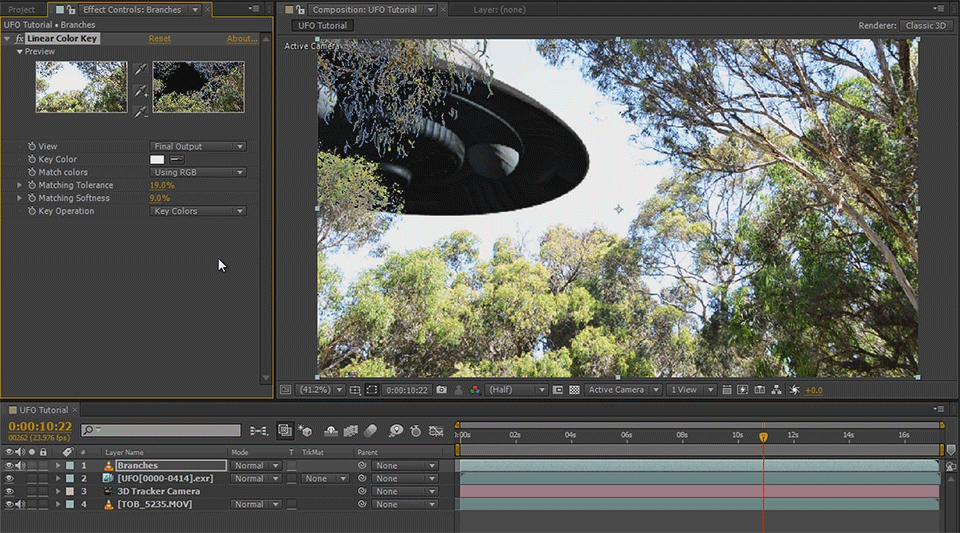
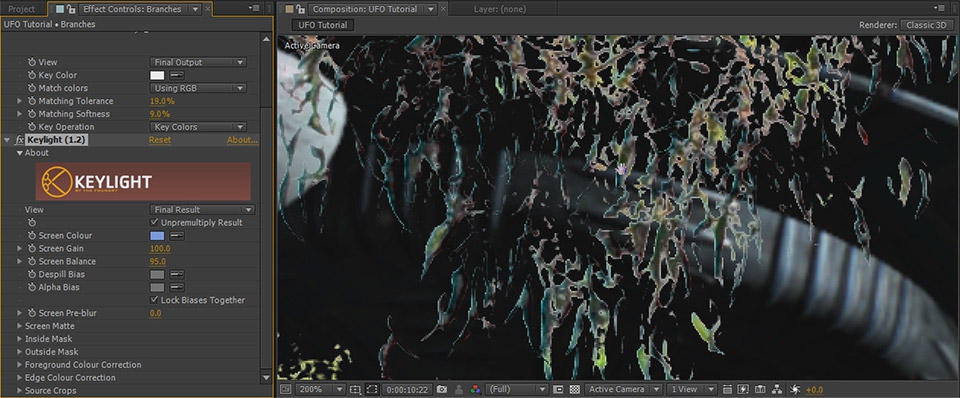
In the above screenshot you can see a bright blue outline around all the leaves. This happens because the bright sky bled into the colour of the leaves. This can be tricky to fix up cleanly. One tool I like to use in Adobe After Effects is the Keylight effect in After Effects to remove some of these ugly artefacts. It might not be perfect, but it will make the overlaying branches sit a lot more natural on the UFO layer.
Now let’s look at how to create some awesome smoke and fire for our UFO!
UFO Smoke Cloud
Next we want to have the UFO emerge from a dark and angry smoke cloud. Think of Independence Day and how the UFOs travel in a fiery cloud of smoke. For this, I am going to use a smoke element from the Action Essentials 2 package by videocopilot. If you do not own Action Essentials, you can find free smoke stock footage elements at detonationfilms and footagecrate.
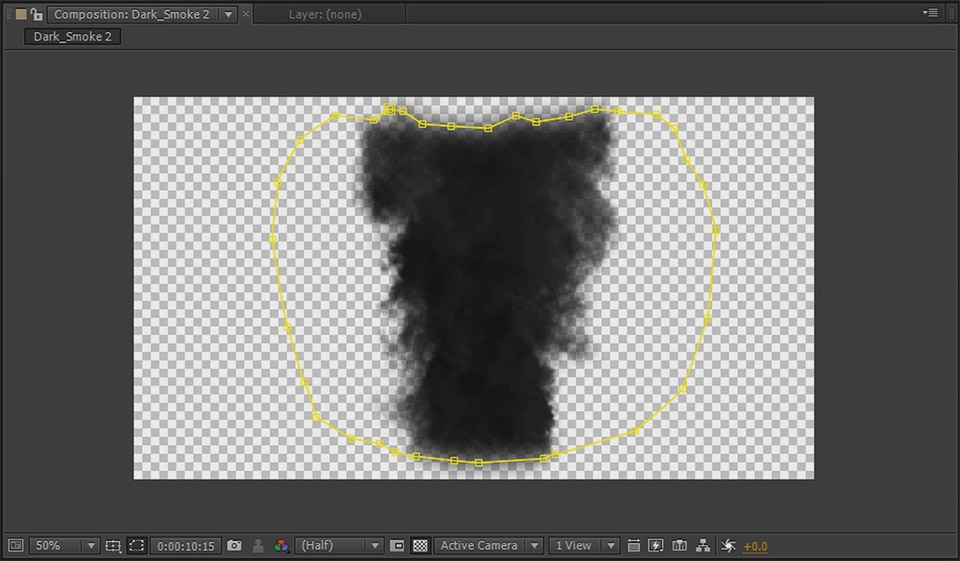
Create a new composition, place the smoke element in it and add any masks required to smoothly cut out the smoke element. Towards the end of the composition, fade out the smoke layer as if it was evaporating slowly. This will allow us to reveal the UFO in the sky just as it slows down.
To place the smoke in our tracked scene, select the base footage layer that has the 3D camera tracker effect applied to it. This should reveal the track points in your preview window. Select a flat triangle on the plane of the sky with your mouse, right click and choose to ‘Create Solid’.
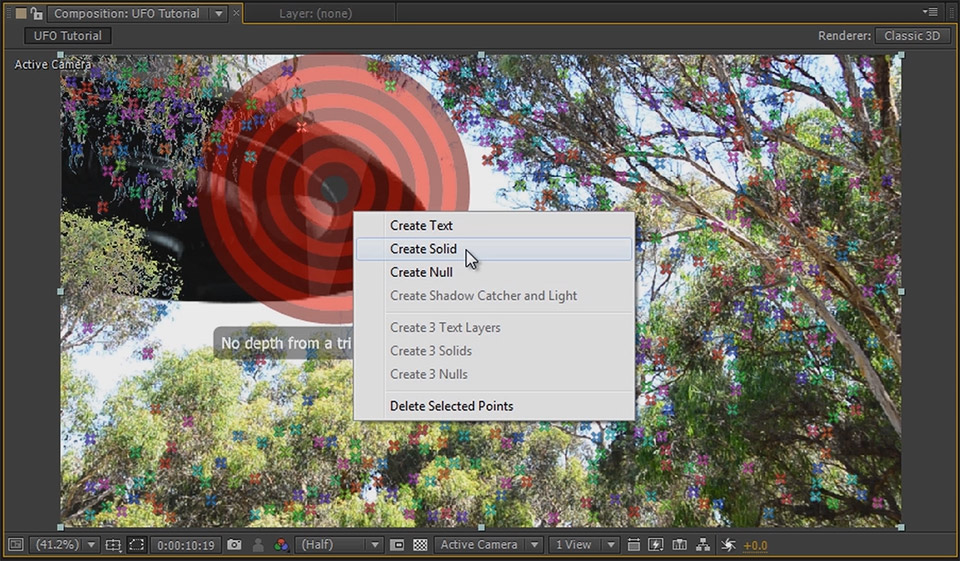
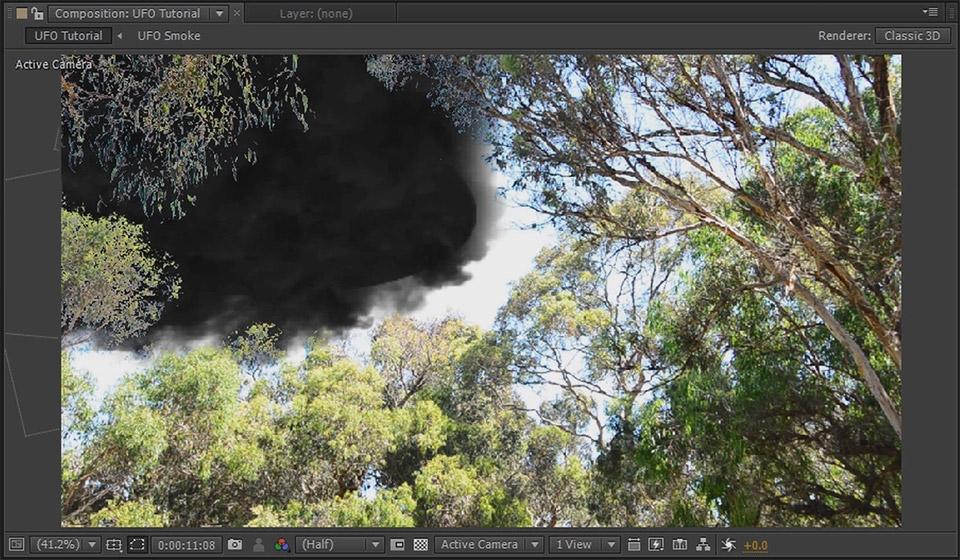
This will add a new solid layer in 3D space at the position of the sky where we want the UFO to emerge. To replace this solid with our smoke composition, make sure the layer is selected and then drag the smoke composition we created onto the solid layer while holding down the ALT key on your keyboard. This will replace the solid layer with the smoke composition but leave all its properties intact. The smoke should now be placed in the sky within our tracked 3D scene.
Scale up the smoke layer as required, duplicate it a couple of times and reposition/scale/time the new smoke layers to spread them out over the area where you want the UFO to appear. Make sure the smoke layers are timed so that they disappear just as the UFO reaches its final position in the sky.
UFO Fire
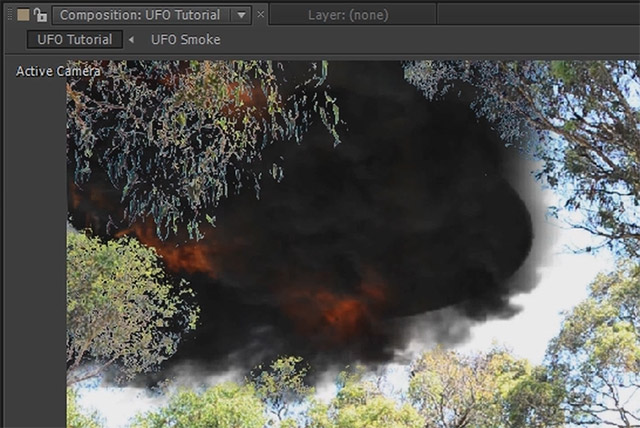
In Independence Day, not only are there dark clouds where the UFOs are traveling, but there is also an intense internal fire within those clouds. Again using fire elements from Action Essentials 2, I added a few fire elements below the smoke layer and scaled, positioned and timed them so it looks like there is a ball of fire traveling underneath the dark smoke cloud. You can add a glow effect to the fire layer to make it look a little bit more dramatic if you want.
Now it’s time to look at an advanced technique to make our 3D integration effect look a little bit more realistic: Z-depth compositing!
Z-Depth Composition
The effect looks pretty cool already, but we can use a technique called ‘Z-depth compositing’ to improve the realism of the UFO effect by having the 3D UFO interact with the 2D smoke and fire layers in a more natural way. Remember that we exported a Z-depth layer when we rendered the UFO with 3dsMax? This Z-depth layer is a black and white representation of the objects and their distance from the camera in 3D space.
Import the Z-depth layer and place it on top of all the smoke and fire layers, just below the branches.
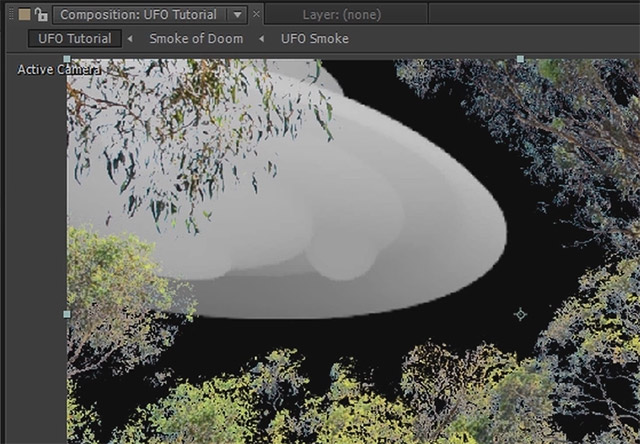
We will use this layer as a tracking matte onto the fire and smoke layers so that it looks like the UFO is pushing through those layers as it emerges. For this, you need to pre-compose all smoke and fire layers. Since these layers are positioned in 3D space, they depend on the camera. Therefore you first need to duplicate the camera, then select the cloned camera, all the smoke and fire layers and pre-compose them. I will call this new layer ‘Smoke of Doom’.
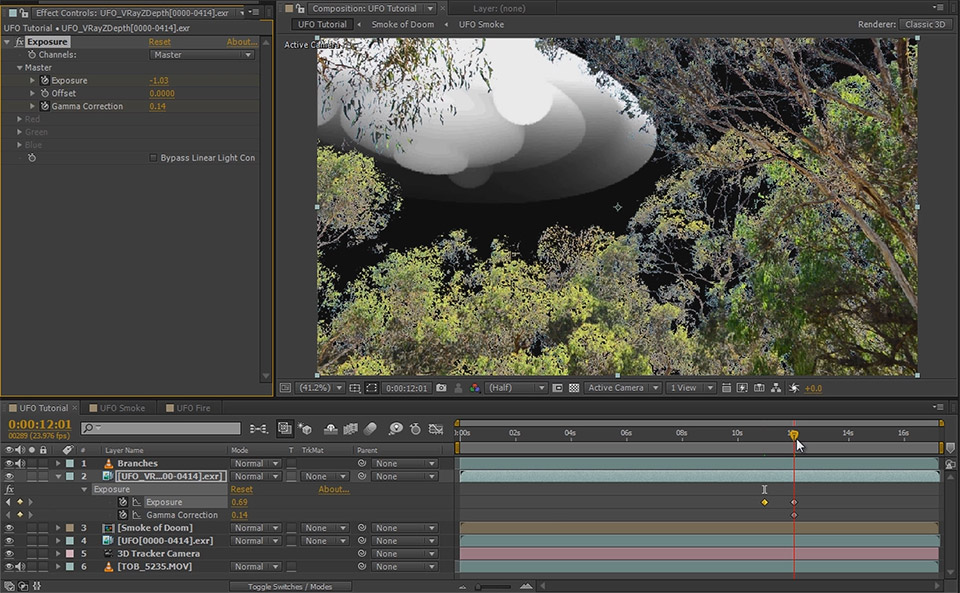
Next, depending on how you rendered out your Z-depth pass, you may want to apply an Exposure effect to the layer and tweak the Exposure, Offset and Gamma Correction properties. The smoke will be invisible where the Z-depth layer is white and it will be visible where the Z-depth layer is black. It will be semi-transparent in the grey areas.
I like to animate the Exposure and Gamma Correction so the UFO Z-depth layer becomes brighter and more contrast-y as the UFO approaches. This will decrease the smoke and fire layer below so it will appear as if the UFO emerges from it.
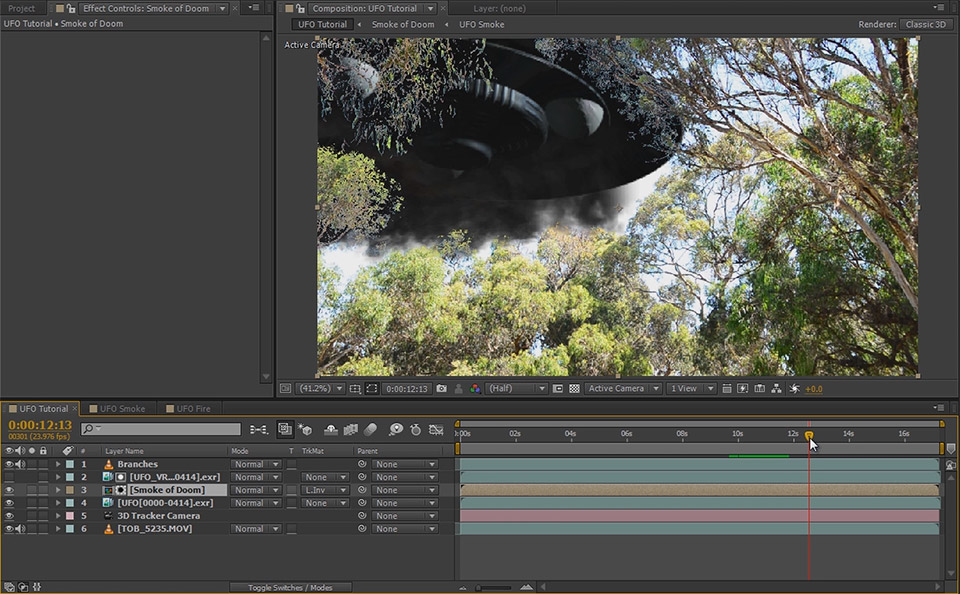
Set the track matte option on the Smoke of Doom layer to ‘Luma Inverted’ to apply the Z-depth layer that sits above it as a track matte. Your UFO should now break through the smoke and fire to come to a stop just in the opening of the treeline.
Colour Correction & Colour Grading
Feel free to add an adjustment layer to your composition and apply some colour correction and colour grading to the shot. This will add some more drama to the effect and, since it will be applied to all layers in the composition, bind them together a bit more realistically.
I like to use the Curves, Levels, Color Balance and Exposure effects for this.
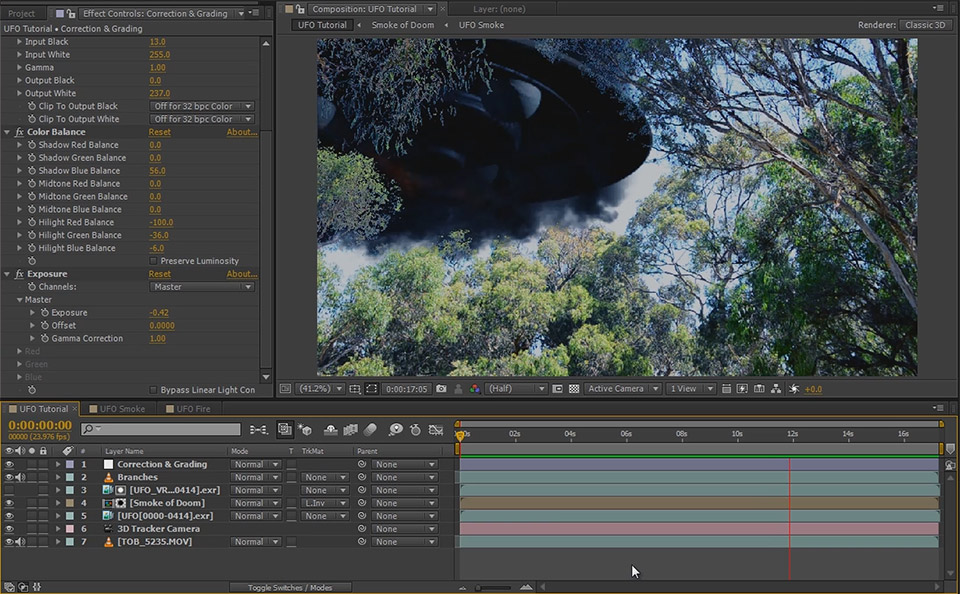
And with that you have finished your final 3D integration effect!


