One of my favourite tools for creating visual effects is to create fake camera pans!
This effect comes in handy when adding dynamic elements when you’re filming by yourself, for special effects or even – curving bullets :D
Here is the new YouTube tutorial covering why and how you can create a fake camera pan in After Effects. Enjoy :)
Basic principle of fake camera pans
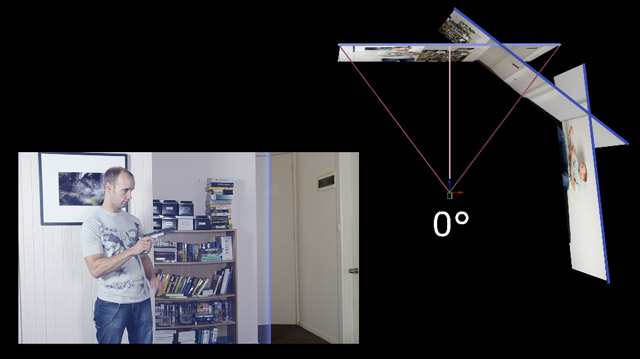
The basic principle behind creating fake camera pans for visual effects is to shoot your footage at different camera pan angles and then stitch these pieces back together into a virtual 3D scene.
Once you have your 3D scene set up you can animate your virtual camera and ‘look around’ as you please :)
In Adobe After effects, this can be done using 3D layers for the different footage elements and aligning them with the correct camera pan angle they were shot at.
Shooting the footage for your fake camera pan
I strongly recommend you put your camera on a tripod when filming your footage for a fake camera pan. Shoot different elements at different camera pan angles where each element should overlap with the one next to it by a fair bit. Personally I prefer to not change my angle by more than 30 degrees or so between each shot otherwise you can get a lot of distortion during your pan :)
Make sure to remember roughly what angle you shot which piece of footage at and preferably give your video files some useful names to identify them :)
Now let’s get to the tricky part – stitching the shots together in Adobe After Effects to create the fake camera pan.
Stitching the elements together in Adobe After Effects
Load all your footage elements into After Effects. Hopefully you labelled them nicely, so put all the layers on top of each other in an order that makes sense, e.g. 0 degrees, 30 degrees, 60 degrees, etc. Turn all layers into 3D layers and hide all of them except the one at 0 degrees camera pan angle.
Next, create a new camera and match the settings (focal length) to the camera you used to film your footage :) If you shot your scene with a 35mm lens make sure you set the camera to 35mm! If you get this wrong your whole camera pan might look wonky!
Now comes the tricky(er) part of the path to good looking fake camera pans:
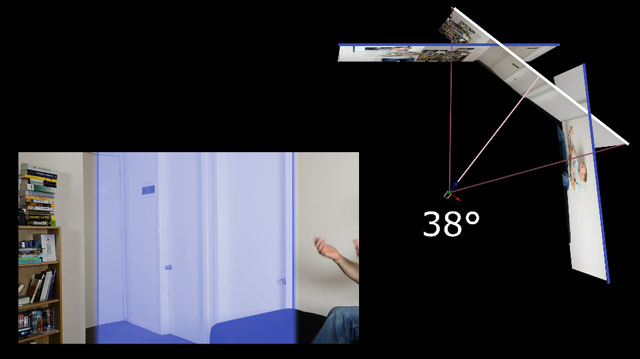
Enable visibility of the first panned shot, parent it to the camera (while the camera is at 0 degrees) and then rotate the camera in After Effects!
Your original 0 degree shot should move out of the shot, but the one we parented to the camera should ‘stick’ to the screen. Rotate the camera to align the panned shot to the 0 degree shot. If the edges don’t fit perfectly, you may have to mask them out a little bit (with feathering) or even apply a mesh warp to pull the features into place.
(I’ve highlighted the edges where the 3d layers intersect in blue)
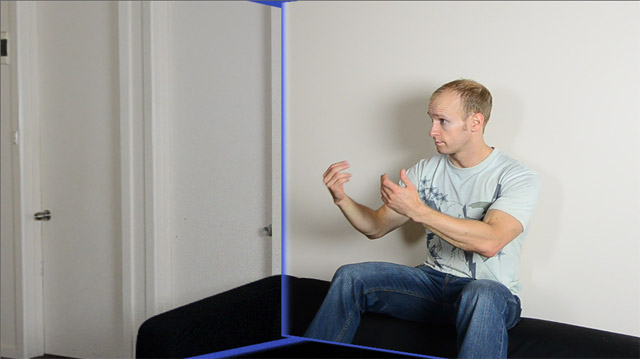
Next, unparent the layer from the camera. This will essentially drop the 3D layer off in 3D space at the correct relational position to the camera. If you now pan your camera, you should see both layers rotate as if you were looking around in a (fake) 3D environment! :)
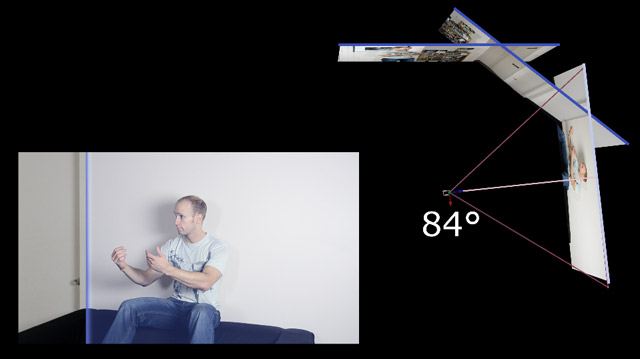
Rotate the camera back to 0 degrees, enable the visibility on the next panned shot, parent it to the camera and repeat the process of aligning it and unparenting it to drop it off at the correct position.
Once you’re done, your layers should be spread out around the camera, replicating the angles and shots you took when filming.
If you switch your view to top-down, your camera and layers should look something like this:
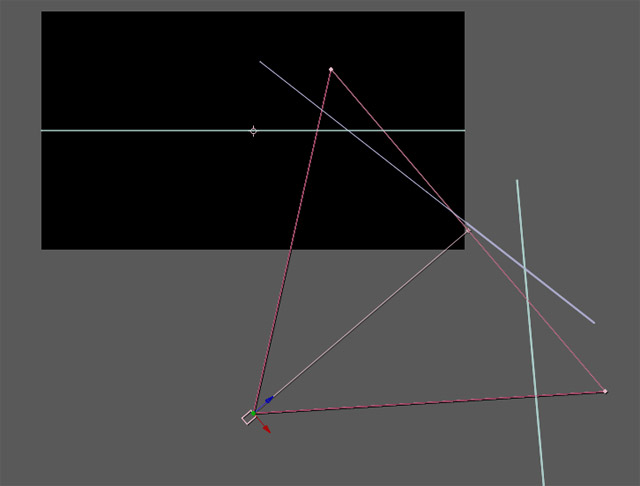
You can now animate the camera as you please to look around in your newly created 3D scene and set up the fake camera pan shot you want :)

There is still a bit of work to do to create the curving bullet, mainly the 3d integration and rendering the bullet from your favourite 3d program (like 3ds max), but the basis for the effect is set!
There are lots of other great effects you can create with fake camera pans and I hope you enjoyed this tutorial :)


