I have gotten quite a few questions about how I created the blood hit effect from my bullet hit tutorial where the camera pans across the screen as I am being hit.
I actually filmed that scene all by myself so I used a fake camera pan to create the camera movement.
The blood effect itself does not actually move.
However, there is a much easier way to create great looking blood hit effects for shots where your camera is moving in Adobe After Effects :)
How to Make Realistic Looking Blood Hit (Bullet Hit) Effects With A Moving Camera
Let’s assume you took some footage of someone pretending to be hit by a bullet.
If the camera is stationary, it is fairly easy to add some blood splatter stock footage to your scene and, using some masks and different blend modes, create a cool bullet hit VFX.

However, the moment your camera moves during during the shot (pun intended), you can no longer simply place a stock footage element on top of your footage because it won’t follow the movement of the camera.

While you could manually animate the position of your blood hit elements to follow the camera, there is a much easier and more precise way to achieve the same thing in Adobe After Effects: camera tracking!
Camera Tracking
Camera tracking allows you to analyse a piece of footage and trace the movement of a distinct visual element throughout the shot. You can apply this recorded tracking data to a null object to keyframe its position, rotation and scale.
Playing back your footage, the null object will then follow the movement of the tracked element and, assuming the object was stationary and your camera was moving, it will appear to follow the camera’s movement!
This allows us to then parent other layers, like blood splatter effects, to the null object and they too will follow the movement of the camera :)
Camera Tracking in Adobe After Effects
First, import your footage into Adobe After Effects and add it into a new composition. The footage I am using is a simple handheld camera pan from left to right as I pretend to be hit by a bullet.

Ensure your footage layer is selected and go to the tracker controls.
If you cannot see this tab, you may have to enable it by selecting Window -> Tracker in your menu bar.
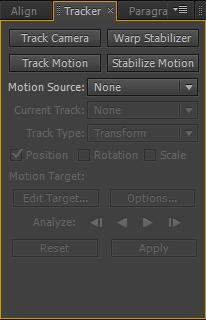
The camera tracker has changed over time, so depending on the version of Adobe After Effects your tracker controls might look slightly different. However, this you should be able to follow this tutorial with After Effects CS4 and up :)
I am using After Effects CS6 and therefore have the following tracking options available:
- Track Camera is the new 3D camera tracker available in CS6. It allows you to reverse engineer a 3D camera position from your footage
- Warp Stabilizer, available since CS5.5, allows you to stabilize shaky camera footage
- Track Motion allows you to trace the movement of visual elements in your footage – this is the what we will do in this tutorial
- Stabilize Motion is the legacy stabilizer for After Effects
Click on the Track Motion button because we want to trace a visual element in our scene so we can link our blood hit effect to it and have it follow the camera’s movement :)
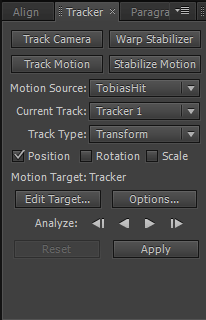
Ensure that your layer’s name shows correctly in the ‘Motion Source’ and that the ‘Position’ checkbox is ticked.
You should see one track point overlayed on your footage.
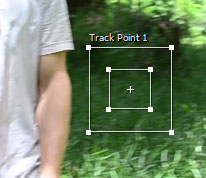
If you tilt your camera during the shot, you may also want to track rotation, which will add a second track point to the footage. However, since the footage I am using is a simple pan from left to right we do not need to worry about that :)
A track point consists of 2 rectangles and a little cross in the center.
- The inner rectangle defines the visual element the camera tracker will try to trace
- The outer rectangle defines the area in which the camera tracker will look for the contents of the inner one
- The cross in the center of the tracker defines the actual position that will be recorded. This cross will move along with the track point each frame :)
Place this track point on a high contrast element in your scene and adjust the rectangles. I am going to place it on the top right corner of the street sign behind me.
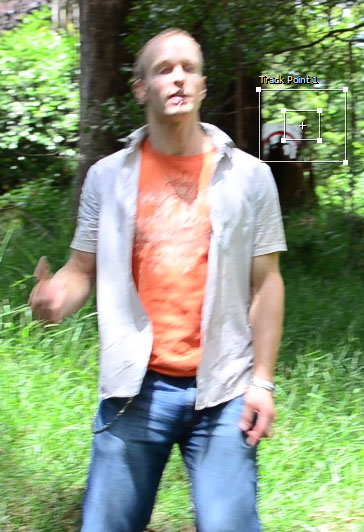
Now begin camera tracking by clicking on the ‘Analyze forward’ button in the tracker controls.

Hopefully your track point will properly follow the element that you want to trace as expected, but if your track point strays off course at any point in time, you can simply stop the tracking process, go back a few frames, adjust the track point and continue tracking :)
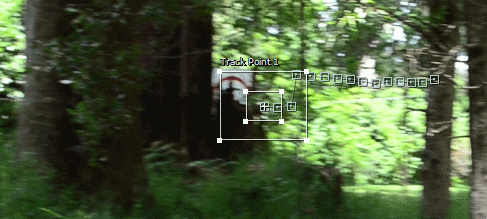
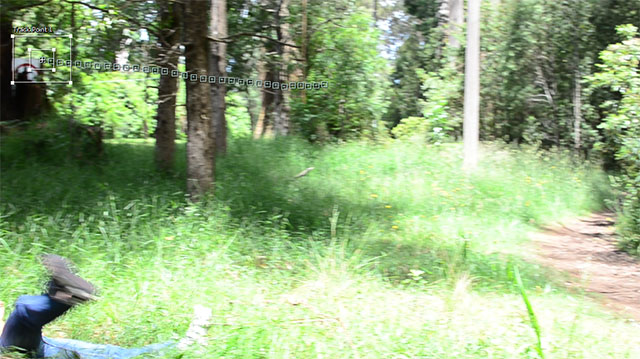
If you have a long shot and the element you are tracking leaves the frame, you can attach your track point to another element without losing the point you are tracing :) In my footage, the street sign is about to leave the frame on the left side.
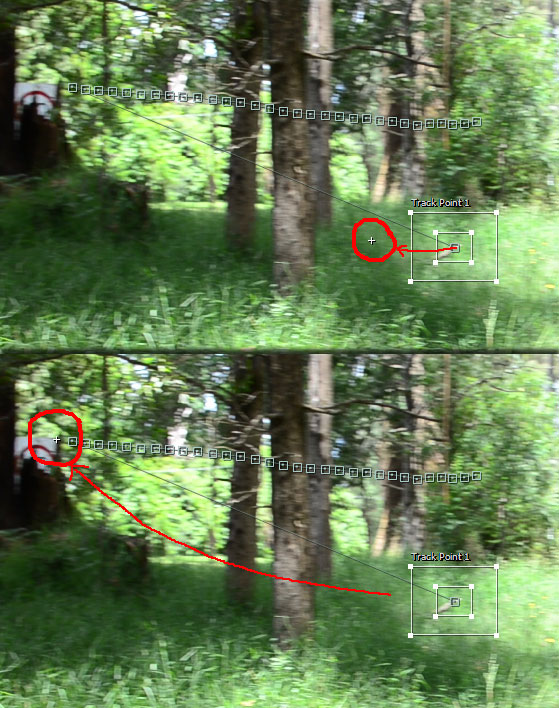
We can fix this by repositioning the track point onto another element to trace. We can then select the small cross in the center of the track point and drag it back to the original position we were tracing. I am going to move the track point onto the branch sticking out of the grass and move the white cross back to the corner of the street sign.
We can then continue tracking as normal :)
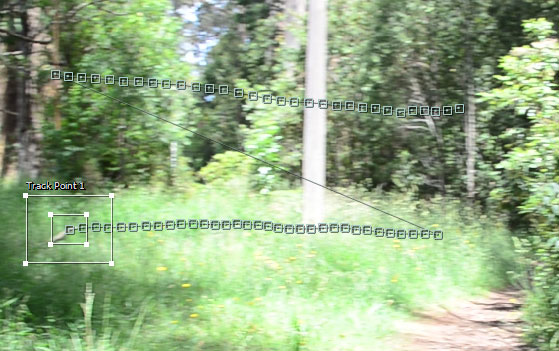
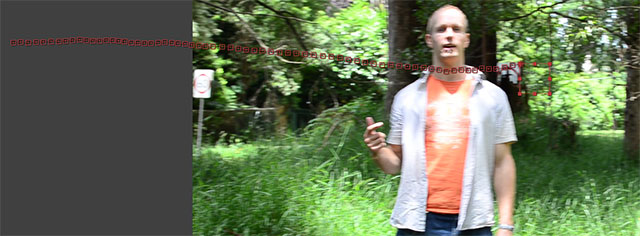
Hopefully the rest of the tracking process will go without problems and, once the footage has been fully analysed, your tracking data will look something like this:
Next, we need to create a null object to store our tracking data. Simply go to Layer -> New -> Null Object. Give your new null object a useful name like ‘Tracker’.

We now can apply the tracking data to our null object :)
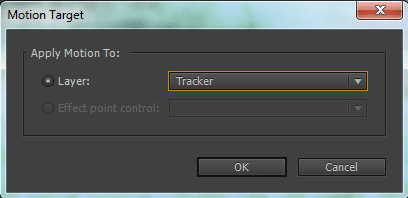
To do this, select your tracked footage layer again and click the ‘Edit Target…’ button in the tracker controls. From the drop down menu, select the newly created null object and hit OK. This sets the null object to be the target of the camera tracking data.
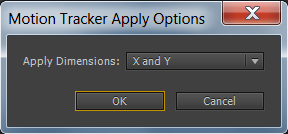
Next click the ‘Apply’ button to apply the tracking data to the current target – which is our null object. Leave the ‘Apply Dimensions’ on ‘X and Y’ and confirm.
The camera tracker will now keyframe the position (as well as rotation and scale if selected) of the null object using the data we created during tracking.
If you now play back your footage, you should see the null object follow the movement of the element you tracked, even after it left the frame :)
Now we can add the blood splatter effects :)
Adding the blood hit
We can now add a blood splatter effect to the bullet hit footage. Add any masks required to properly place your stock footage elements and then parent them to the Tracker null object we created in the previous step.
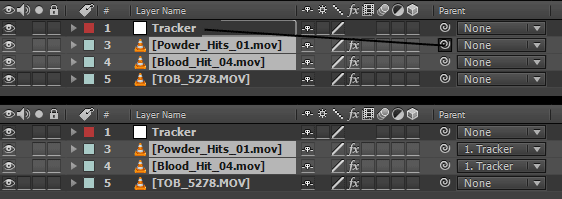
Because our stock footage is now linked to the movement of the null object, it will follow our footage as expected :)


4 Responses
Where i can find effects you use like blood ?
The ones I personally use come from the excellent Action Essentials 2 stock footage pack by Video Copilot. You can find free stock footage on sites like detonationfilms.com or footagecrate.com
hey bro../which website useful to download video footage. ..
how to split the video from the green screen
also I want to share something Bro
………I’m from India
here people’s have no interested in this activities. They are simply waste the time
I can’t reach my editing with myself
I’m eager ,hungry to edit like you. Please help me pro.
pls
pls
pls
pls
pls
pls
pls
pls………..