I have always enjoyed the effect of the camera passing through walls or floors for seamless scene transitions! Today I show you how to create this awesome effect using 3D Projection inside of Adobe After Effects :)
3D Projection
3D Projection is a technique where you use a light to shine through a piece of footage and project the image onto any 3D layers in your scene. This works much like an old school slide show projector. If you are clever about setting up your 3D layers in After Effects, this allows you to somewhat re-construct the geometry of the original scene.
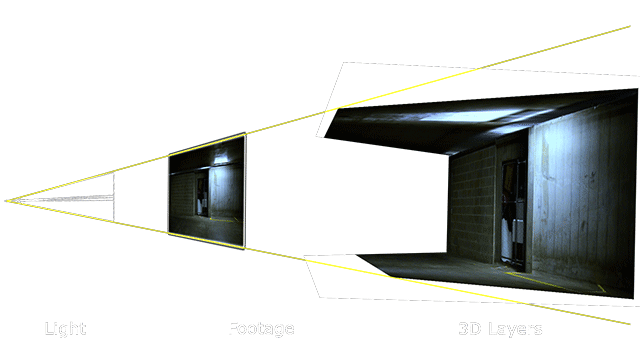
Once you have this 3D projection set up, you can add a camera into the scene and move it around and, within limits, it will appear to be moving around in the actual 3D scene :)
This effect is a bit more advanced so I will assume that you have a basic understanding of how to use After Effects and have worked with 3D layers before. Let’s get started!
Setting Up The 3D Scene
This effect will work best with a scene that contains a lot of depth. Since the parallax effect will be enhanced the more you see of the floor, the ceiling and the walls, I do recommend using a fairly wide angle shot :)
Create a new composition.
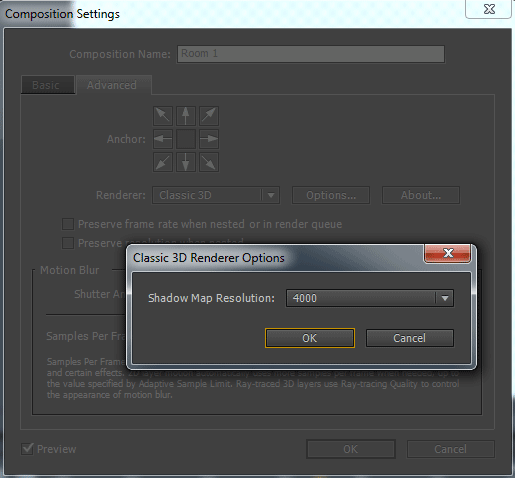
One important thing we need to configure before we get started is the shadow quality of our composition. The projection of our footage layer is technically its shadow so we want to make sure we set the shadow quality to very high, otherwise we might not see much more than a blurry mess.
For this, open your composition settings, go to the ‘Advanced’ tab and click on ‘Options…’. Set the ‘Shadow Map Quality’ to something large, like 4000.
For the first scene, I have an image here that I took in a car park.
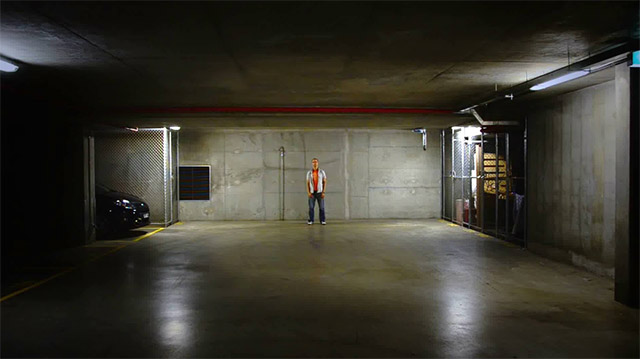
Add this image into your composition as a new layer.
This layer will be projected onto the 3D layers we will set up to remodel the geometry of the scene.
Because we will eventually turn it into a 3D layer and disable its visibility, let’s duplicate it and set the copy up as a Guide Layer. Set the opacity of the guide layer to something like 30%.

A guide layer will be visible in the composition but won’t be rendered as part of the final effect. We just want to add it so we can still see our scene once we disable the visibility of the original garage layer.
Now turn the original garage layer into a 3D layer.
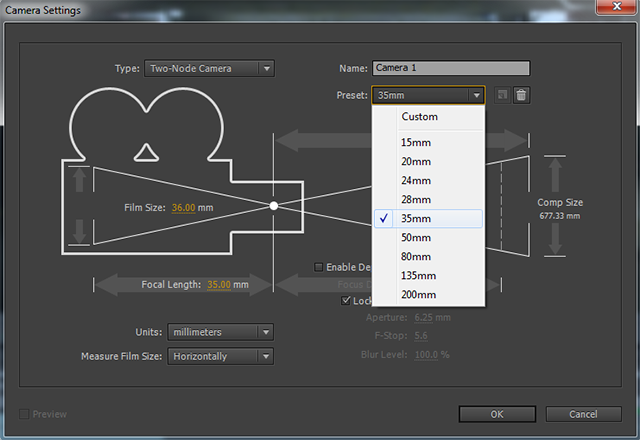
Create a new camera. Set up the camera properties, especially the focal length, to match the camera you used to shoot your scene as precisely as possible. I used a focal length of 35mm.
Create a new spot light. Set the following properties
- Light Type: Spot
- Intensity: 100%
- Colour: White
- Cone Angle: 180%
- Falloff: None
- Cast Shadows: ENABLED (this is important!)
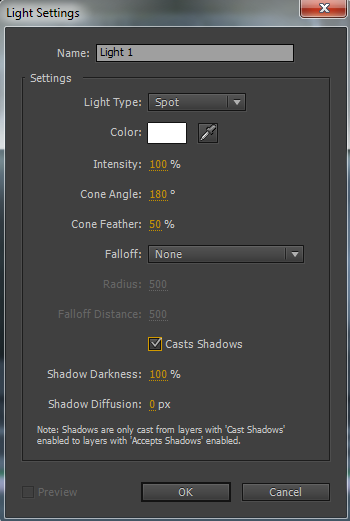
The most important thing to check is the ‘Cast Shadows’ option. Remember we will shine this light through our garage image to project the shadow of the garage image – the projection – onto the 3D layers. If the light does not cast shadows, the effect will not work.
Placing The Light And The Projection Layer
We now need to position everything so that the light shines from the camera position through the footage layer into the scene.
For this, reveal the position property for the camera, the light and the garage layer. You can do this by selecting each layer and pressing ‘p’ on your keyboard.
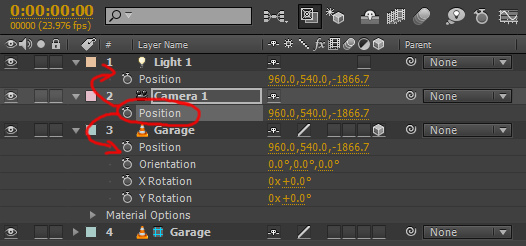
Select the position property of the camera, copy it (Ctrl+C) and paste it (Ctrl+V) onto the position property of the light and onto the position property of the garage layer. If you go to your top view, the camera, the light and the footage layer should now be at the exact same position.
The light should be aiming straight forward in the same direction as the camera.
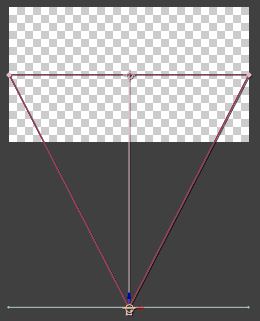
Select the footage layer and move it in front of the camera and in front of the light, but only by a little bit.
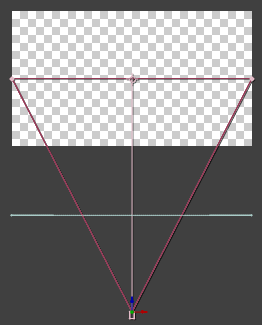
When you return to your active camera view, you will see the footage layer massively zoomed in. Grab the corners of it and scale it down so it fits exactly into your composition.
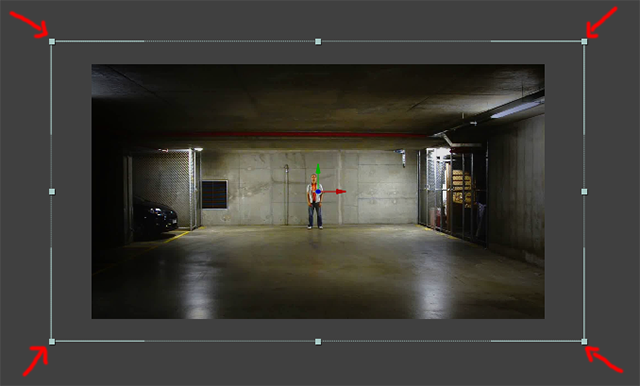
Material Settings For 3D Projection
We now have the footage nicely placed in front of our camera and in front of our light so it can be projected straight onto any 3D layers we set up in our composition. Before we do that, we need to change a few material settings for our footage layer.
Open up the material options on the garage layer by selecting it and pressing ‘a’ twice.
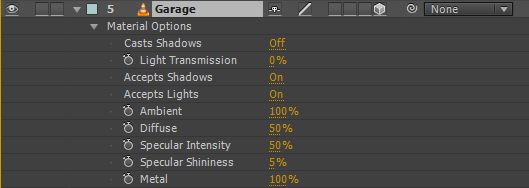
Set the ‘Cast Shadows’ option to ‘Only’ by clicking on it twice. This will cause the footage layer to become invisible, but fortunately we have our guide layer set up so we should still be able to see our original scene, even if it is only faint. Increase the ‘Light Transmission’ property to 100%.
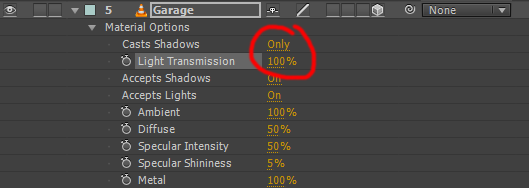
This will cause all light that hits this layer to pass through it unobstructed but pick up its colour and project it as a shadow onto any geometry in the scene :)
We are now ready to set up our 3D layers!
Setting up the 3D Scene
For now, disable the light in the scene.

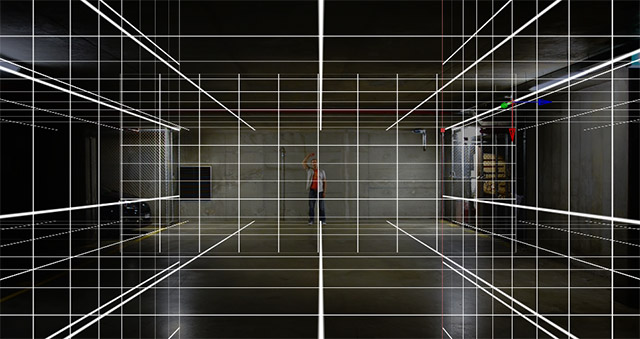
Create a new white solid layer and apply a Grid effect to it.
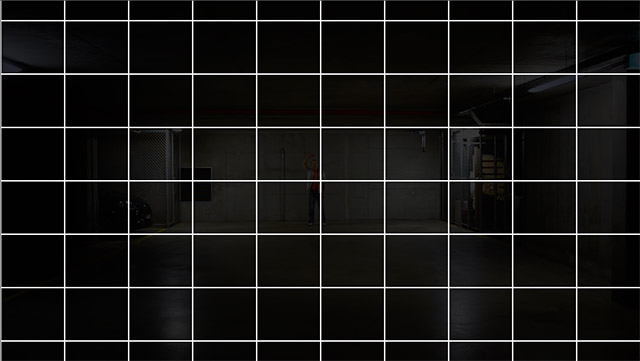
Enable the 3D switch on the layer and position it as precisely as you can over the floor in your scene. Feel free to move it around and rotate it if you need to, though you should try to keep it as flat as possible since any apparent distortion should really just come from your camera, not from a tilted layer. Try to line the bottom edge up with the bottom of your composition.

Next, and this is important, open the material settings on the layer and set the ‘Receive Lights’ option to ‘Off’. This will prevent the 3D layer from being affected by the brightness of any lights in the scene and ensure that it is always fully lit so we can see our projected image.

Duplicate the grid and position this new copy to match over the ceiling of your scene.
Repeat the process for the sides and the back wall.
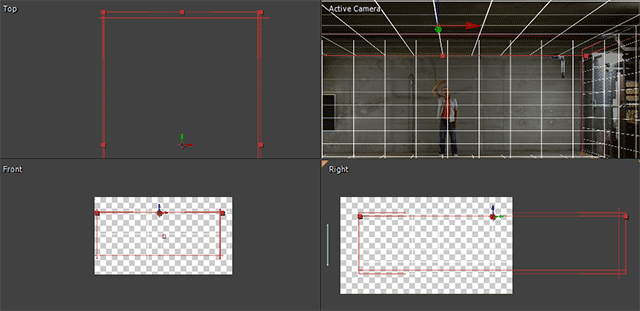
Next, use the side views to ensure that your room is fully sealed off and scale down any layers to fit together nicely. Remember, any holes you have in your 3D room in After Effects will have the same effect as having a hole in a real life movie screen.
Revealing The 3D Projection
Now for the fun part :)
Enable the light again and then disable the Grid effect on all the 3D layers we set up for the geometry of our room. Voil… aaaah! Looks exactly like it did without all the extra work!
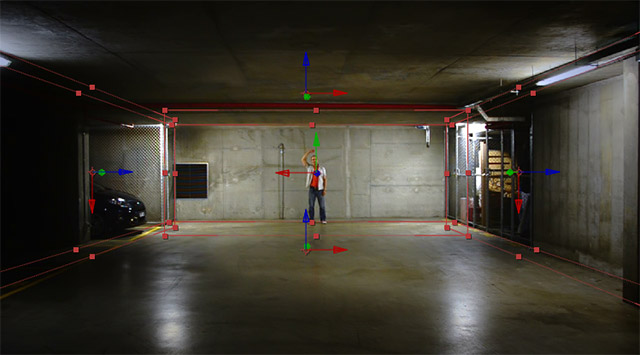
Well… not quite ;)
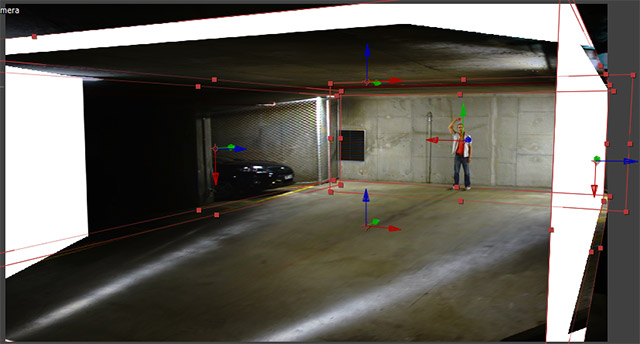
Grab the camera tool and move your camera around! You should now see that the garage layer we set up is being projected onto the 3D layers we created to represent the walls, floor and ceiling of our original scene.
Moving the camera around in your composition will now give you a sense of moving around inside a 3D environment :)
Animating The Camera
Let’s animate the camera to sink through the floor!
We want the position of the camera to move downwards, however, because a camera also has a ‘point of interest’, it will start looking upwards if we do not move this look-at-point lower at the same speed. We can however, get around this issue by using a Null object and linking the camera to it.
Create a new Null object and call it ‘Camera Null’.
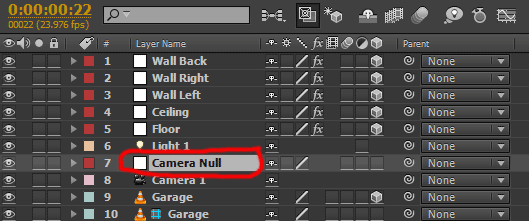
Parent the camera to the new Null object.
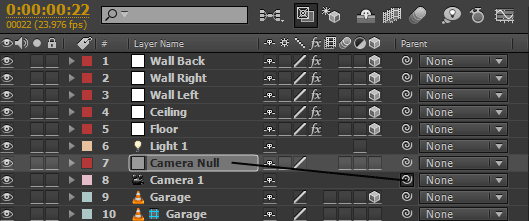
If you animate the position of the Null object, the camera position and point of interest will follow along so your camera’s view direction remains horizontal :)
Now animate the position of the Camera Null object to move downwards, which will cause the camera to sink through the floor. How far or how fast you want this to happen is really up to you and what effect you are going for :)
However, you should move far enough so the floor of the room has left the screen at the top.

You should now see the camera sink through the floor nicely. Don’t worry about the white pieces we see of the solid layers underneath the room – we will sort that out shortly! For now, just enjoy how cool this 3D projection VFX looks already :)

Setting Up The Second Room
Now let’s set up the second room!
Because our composition is pretty cluttered up already, let’s hide a few of the layers so we have a better working space!
You can do this by enabling the ‘shy’ flag on any layer you want to hide. Do this for all layers except the camera. Enable the ‘hide shy layers’ option to hide everything except for the camera.
Before hiding all the layers, ensure to disable the visibility of the guide layer as well as all other layers except for the camera.
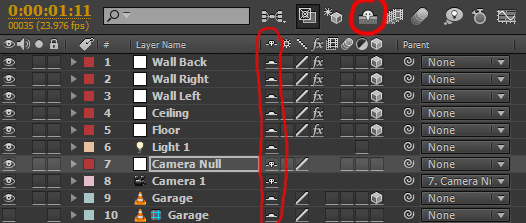
Go to the time where your camera has reached its lowest point. Now we are pretty much going to repeat the same process we just went through to set up the second room for our cool camera-through-the-floor 3D projection effect.
So, like before, import the image for the second room. I am going to use this photo of a … um … Wine Cellar!
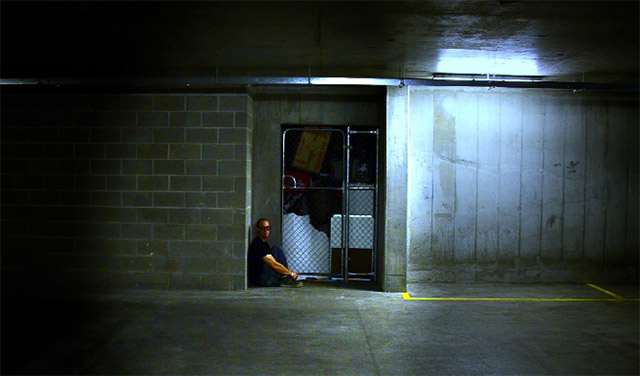
Create yourself a new guide layer from this new image and then create a second light with the same options as the first one we set up.
Enable the 3D flag on the image and move the image and the light to the same position as the camera.
Watch out!
Remember the camera is parented to the Camera Null object, which is keyframed so you have to be a bit careful when setting up the positions of the 3D layer and the light so they are properly positioned at the same position as the camera and are facing straight forward.
You can copy the X and Y position of the Camera Null to the light, the light’s point of interest and the wine cellar layer. Copy the Z position of the camera to the light and the wine cellar layer as well.
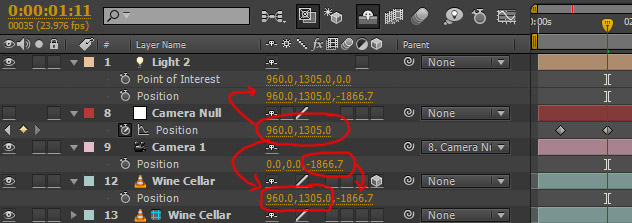
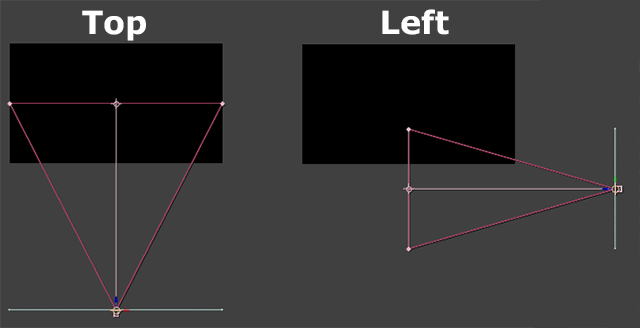
Using the side views, ensure the camera, light and image layer are set up exactly like they were for the first room :)
Go to the material settings for the footage layer and set Cast Shadows to ‘Only’ and set Light Transmission to 100%.
Now, as before, disable the light, create new solids for the walls, floor and ceiling and position them properly in 3D space.
Remember to set their ‘Accept Lights’ property in the material settings to ‘Off’ and ensure the second room is properly sealed off.
Because we want this room to match up with with the room we set up before, one story up, we want to make sure they line up.
Unhide all shy layers for a moment and enable the visibility of the geometry of the top room. Ensure the ceiling of the lower room lines up nicely with the floor of the top room.
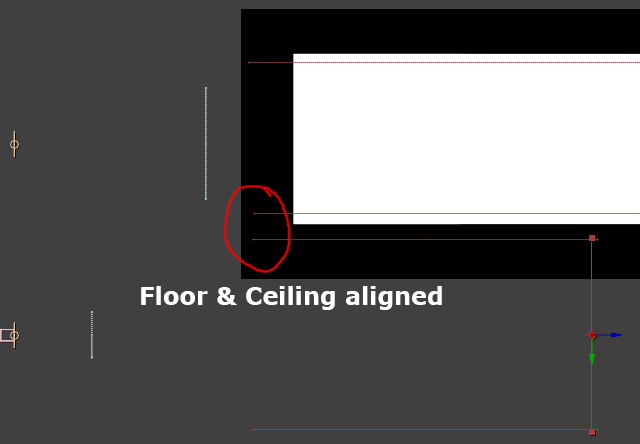
Hide everything for room 1 again and play back your animation to watch the camera sink through the ceiling of the second room and arrive in the wine cellar :)

Sweet!
The second half of the 3D projection camera transition is completed. Now let’s connect the two rooms! Unhide all shy layers, enable their visibility and play back your complete animation.
Urks! Besides the gap between the two rooms which we expect to see, you are likely going to also see something ugly like this:
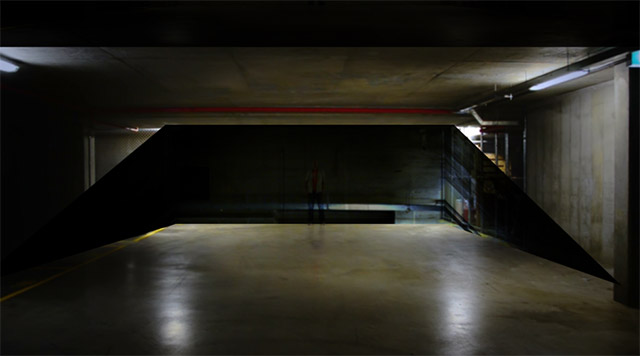
This is happening because we now have 2 lights and 2 projection layers in our composition and they are being projected onto ANY 3D layers in the scene. So the images for both rooms start to overlap where their projections overlap!
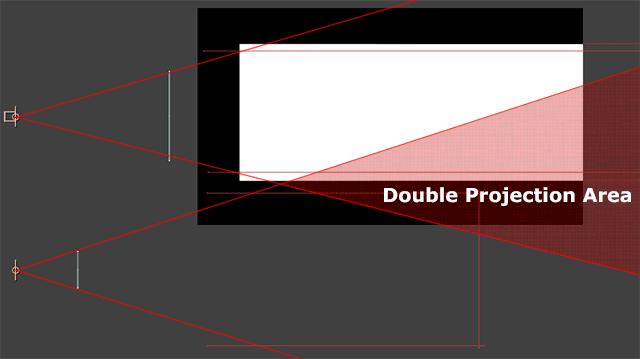
We will sort this out in a moment, for now let’s focus on closing the gap between the rooms.
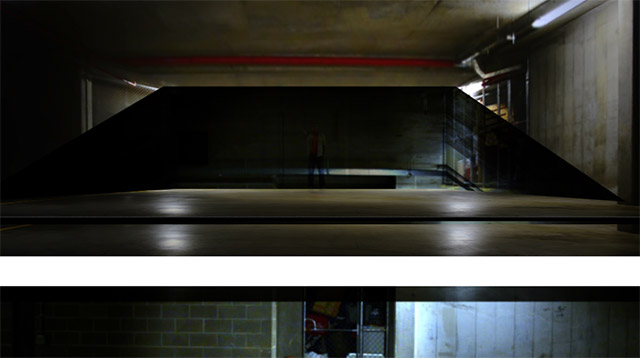
I took a photo of the floor while we were on set and I will use this texture to create a connecting piece. You can really use any texture you want as long as it fits into the 3D projection scene you want to create.
Drop your texture in the composition and turn it into a 3D layer.

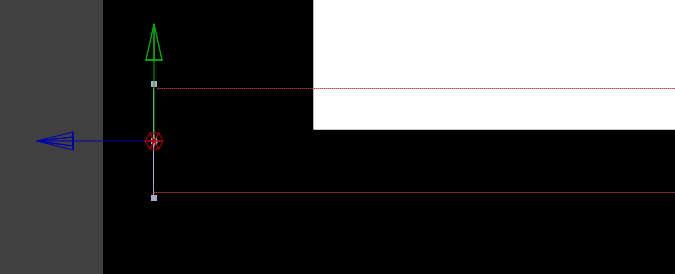
Position it to close the gap between the two rooms.
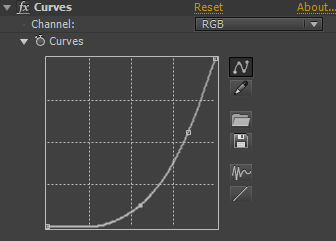
If necessary, apply a curves adjustment to the layer to blend it more naturally into your scene.
Playing back your animation, the two rooms should now be properly connected and it should appear as if the camera is sinking through the floor of the garage and entering the wine cellar scene from the top.

Well, except for the ugly double projection that is still happending. Let’s get that sorted out!
Pre-Composing The Rooms
To get rid of the ugly double projection problem, we need to pre-compose the two rooms independently. Because the compositions for both rooms will contain some 3D elements (the walls, light and projection layer) and all 3D elements depend on a camera for correct positioning, we first need to duplicate the Camera and the Camera Null object. Ensure the copy of the camera is parented to the copy of the null object.
Select all layers we set up for room one, the connecting piece between the rooms, the copy of the camera and the copy of the Camera Null object and pre-compose them.
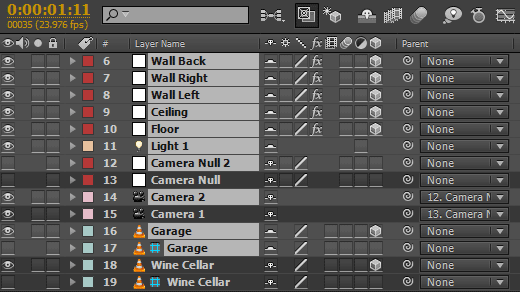
Call the composition ‘Room 1’.
Duplicate the camera and the Camera Null object one more time and ensure the copy of the camera is parented to the copied Camera Null layer.
Select all layers except for the ‘Room 2’ composition and pre-compose them. Call this comp ‘Room 2’.
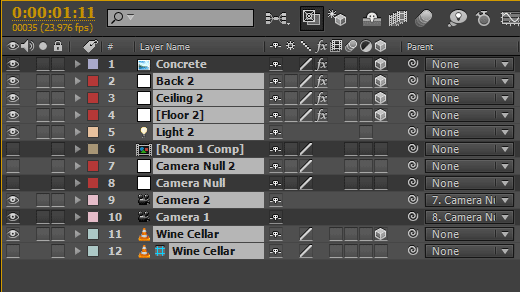
Our final composition should have two nested compositions in it, Room 1 and Room 2, as well as a camera and the Camera Null layer as well as the concrete connecting piece between the rooms.

Playing through our animation, you will likely encounter some strange overlapping visual elements between the two rooms. Most of them will be caused by the fact that the 2 compositions we created for the rooms are flat layers and their 3D layers don’t know anything about each other and therefore won’t properly obscure each other.

This however, can be easily fixed by adding an animated mask to the room that sits on top and removing the overlapping artefacts. You may also have to tweak the connecting concrete piece a little bit to clean up the connection point :)
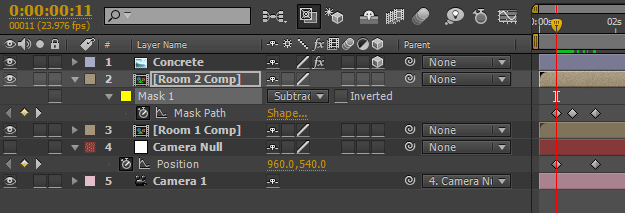
And with that you should be done with your complex – but very awesome – 3D transition effect!

I hope you enjoyed this tutorial and find lots of useful applications for this effect (or any variants of it) for your own projects :)


10 Responses
Hi,
we want to hire you in our 3d Holographic projection.
You will give us our boss 3d effect & that will live simultaneously 300 places by 3d holographic projection.
Immediate.
Kindly reply me.
lov it
Well done, here’s a tutorial on how to achieve this with extruded 3D shapes:
https://vimeo.com/87376234
I’ve tried this and its not working. I create all the setup and when I get the grid effect, the solids stay white and don’t recieve any shadows from the original image. I’ve tweaked every posible parameter and those layers either disappear or keep being white. When I make them accept shadows only the just dissapear.
I even made it all again from scratch keeping up with every instruction in the tutorial and doesn’t work.
Any tips?
Hm, I know a couple of people had the issue. They usually resolved it by ensuring that the light transmission properties were set up correctly, but it’s hard to tell what might be wrong given there are so many settings involved.
I just tried this yesterday and had the same problem. So I did it again from scratch and the same thing. However I was able to correct it by double checking the position of my “Scene” layer and was able to correct the floor and ceiling to work properly. Then I had a white feather stripe that took up a 3rd of my screen and was able to correct that by going into my “Light” layer and changing the Falloff to none and solved it. I know I’m a little late in replying but I’m just happy I figured it out.
Where i can find the white feather? And are you do all things again to change the fall of or just change it on the light setting
What do you mean by ‘white feather’?
I’ve tried all the setup except for the Grid that refuse to expand beyond up and down… No dept was possible for me. What’s the reason for this?
The the xy is not working in my case.
It sounds like you have not turned your grid layer into a 3D layer. Here is a basic tutorial on 3D in After Effects: https://www.surfacedstudio.com/tutorials/after-effects/adobe-after-effects-beginner-tutorial-3d